Updating A 1999 Saab With An Arduino

Unless your car is fresh off the lot, you’ve probably had the experience of riding in a newer car and seeing some feature or function that triggered a little pang of jealousy. It probably wasn’t enough for you to run out and sign yourself up for a new car loan (which is what the manufacturer was hoping for), but it was definitely something you wished your older model vehicle had. But why get jealous when you can get even?

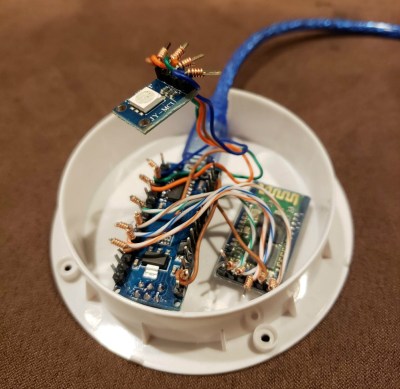
[Saabman] wished his 1999 Saab 9-5 had the feature where a quick tap of the turn signal lever would trigger three blinks of the indicator. Realizing this was an electronic issue, he came up with a way to retrofit this function into his Saab by adding an Arduino Pro Micro to the vehicle’s DICE module.

The DICE (which stands for Dashboard Integrated Central Electronics) module controls many of the accessories in the vehicle, such as the lighting and wipers. In the case of the blinkers, it reads the state of the signal lever switches and turns the blinkers on and off as necessary. After poking around the DICE board, [Saabman] found that the 74HC151 multiplexer chip he was after: the state of the blinker switches could be read from pins 1 and 2, and he’d even be able to pull 5 V for the Arduino off of pin 16.

After prototyping the circuit on a breadboard, [Saabman] attached the Pro Micro to the top of the 74HC151 with some double sided tape and got to work on refining the software side of the project. The Arduino reads the state of the turn signal switches, and if they flick on momentarily it changes the pin from an input to an output and brings it high for three seconds. This makes the DICE module believe the driver is holding the turn lever, and will keep the blinkers going. A very elegant and unobtrusive way of solving the problem.

Hackers aren’t complete strangers to the garage; from printing hard to find parts to grafting in their favorite features from other car manufacturers, this slick Saab modification is in good company.

Continue reading “Updating A 1999 Saab With An Arduino”

Automatic Sunglasses, The Electromechanical Way

These days, photochromic lenses are old-hat. Sure, it’s useful to have a pair of glasses that automatically tints due to UV light, but what if you want something a little more complex and flashy? Enter [Ashraf Minhaj]’s SunGlass-Bot.

The build is simple, beginning with an Arduino Pro Mini for reasons of size. Connected to the analog input is a light-dependent resistor for sensing the ambient light level. This reading is then used to decide whether or not to move the servo which controls the position of the lenses. In low light, the lenses are flipped up to allow clear vision; in brighter light, the lenses flip down to protect the eyes. Power is supplied by a homebrew powerbank that it appears [Ashraf] built from an old phone battery and a small boost converter board. All the files to recreate the project are available on Github, too.

It’s a fun build that [Ashraf] shows off in style. While this may not be as effortless as a set of Transition lenses or as quick as a welding mask filter, it has a certain mechanical charm that wouldn’t be out-of-place in a certain sci-fi aesthetic.

Hungry for more? Check out these self-blending sunglasses we featured a while back. Video after the break.

Continue reading “Automatic Sunglasses, The Electromechanical Way”

Sushi-Snarfing Barbie Uses Solenoid To Swallow

The view from America has long seen French women as synonymous with thin and/or beautiful. France is well-known for culinary skill and delights, and yet many of its female inhabitants seem to view eating heartily as passé. At a recent workshop devoted to creating DIY amusements, [Niklas Roy] and [Kati Hyyppä] built an electro-mechanical sushi-eating game starring Barbie, American icon of the feminine ideal. The goal of the game is to feed her well and inspire a happy relationship with food.

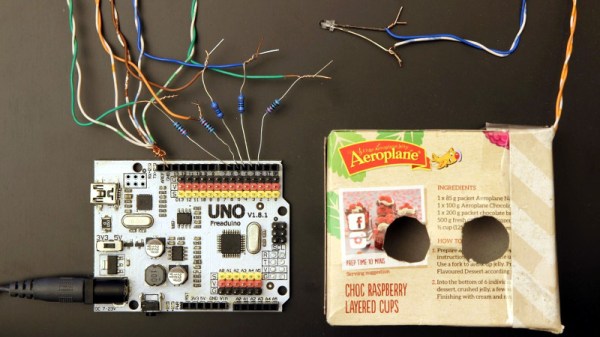
Built in just three days, J’ai faim! (translation: I’m hungry!) lets the player satiate Barbie one randomly lit piece of sushi at a time. Each piece has a companion LED mounted beneath the surface that’s connected in series to the one on the game board. Qualifying sushi are determined by a photocell strapped to the underside of Barbie’s tongue, which detects light from the hidden LED. Players must race against the clock to eat each piece, taking Barbie up the satisfaction meter from ‘starving’ to ‘well-fed’. Gobble an unlit piece, and the score goes down.

The game is controlled with a lovely pink lollipop of a joystick, which was the main inspiration for the game. Players move her head with left and right, and pull down to engage the solenoid that pushes her comically long tongue out of her button-nosed face. Barbie’s brain is an Arduino Uno, which also controls the stepper motor that moves her head.

[Niklas] and [Kati] wound up using cardboard end stops inside the box instead of trying to count the rapidly changing steps as she swivels around. The first motor they used was too weak to move her head. The second one worked, but the game’s popularity combined with the end stops did a number on the gears after a day or so. Click past the break to sink your teeth into the demo video.

Barbie can do more than teach young girls healthy eating habits. She can also teach them about cryptography.

Continue reading “Sushi-Snarfing Barbie Uses Solenoid To Swallow”

Dog-Or-Catapult Controls The Speed Of The Feed

[NathanKing] has a cute, rambunctious pupper who eats way too fast for her own good. He’s tried various distribution methods intended to get her to slow down, but she’s just too excited to eat. [Nathan]’s latest solution is to launch the food piece by piece using a catapult. The dog loves the gamified feeding method, which is sort of like one-way fetch. She gets a bit of exercise, and everyone is amused for the half hour it takes to fling 1.5 cups of food one piece at a time.

Electronics-wise, this food flinger doesn’t use much more than three servos and an Arduino Uno. Servo #1 pulls the arm back until it hits a limit switch. Servo #2 holds the arm down , and servo #3 rotates the food tube until it drops a unit of kibble into the spoon. Then servo #2 lets the arm go, and the tasty morsel flies about 30 feet (10 meters).

[Nathan] doesn’t offer step-by-step instructions, but there is more than enough detail to replicate this project. He used what he had on hand, such as scrap aluminium from another project for the frame. Future plans include swapping out the 6V lantern battery for rechargeable AAs, and downsizing to a Nano. We’ve fetched a couple of videos for you and thrown them in after the break. Go get ’em, reader!

Pets need plenty of water, especially during the summer. Here’s a no-sweat automatic watering solution we saw a few years ago.

Continue reading “Dog-Or-Catapult Controls The Speed Of The Feed”

The Precise Science Of Whacking A Wine Glass

It’s common knowledge that tapping a wine glass produces a pitch which can be altered by adjusting the level of the tipple of choice inside. By filling twelve glasses with different amounts of liquid and tuning them to the twelve notes of the scale, it’s possible to make a one-octave instrument – though the speed and polyphony are bottle-necked by the human operator. If you think it sounds like a ripe project for automation, you’re correct: [Bitluni’s lab] has done what needed to be done, and created a MIDI instrument which plays the glasses using mallets.

Electronically it’s a simple build – some 12 V solenoids driven by MOSFETs, with an Arduino in charge. For the mechanical build, a 3D printer proved very useful, as each mallet could be made identical, ensuring a consistent tone across all glasses. Rubber covers printed in flexible filament were fitted to reduce the overtones and produce a clearer sound. [Bitluni] also utilised different types of glasses for the low and high pitches, which also helped to improve the clarity of the tone.

MIDI is of course the perfect protocol for this application; simple, lightweight and incredibly widely used, it’s the hacker’s delight for projects like this. The instrument can perform pre-programmed sequences, or be played live with a MIDI controller. Both of these are shown in the video after the break – stick around for a unique rendition of Flight Of The Bumblebee. For a more compact wine glass based music creation solution, we recommend this nifty project, which alters pitch using a water balloon raised and lowered into the glass by a servo.  Continue reading “The Precise Science Of Whacking A Wine Glass”

Light Painting Animations Directly From Blender

Light painting: there’s something that never gets old about waving lights around in a long exposure photo. Whilst most light paintings are single shots, some artists painstakingly create frame-by-frame animations. This is pretty hard to do when moving a light around by hand: it’s mostly guesswork, as it’s difficult to see the results of your efforts until after the photo has been taken. But what if you could make the patterns really precise? What if you could model them in 3D?

[Josh Sheldon] has done just that, by creating a process which allows animations formed in Blender to be traced out in 3D as light paintings. An animation is created in Blender then each frame is automatically exported and traced out by an RGB LED on a 3D gantry. This project is the culmination of a lot of software, electronic and mechanical work, all coming together under tight tolerances, and [Josh]’s skill really shines.

The first step was to export the animations out of Blender. Thanks to its open source nature, Python Blender add-ons were written to create light paths and convert them into an efficient sequence that could be executed by the hardware. To accommodate smooth sliding camera movements during the animation, a motion controller add-on was also written.

The gantry which carried the main LED was hand-made. We’d have been tempted to buy a 3D printer and hack it for this purpose, but [Josh] did a fantastic job on the mechanical build, gaining a solidly constructed gantry with a large range. The driver electronics were also slickly executed, with custom rack-mount units created to integrate with the DragonFrame controller used for the animation.

The video ends on a call to action: due to moving out, [Josh] was unable to continue the project but has done much of the necessary legwork. We’d love to see this project continued, and it has been documented for anyone who wishes to do so. If you want to check out more of [Josh]’s work, we’ve previously written about that time he made an automatic hole puncher for music box spools.

Thanks for the tip, [Nick].

Continue reading “Light Painting Animations Directly From Blender”

Hands-On With New Arduino FPGA Board: MKR Vidor 4000

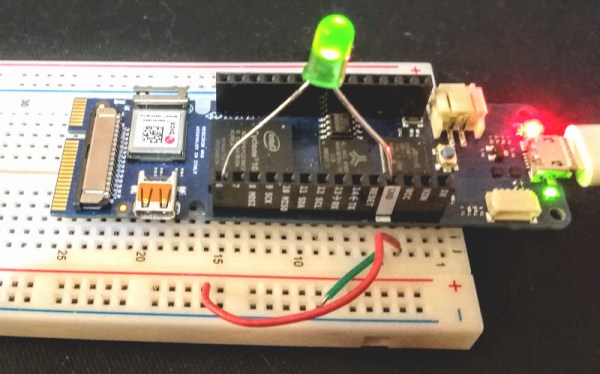
Hackaday brought you a first look the Arduino MKR Vidor 4000 when it announced. Arduino sent over one of the first boards so now we finally have our hands on one! It’s early and the documentation is still a bit sparse, but we did get it up and running to take the board through some hello world exercises. This article will go over what we’ve been able to figure out about the FPGA system so far to help get you up and running with the new hardware.

Continue reading “Hands-On With New Arduino FPGA Board: MKR Vidor 4000”