Definitive Dog Feeding With Arduino

Some dogs have no sense of self-preservation. Given the opportunity, they will eat until they’re sick. It’s up to us humans to both feed them and remember doing it so they aren’t accidentally overfed. In a busy household with young children, the tricky part is the remembering.

[Bryan]’s family feeds their dog Chloe once a day, in the mornings. She was a rescue who spent a few years scrounging for meals on the street, so some part of her is always interested in finding food, even if she just ate. Each morning, the flurry of activity throughout the house is compounded by Chloe’s repeated requests for food, so [Bryan] got his kids involved and built a simple circuit that lets everyone know—at a glance—whether Chloe was fed.

Chloe’s kibble is kept in a touch-top wastebasket that flips open at the press of a button. [Bryan]’s dog-fed detector uses a reed switch and an Arduino clone to detect when the lid is opened. When the reed switch goes, low, the Arduino lights up an LED. The light stays on for two hours and then shuts off automatically to get ready for the next day. You don’t have to beg for a demo video, because it’s waiting for you after the break.

Since Chloe devours a bowl of food in about two minutes flat, maybe the next project for [Bryan]’s family could teach her to slow down a bit.

Continue reading “Definitive Dog Feeding With Arduino”

Arduino BabyTV Is Big Fun At Low Resolution

What kind of TV do you have? An older 720p model, or the now standard 1080p? Perhaps you’ve made the leap to the next generation, and are rocking a 4K display in the living room. All those are are fine and dandy if you just want to watch the local sportball contest, but where’s the challenge in that? With all the technology and modular components we have access to anymore, nowadays all the real hackers are making their own TVs.

Of course, when [Nikolai] built his very own LED TV, he did have to make a few concessions. For one thing, there’s no tuner on this model. Oh, and there’s the small issue of only having a 16×16 resolution. It might not be your idea of the perfect display, but it’s just perfect for his newborn son.

That’s right, [Nikolai] got his entry for the “Hacker Parent of the Year” award in early, and built an LED display for his son that he’s calling “BabyTV”.

Rather than the shows, trash, advertisements that they play on the kid channels, this TV only shows animated characters from retro games. We’ll concede that this project might be an elaborate Clockwork Orange style attempt at hypnotizing his son to instill an appreciation for classic gaming. But we’ll allow it.

To make his BabyTV go, [Nikolai] used a 16×16 WS2812B LED panel and an Arduino Nano. Two rotary encoders are used to allow adjusting brightness and change the character currently being shown on the screen. As a particularly clever hack, the Arduino has an IR sensor attached and is constantly watching for any signals. If an IR signal is detected, the BabyTV switches to the next image. So if Junior has a standard IR remote in his hands, any button he presses will cause the display to change to the next “channel”.

Historically speaking we haven’t seen much stuff for children here at Hackaday, but 2018 seems to be changing that. Recent projects like the incredible scratch built mini excavator and gorgeous AT-ST high chair would seem to indicate we’re currently witnessing a generation of hackers become parents. Don’t panic folks, but we might be getting old.

Continue reading “Arduino BabyTV Is Big Fun At Low Resolution”

Moltoduino: Arduinos All The Way Down

It is getting difficult to find a desktop or laptop computer with only a single CPU. Even a typical ARM-based computer now probably has multiple cores. Of course, there’s nothing to stop you from using multiple microcontrollers — like the Arduino — together. To make the process neater, [Dimitris Platis] put together Moltoduino, essentially an Arduino on a shield made to plug into another Arduino. And, yes, they will stack. You can see a video about the open source boards, below.

The key is how the board brings the pins out to connections that are easy to jumper between boards. There are several obvious use cases, but one that [Dimitris] is particularly interested in is hardware-in-the-loop testing. The idea is that you can use a simulated I/O device in one computer to exchange fake data with the software under test.

Continue reading “Moltoduino: Arduinos All The Way Down”

Debugging With Serial Print At 5333333 Baud

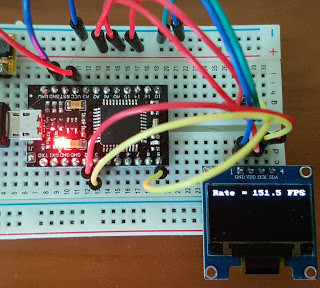
Debugging with printf is something [StorePeter] has always found super handy, and as a result he’s always been interested in tweaking the process for improvements. This kind of debugging usually has microcontrollers sending messages over a serial port, but in embedded development there isn’t always a hardware UART, or it might already be in use. His preferred method of avoiding those problems is to use a USB to Serial adapter and bit-bang the serial on the microcontroller side. It was during this process that it occurred to [StorePeter] that there was a lot of streamlining he could be doing, and thanks to serial terminal programs that support arbitrary baud rates, he’s reliably sending debug messages over serial at 5.3 Mbit/sec, or 5333333 Baud. His code is available for download from his site, and works perfectly in the Arduino IDE.

The whole thing consists of some simple, easily ported code to implement a bare minimum bit-banged serial communication. This is output only, no feedback, and timing consists of just sending bits as quickly as the CPU can handle, leaving it up to the USB Serial adapter and rest of the world to handle whatever that speed turns out to be. On a 16 MHz AVR, transmitting one bit can be done in three instructions, which comes out to about 5333333 baud or roughly 5.3 Mbit/sec. Set a terminal program to 5333333 baud, and you can get a “Hello world” in about 20 microseconds compared to 1 millisecond at 115200 baud.

He’s got additional tips on using serial print debugging as a process, and he’s done a followup where he stress-tests the reliability of a 5.3 MBit/sec serial stream from an ATMega2560 at 16 MHz in his 3D printer, and found no missed packets. That certainly covers using printf as a debugger, so how about a method of using the debugger as printf?

This 3D-Printed Robotic Vacuum Sucks

After you’ve taken a moment to ponder the turn of phrase used in the title, take a look at this scratch-built robotic vacuum created by [theking3737]. The entire body of the vacuum was 3D printed, and all of the internal electronics are off-the-shelf modular components. We can’t say how well it stacks up against the commercial equivalents from iRobot and the like, but it doesn’t look like it would be too hard to build one yourself to find out.

The body of this rather concerned-looking robot was printed on a DMS DP5 printer, which is a neat trick as it only has a build platform of 200 mm x 200 mm. Once all the pieces were printed, a 3D pen was used to “weld” the sections together. The final result looks a bit rough, but should give a bond that’s just as strong as the printed parts themselves.

The robot has four sets of ultrasonic range finders to detect walls and obstacles, though probably not in the positions you would expect. The right side of the robot has two sets of sensors, while the left side only gets one. We aren’t sure the reasoning behind the asymmetrical layout, but presumably the machine prefers making right turns.

Control is provided by an Arduino Mega and the ever-reliable HC-05 Bluetooth module. A companion Android application was written which allows configuring the robot without having to plug into the Arduino every time you want to tweak a setting.

We can’t say we’ve seen that many DIY robotic vacuums here at Hackaday, but we’ve certainly featured our fair share of hacks for the commercially available models.

Cat laser on a pan-tilt robot

Robotic Laser Keeps Cat Entertained While You Hack

Whether it’s our own cat or a neighbor’s, many of us have experienced the friendly feline keeping us company while we work, often contributing on the keyboard, sticking its head where our hands are for a closer look, or sitting on needed parts. So how to keep the crafty kitty busy elsewhere? This roboticized laser on a pan-tilt mechanism from the [circuit.io team] should do the trick.

The laser is a 650 nm laser diode mounted on a 3D printed pan-tilt system which they found on Thingiverse and modified for attaching the diode’s housing. It’s all pretty lightweight so two 9G Micro Servos do the grunt work just fine. The brain is an Arduino UNO running an open-source VarSpeedServo library for smooth movements. Also included are an HC-05 Bluetooth receiver and an Android app for controlling the laser from your phone. Set it to Autoplay or take a break and use the buttons to direct the laser yourself. See the video below for build instructions and of course their cat, [Pepper], looking like a Flamenco dancer chasing the light.

Continue reading “Robotic Laser Keeps Cat Entertained While You Hack”

Arduino Watchdog Has Bite And Doesn’t Need Treats

My dog Jasper isn’t much of a watchdog: he’s too interested in sleeping and chasing my cats to keep an eye on things. Fortunately, [Vadim] has come up with a more reliable alternative with this simple Arduino watchdog. It’s designed to work with crypto coin mining rigs, but it could be easily adapted for other high-uptime uses, such as file servers or doomsday weapons.

Continue reading “Arduino Watchdog Has Bite And Doesn’t Need Treats”