Push Buttons, Create Music With A MIDI Fighter

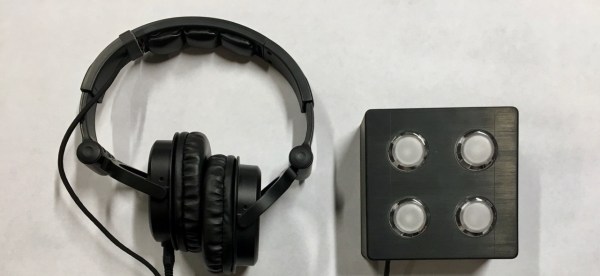
Musicians have an array of electronic tools at their disposal to help make music these days. Some of these are instruments in and of themselves, and [Wai Lun] — inspired by the likes of Choke and Shawn Wasabi — built himself a midi fighter

Midi fighters are programmable instruments where each button can be either a note, sound byte, effect, or anything else which can be triggered by a button. [Lun]’s is controlled by an ATmega32u4 running Arduino libraries — flashed to be recognized as a Leonardo — and is compatible with a number of music production programs. He opted for anodized aluminum PCBs to eliminate flex when plugging away and give the device a more refined look. Check it out in action after the break!

Continue reading “Push Buttons, Create Music With A MIDI Fighter”

Building This TARDIS Is Anything But A Snap

As an avid fan of the show Dr Who, [Adam Sifounakis] saw a model for a laser-cut TARDIS that piqued his curiosity that eventually grew into a multi-week project involving multiple setbacks, missteps, revamps and — finally — gratification. Behold, his sound activated TARDIS.

First and foremost, assembling and painting the model was a fun puzzle — despite a few trips to the store — with a little backtracking on the painting due to impatience. Next, the creation of a pulsing soft white LED circuit timed with an audio clip to really sell the image of a mini-TARDIS proved to be a tedious ordeal, paying off in the end with a satisfying glow through the vellum-diffused windows on the model.

How to trigger the lights? [Sifounakis] initially wanted a capacitive sensor to trigger the sound effects, but that way lay dragons — and madness — so he went with snap-activated effect to activate the TARDIS like the Doctor himself. After struggling with building his own microphone setup, he switched to an electret mic with adjustable gain which worked like a charm. Setting up this TARDIS’ Adafruit Pro Trinket brain involved a snag or two, and after that it was smooth sailing!

Until he hit another hitch with the power circuit too, that is. Luckily enough, adding a capacitor to give the circuit a bit more juice on boot solved the issue. All that was left to do was dismantle and rebuild his circuit after all this troubleshooting and substitutions, and — finally — install it in his model.

With much satisfaction and a final rework of the LED pulsing effect, it was done. Check it out!

Continue reading “Building This TARDIS Is Anything But A Snap”

Solar Tide Clock Keeps Track Of The Moon

Old fashioned tide clocks were an attempt to predict high tide by timing the rising and setting of the moon. When you looked at one you could see how many hours until the next high tide. [rabbitcreek] wanted to make his own version of the tide clock that does a better job of predicting the actual high tide than those old clocks, which were essentially glorified timers tuned to the moon’s phases.

[rabbitcreek] based his the tide prediction software off of [Luke Miller’s] Tide Clock, which applies location-specific adjustments to the standard lunar clock, taking into consideration such factors as the geographic features (basin depth, etc.) that modify the default timing. [Miller]’s Arduino code includes a library of common locations organized by NOAA station number.

[rabbitcreek]’s project consists of a Adafruit Feather board hooked up to a DS3231 RTC breakout and a HS-225BB servo, which turns the clock’s hand. It’s an 180-degree servo, attached to a hacked-down Actobotics gearbox gearing the servo down 2:1 to permit 360 degrees of movement.

He also wanted his creation to be left to operate unattended for years, theoretically — so solar power was a natch. The face of the clock consists of individual wavers of solar panel glued into a huge clock-like array. The solar cells feed into an Adafruit PowerBoost 500, a TPL5111 low power timer breakout, and a LiPo battery for when it’s dark out.

If you’re looking for more solar clocks check out this one that uses capacitors as hour markers.

Customizable PCB Business Card

[Corey Harding] designed his business card as a USB-connectable demonstration of his skill. If potential manager inserts the card in a USB drive, open a text editor, then touches the copper pad on the PCB, [Corey]’s contact info pops up in the text box.

In addition to working as a business card, the PCB also works as a Tiny 85 development board, with a prototyping area for adding sensors and other components, and with additional capabilities broken out: you can add an LED, and there’s also room for a 1K resistor, a reset button, or break out the USB’s 5V for other uses. There’s an AVR ISP breakout for reflashing the chip.

Coolly, [Corey] intended for the card to be an Open Source resource for other people to make their own cards, and he’s providing the Fritzing files for the PCB. Fritzing is a great program for beginning and experienced hardware hackers to lay out quick and dirty circuits, make wiring diagrams, and even export PCB designs for fabrication. You can download [Corey]’s files from his GitHub repository.

For another business card project check out this full color business card we published last month.

Arduino And Pi Breathe New Life Into Jukebox

What do you do when someone gives you a Wurlitzer 3100 jukebox from 1969, but keeps all the records? If you are like [Tijuana Rick], you grab an Arduino and a Rasberry Pi and turn it into a really awesome digital music player.

We’ll grant you, making a music player out of a Raspberry Pi isn’t all that cutting edge, but restoration and integration work is really impressive. The machine had many broken switches that had been hastily repaired, so [Rick] had to learn to create silicone molds and cast resin to create replacements. You can see and hear the end result in the video below.

[Rick] was frustrated with jukebox software he could find, until he found some Python code from [Thomas Sprinkmeier]. [Rick] used that code as a base and customized it for his needs.

There’s not much “how to” detail about the castings for the switches, but there are lots of photos and the results were great. We wondered if he considered putting fake 45s in the machine so it at least looked like it was playing vinyl.

Of course, you don’t need an old piece of hardware to make a jukebox. Or, you can compromise and build out a replica.

Continue reading “Arduino And Pi Breathe New Life Into Jukebox”

Fidget Spinner Gets Useful As MIDI Controller

Fidget spinners are not only a fad, but pretty much useless. Sounds like a job for hacking to make the toys have some actual purpose. [D777k] took up the challenge and created a MIDI controller from a common spinner. You can see a video of the results, below.

The device uses a LightBlue Bean controller and Garage Band as the MIDI software. Granted, it might not be super useful, but it is better than just a plain old spinner. [D777k] calls it a “whirling dervish of sound making!

The Arduino code that drives the thing is very simple. It reads three axes of acceleration and uses that to drive the MIDI software. When the acceleration exceeds a threshold, the software creates a new note based on the sums and differences of the accelerations.

The Lightblue Bean isn’t anything new, but it is well suited for this kind of service. Certainly, making a toy into a MIDI controller isn’t an original idea, either. But it sure is fun.

Continue reading “Fidget Spinner Gets Useful As MIDI Controller”

Sub-$20 Arduino-Based Telemetry System

[William Osman] set out to prove that unlike expensive commercial data logging rigs, he could get the same results for under twenty bucks. He wanted to build a wireless three-axis accelerometer for a race car project, allowing engineers to make modifications to the suspension based on the data collected.

The hardware consists of an Arduino Pro Mini connected to a three-axis accelerometer, and an nRF24L01 wireless module. Power is supplied by the race car’s 12 V, changed to 5 V by a linear regulator with the Pro Mini in turn supplying 3.3 V. The base station consists of an Arduino and another nRF24L01 module plugged into a laptop.

The telemetry system is based on COSMOS, an open-source, realtime datalogging platform put out by Bell Aerospace. COSMOS consists of fifteen separate applications depending on how you want to view and manage your telemetry. You can download [William]’s COSMOS config files and Arduino sketch on Google Docs.

We’ve published a bunch of pieces on telemetry, like this ESP8266 telemetry project, a rocket telemetry rig, and open sourcing satellite telemetry.

[Thanks, Dennis Nestor!]