The Smart Humidor

humidor

If you’re a cigar aficionado, you know storing cigars at the proper temperature and humidity is something you just need to do. Centuries of design have gone into the simple humidor, and now, I guess, it’s time to put some electronics alongside your cigars.

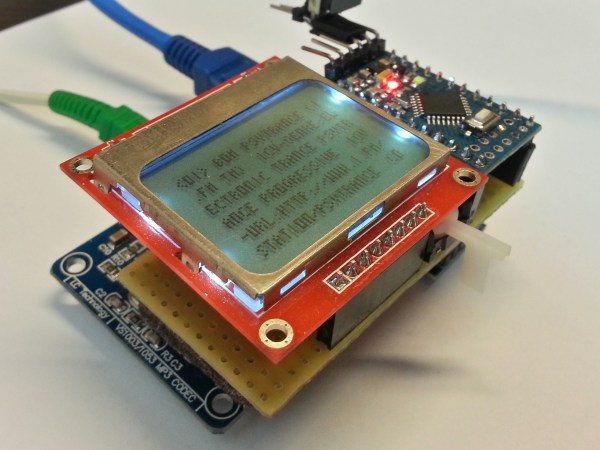
The design of [dzzie]’s smart humidor consists of an Arduino, WiFi shield, LCD + button shield, and most importantly, a DHT22 temperature and humidity sensor. In a bit of thoughtfulness, only the DHT22 is mounted inside the humidor; everything else is in an enclosure mounted outside the humidor, including a few buttons for clearing alerts and logging when water is added.

The smart humidor reads the DHT22 sensor every 20 minutes and uploads the data to a web server where useful graphs are rendered. The control box will send out an alert email to [dzzie] if the temperature or humidity is out of the desired range.

Electric Go-Cart Has Arduino Brains

arduino powered go cart

Oh how times have changed. Back in the 30’s the VW Beetle was designed to be cheap, simple and easy for the typical owner to maintain themselves. Nowadays, every aspect of modern cars are controlled by some sort of computer. At least our go-carts are spared from this non-tinkerable electronic nightmare…. well, that’s not completely true anymore. History is repeating itself as [InverseCube] has built an electronic go-cart fully controlled by an Arduino. Did I forget to mention that [InverseCube] is only 15 years old?

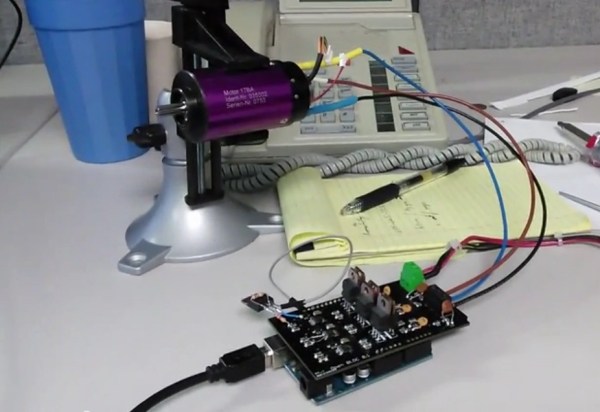
The project starts of with an old gas-powered go-cart frame. Once the gas engine was removed and the frame cleaned up and painted, a Hobbywing Xerun 150A brushless electronic speed controller (ESC) and a Savox BSM5065 450Kv motor were mounted in the frame which are responsible for moving the ‘cart down the road. A quantity of three 5-cell lithium polymer batteries wired in parallel provide about 20 volts to the motor which results in a top speed around 30mph. Zipping around at a moderate 15mph will yield about 30 minutes of driving before needing to be recharged. There is a potentiometer mounted to the steering wheel for controlling the go-cart’s speed. The value of the potentiometer is read by an Arduino which in turn sends the appropriate PWM signal to the ESC.

Continue reading “Electric Go-Cart Has Arduino Brains”

Monster 100W LED Flashlight Produces A Whopping 8500lm!

100W LED Flashlight

[Yannick] got a hold of a 100W LED diode recently, and like any self-respecting hacker, he just had to turn it into a ridiculously over powered flash light.

The tricky thing about these diodes is that they need a high amount of DC voltage, anywhere from 32-48V typically. [Yannick’s] using a 12V sealed lead acid battery coupled with a 600W constant current boost converter which ups it to 32V at around 3.2A. He also managed to find a giant aluminum heat-sink to keep the diode from getting too hot. A 120mm fan helps to keep the heat sink nice and cool, which allows the light to be run constantly without fear of burning it out. But just in case he also has an Arduino monitoring the temperatures — oh and it provides PWM control to adjust the brightness of the light!

To focus the flashlight he bought a proper lens and reflector which can be mounted directly to the diode. At full power the LED puts out around 8500lm, which is brighter than almost all consumer projectors available — or even the high beams of a car!

Continue reading “Monster 100W LED Flashlight Produces A Whopping 8500lm!”

A Laser Cut Word Clock

DIY laser cut word clock.

What is a word clock? A word clock is a clock that displays the time typographically that is also an interactive piece of art. Rather than buy one for $1500, [Buckeyeguy89] decided to build one as a present for his older brother. A very nice present indeed!

There are many different things that come into play when designing a word clock. The front panel is made from a laser cut piece of birch using the service from Ponoko. Additionally, white translucent pieces of acrylic were needed to keep each word’s light from bleeding into the neighboring letters. The hardware uses two Arduinos to control the LEDs and a DS3231 RTC for keeping accurate time. The results are very impressive, but it would sure make assembly easier if a custom PCB was used in the final version. For a one-off project, this makes a great birthday present.

The craftsmanship of this word clock is great, making it well suited for any home. What projects have you built that involve more than just electronics? Sometimes, quality aesthetics make all the difference.

Quick And Dirty RFID Door Locks Clean Up Nice

homemade RFID Door Locks

[Shawn] recently overhauled his access control by fitting the doors with some RFID readers. Though the building already had electronic switches in place, unlocking the doors required mashing an aging keypad or pestering someone in an adjacent office to press a button to unlock them for you. [Shawn] tapped into that system by running some wires up into the attic and connecting them to one of two control boxes, each with an ATMega328 inside. Everything functions as you would expect: presenting the right RFID card to the wall-mounted reader sends a signal to the microcontroller, which clicks an accompanying relay that drives the locks.

You may recall [Shawn’s] RFID phone tag hack from last month; the addition of the readers is the second act of the project. If you’re looking to recreate this build, you shouldn’t have any trouble sourcing the same Parallax readers or building out your own Arduino on a stick, either. Check out a quick walkthrough video after the jump.

Continue reading “Quick And Dirty RFID Door Locks Clean Up Nice”

Solar Powered DIY Plant Watering System

Solar Powered Watering System

It’s great having fresh vegetables just a few steps away from the kitchen, but it takes work to keep those plants healthy. [Pierre] found this out the hard way after returning from vacation to find his tomato plant withering away. He decided to put an end to this problem by building his own solar-powered plant watering system (page in French, Google translation).

An Arduino serves as the brain of the system. It’s programmed to check a photo resistor every ten minutes. At 8:30PM, the Arduino will decide how much to water the plants based on the amount of sunlight it detected throughout the day. This allows the system to water the plants just the right amount. The watering is performed by triggering a 5V relay, which switches on a swimming pool pump.

[Pierre] obviously wanted a “green” green house, so he is powering the system using sunlight. A 55 watt solar panel recharges a 12V lead acid battery. The power from the battery is stepped down to the appropriate 5V required for the Arduino. Now [Pierre] can power his watering system from the very same energy source that his plants use to grow.

Non-Lethal Electric Chair Brings The Death Row Experience Home

Non-Lethal electric chair for Oculus Rift Hackathon

One of our trusty tipsters named [Arman] wrote in to tell us about this awesome little Horror VR Hackathon that sought to create a non-lethal electric chair, for a seriously creepy and shocking experience.

[Arman] works in a small prototyping shop, so when a few guys from the local VR group called to ask for help building a non-lethal electric chair, he thought they were joking — until they showed up at the shop! Finally understanding what they really wanted to do, he hooked them up with an EL wire power supply (high voltage AC, low amperage) for their first prototype.

Unfortunately the EL power supply driver took too much juice, so they called [Arman] back the next day to hack together some of those joke gum shockers instead — he hooked them up to an Arduino and they work like a charm.  Continue reading “Non-Lethal Electric Chair Brings The Death Row Experience Home”