Power Your Guitar Pedals With Drill Batteries

Guitar pedals are a great way to experiment with the sound of your instrument. However, they require electricity, and when you’re using more than a couple, it can get messy. Some will run on batteries, while others are thirstier for more current and will only work with a plugback. There are a great many solutions out there, but most people with more than a few pedals to power will end up going to some kind of mains powered solution. [Don] is here to show us that it’s not the only way.

Mains power is great for some things, but where pedals are concerned, it’s not always perfect. There are issues with noise, both from cheap power supplies and poorly designed pedals, and it means you’re always hunting for a power socket, which is limiting for buskers.

[Don] realised that the common drill battery is a compact source of clean, DC power, and decided to use that to power his rig. By slapping together a drill battery with a pre-assembled buck converter and a 3D printed adapter, he was able to build a portable power supply for his pedals. Thanks to the fact that the vast majority of pedals use 9V DC with the same input jack design, it’s a cinch to wire up. With an appropriately sized buck converter, a drill battery could supply even a hefty pedalboard for a significant period of time.

Overall, it’s a great hack that solves a problem faced by many performing musicians. We’ve seen our fair share of guitar pedals around Hackaday – perhaps you’d like to see how one makes it from concept to production?

Continue reading “Power Your Guitar Pedals With Drill Batteries”

TRS-80 Model 100 Goes Cellular

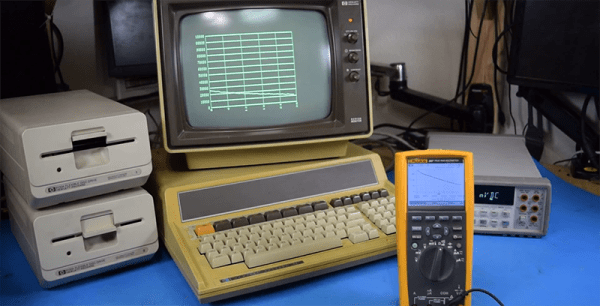
There are a few old products that have rabid fan bases, and the TRS-80 Model 100 is one of those. Depending on your point of view it’s either a small laptop or a large organizer, but in 1983 it was the ultimate computer on the go. The $1100 version had a whopping 8K of memory and the LCD screen showed 8 lines of 40 characters in glorious monochrome. One cool feature was the built-in 300 baud phone modem, which [Trammell Hudson] wanted to try, but he doesn’t have a landline. He tried a VOiP phone, but it wouldn’t wedge into the acoustic couplers well enough. Then he decided to go cellular.

He had already hooked up an old ITT 500 series dial phone to an Adafruit Fona ceullar board. He even has Teensy software to decode the dial, drive the dial tone and otherwise make the phone work. This time he hooked a handset up through a headset jack.

Continue reading “TRS-80 Model 100 Goes Cellular”

Vectrex, Finally In Color

The Vectrex is everybody’s favourite vector-based console from the early 1980s. Vector graphics really didn’t catch on in the videogame market, but the Vectrex has, nonetheless held on to a diehard contingent of fans that continue to tinker with the platform to this day. [Arcade Jason] just so happens to be leading the pack right now.

The Vectrex has always been a monochrome machine, capable of only displaying white lines on its vector monitor. Color was provided by plastic overlays that were stuck to the screen, however this was never considered a particularly mindblowing addition to the console. [Jason] decided he could do better, and dug deep into his collection of vector monitors.

With a 36″ color vector monitor to hand, the Vectrex was laid out on the bench, ready for hacking. The bus heading to one of the DACs was hijacked, and fed through a series of OR and AND logic to generate color signals, since the original Vectrex hardware had no way of doing so. This is then fed to the color monitor, with amazing results.

[Jason]’s setup is capable of generating 8 colors on the screen, and it’s almost by some weird coincidence that this really does make the classic Vectrex games pop in a way they never have before. It’s also a testament to a simpler time that it’s possible to hack this console’s video signals on a breadboard; modern hardware runs much too fast to get away with such hijinx.

It’s an epic hack that through experimentation and some serendipity, has turned out some exciting results. [Jason] is now in the process of taking this to the next level, experimenting with adding color intensity control and other features to the mix.

It’s not [Jason]’s first time around these parts, either – we saw his big-screen Vectrex just a month ago!

[Thanks to Morris for the tip!]

Continue reading “Vectrex, Finally In Color”

Tips On Building The BlackIce BBC Micro

You can look at pictures and video of the Grand Canyon, Paris, New York City or anywhere else, and yet when you finally see those places with your own eyes it is somehow different. Fielding an old computer like the BBC Micro on an FPGA has been done before. But there’s always something to learn when you do it yourself. [Machina] took a BlackIce board and made a BBC Micro replica, but he learned a few things along the way and decided to share them for our benefit.

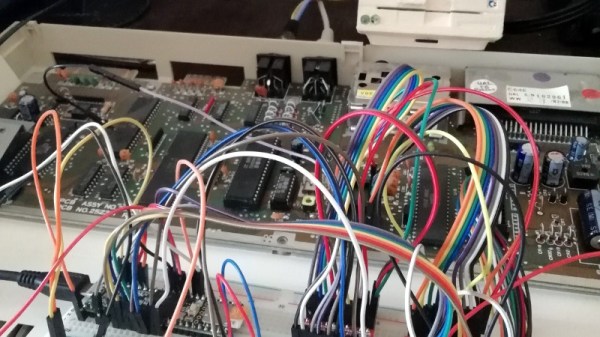
He used the BlackIce board with [Dave’s] BBC Micro implementation that we’ve covered before. [Machina] was impressed that the board takes PMOD plug ins, so it was easy — almost — to add a VGA and keyboard port. Although both gave him some unexpected problems.

Continue reading “Tips On Building The BlackIce BBC Micro”

Why Sony’s Trinitron Tubes Were The Best

If you’re old enough to remember Cathode Ray Tube (CRT) Televisions, you probably remember that Sony sold the top products. Their Trinitron tubes always made the best TVs and Computer Monitors. [Alec Watson] dives into the history of the Sony Trinitron tube.

Sony Color TVs didn’t start with Trinitron — for several years, Sony sold Chromatron tubes. Chromatron tubes used individually charged wires placed just behind the phosphor screen. The tubes worked, but they were expensive and didn’t offer any advantage over common shadow mask tubes. It was clear the company had to innovate, and thanks to some creative engineering, the Trinitron was born.

Closeup of a Trinitron tube shows unbroken vertical stripes which led to a brighter picture.

All color TV’s shoot three electron guns at a phosphor screen. Typical color TVs use a shadow mask — a metal sheet with tiny holes cut out. The holes ensure that the electron guns hit only the red, green and blue dots of phosphor. Trinitrons use vertical bars of single phosphor color and a picket fence like aperture grille. The aperture grill blocks less of the electron beam than a shadow mask, which results in a much brighter image. Trinitrons also use a single electron gun, with three separate cathodes.

[Alec] is doing some amazing work describing early TV systems and retro consumer electronics over on his YouTube channel, Technology Connections. We’ve added him to our Must watch subscription list.

Interested in retro CRTs? Check out Dan’s article on cleaning up the fogged plastic safety screen on the front of many CRTs.

Continue reading “Why Sony’s Trinitron Tubes Were The Best”

Rescue An Old Washing Machine With Modern Controls

The humble washing machine is an appliance that few of us are truly passionate about. They’re expected to come into our lives and serve faithfully, with a minimum of fuss. In the good old days, it was common for a washing machine to last for well over 20 years, and in doing so ingratiate itself with its masters. Sadly now while the simple mechanical parts may still be serviceable, the electronics behind the scenes can tend to fail. This is a Russian story (Google Translate link) about giving a new brain to an old friend.

The machine in question is known as an Oriole, and had served long and hard. Logic chips and entire controllers had been replaced, but were continuing to fail. Instead, a replacement was designed to keep the machine operational for some time yet. Rather than relying on recreating the full feature set of the machine it was decided to eliminate certain things for simplicity. Settings for different fabric types or wash modes were eliminated, which is an easy choice if like most people all your washes are done in the same mode anyway. A water level sensor was found to be no longer functioning properly and was simpler to eliminate than repair.

The brain is a PIC microcontroller, with an ESP12 acting as a webserver for monitoring and control. Additionally, a glass lens was taken from some former medical equipment and neatly installed in the control panel of the machine before an OLED display, giving the machine far more feedback than before. Control is still done with the machine’s original buttons. Temperature sensors were added as well to allow the machine to shut itself down in the event of an overheating problem. It’s all tied together on what looks to be a classic single-sided homebrew PCB.

It’s a great project that shows it’s easy to bring modern electronic might to bear on vintage mechanical hardware, with great results. A washing machine lives to see another day, another load – and the landfill remains just that much lighter, to boot.

We’ve seen controller builds for old washing machines before, too – like replacing mechanical control with an Arduino.

[Thanks to Tirotron for sending this in!]

Custom PCB Revives A Vintage Tree Stand

After 56 years, [Jeff Cotten]’s rotating Christmas tree stand had decided enough was enough. While its sturdy cast aluminum frame was ready for another half-century of merriment, the internal mechanism that sent power up through the rotating base had failed and started tripping the circuit breaker. The problem itself seemed easy enough to fix, but the nearly 60 year old failed component was naturally unobtanium.

But with the help of his local makerspace, he was able to manufacture a replacement. It’s not exactly the same as the original part, and he may not get another 56 years out of it, but it worked for this season at least so that’s a win in our books.

The mechanism inside the stand is fairly simple: two metal “wipes” make contact with concentric circle traces on a round PCB. Unfortunately, over the years the stand warped a bit and the wipe made contact with the PCB where it wasn’t intended do. This caused an arc, destroying the PCB.

The first step in recreating the PCB was measuring the wipes and the distance between them. This allowed [Jeff] to determine how thick the traces needed to be, and how much space should be between them. He was then able to take that data and plug it into Inkscape to come up with a design for his replacement board.

To make the PCB itself, he first coated a piece of copper clad board with black spray paint. Using the laser cutter at the makerspace, he was then able to blast away the paint, leaving behind the two concentric circles. A quick dip in acid, a bit of polishing with toothpaste, and he had a replacement board that was close enough to bolt up in place of the original hardware.

If you’d like to see the kind of hacks that take place above the stand, we’ve got plenty to get you inspired before next Christmas.