The Amiga is the platform that refuses to die. It must be more than two decades since the debacle surrounding the demise of the original hardware, yet the operating system is still receiving periodic updates, you can still buy Amiga hardware now sporting considerably more powerful silicon than the originals, and its worldwide community is as active as ever.
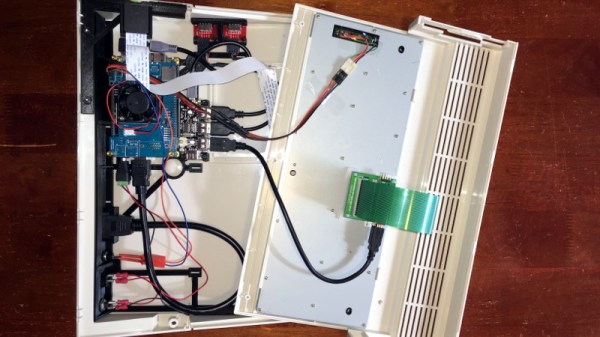
One of those community projects is the MiSTer FPGA Amiga-on-an-FPGA, and it was this that caught the attention of [Mattsoft]. Impressed with the quality of its recreation of an Amiga, he decided to turn his into a “real” Amiga, so found an Amiga 600 case and keyboard, and set to work. Into the mix went the Terasic DE10-Nano FPGA board, I/O and RAM boards, a Tynemouth Software keyboard interface, a USB hub, and some well-designed 3D-printed parts allow the original Amiga case to be used without modifications.
The Amiga 600 was the base model in the final Amiga range from the early 1990s, and at the time despite its HDD interface and PCMCIA slot it languished in the shadow of its Amiga 1200 sibling. The styling has aged well though, and this upgrade certainly breathes a little life back into the case if not strictly the machine itself. If you want to learn a bit more about MiSTer then a look at the project’s wiki is in order. Perhaps you don’t have an Amiga though and would like to wallow in a bit of nostalgia without splashing out for hardware, in that case, give AROS a look.
Thanks [intric8] for the tip.