Sometimes we stumble upon a hack that’s not entirely new but which is still pretty exceptional. So it is with [Hèrm Hofmeyer]’s guide to recreating a film cartridge for the Kodak Disc photographic format. It’s written in 2020, but describing a project around a decade old.
The disc format was Kodak’s great hope in the 1980s, the ultimate in photographic convenience in which the film was a 16-shot circular disc in a thin cartridge. Though the cameras were at the consumer end of the market they were more sophisticated than met the eye, with the latest electronics for the time and some innovative plastic multi-element aspherical lenses. It failed in the face of better compact 35 mm cameras because the convenience of the disc wasn’t enough to make up for the relatively small negative and that few labs had the specialized printing equipment to get the best results from the format. The cameras faded from view, and the film ceased manufacture at the end of the 1990s.
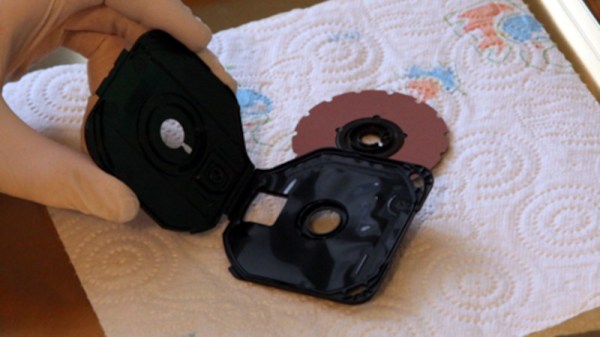
The biggest hurdle to creating a Disc cartridge comes in the cartridge shells themselves. It’s solved by sourcing them second-hand from Film Rescue International, a specialist in developing expired photographic film. The stages follow the cutting of a film disc, perforating its edges, and fitting it into the cartridge. It’s an exact enough process in the pictures, and it’s worth remembering that in the real cartridges it must be done in the dark.
This is an interesting piece of work for anyone with an interest in photography, and while the Disc cameras were always a consumer snapshot camera we can see that it would appeal to those influenced by Lomography. We wish we could get our hands on a Disc cartridge, an maybe CAD up a 3D printable version to make it more accessible.