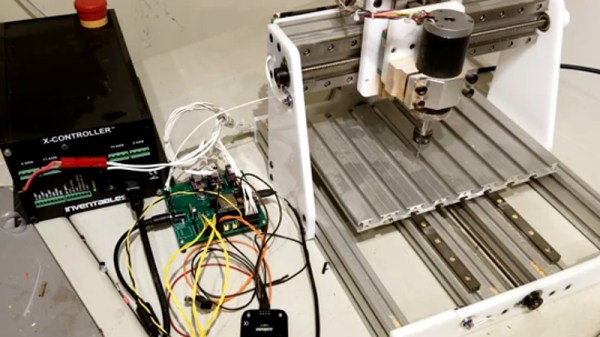
DIY Cable Chain Looks Great, Stays Cheap

If you’ve built a 3D printer, CNC, laser cutter, or basically any piece of electrical equipment that moves around, then you’ve run into the problem of securing the bundle of wires that such machines always require. The easy way out is to zip tie them all up into a tight harness or put them in commercially available wraps or sleeves, but these don’t really impart any mechanical strength on the wires. With repetitive motion it’s not unheard of to break a conductor or two, causing intermittent failures and generally leading to a painful diagnostic session trying to isolate the broken wire.

An alternative are what are generally referred to as “cable chains”. These are rigid enclosures for your wiring that not only keep things tidy, but give the wires the mechanical support necessary to prevent fatigue. Unfortunately, they are often many times more expensive than a simple wire wrap or pack of zip ties. But [Brad Parcels] has written into our tip line to share with us a sort of hybrid approach to wire management that has many of the same advantages as a traditional cable chain, but at a greatly reduced cost.

The key to the design is using the metallic tape from a cheap tape measure to give the bundle of wires some mechanical strength. As anyone who’s ever played around with a tape measure knows, if you bend the tape over into a U shape it will hold the bend even if you extend and retract it. Thanks to this principle, [Brad] realized that all he need to do was add some wire sleeves and he would have a cheap and effective way to keep his wiring neat and sag-free.

[Brad] punches holes in the tape to secure it to his 3D printed mounting arms, but really any method of securing the tape to the frame of your machine will work just as well. He then slides a cable sleeve over the tape itself to protect from any possibility of the edge of the tape nicking a wire, and then finally a larger wire sleeve over the entire assembly.

After running the wires between the two sleeves, heatshrink can be used on the ends to neatly close everything up. Just make sure you remember all your wires before you seal it, [Brad] learned that one the hard way. But overall, he reports this DIY cable chain arrangement has been working wonderfully in his machine, providing smooth and silent movement for only a few bucks.

Cable management for projects that move is one of those things that doesn’t always get the attention it deserves. Not only can it keep your project looking professional, but it just might save you some time down the road by preventing failures.

CNC’d MacBook Breathes Easy

Sick of his 2011 Macbook kicking its fans into overdrive every time the temperatures started to climb, [Arthur] decided to go with the nuclear option and cut some ventilation holes into the bottom of the machine’s aluminum case. But it just so happens that he had the patience and proper tools for the job, and the final result looks good enough that you might wonder why Apple didn’t do this to begin with.

After disassembling the machine, [Arthur] used double-sided tape and a block of scrap wood to secure the Macbook’s case to the CNC, and cut out some very slick looking vents over where the internal CPU cooler sits. With the addition of some fine mesh he found on McMaster-Carr, foreign objects (and fingers) are prevented from getting into the Mac and messing up all that Cupertino engineering.

[Arthur] tells us that the internal temperature of his Macbook would hit as high as 102 °C (~215 °F) under load before his modification, which certainly doesn’t sound like something we’d want sitting in our laps. With the addition of his vents however, he’s now seeing an idle temperature of 45 °C to 60 °C, and a max of 82 °C.

In the end, [Arthur] is happy with the results of his modification, but he’d change a few things if he was to do it again. He’s somewhat concerned about the fact that the mesh he used for the grill isn’t non-conductive (he’s using shims of card stock internally to make sure it doesn’t touch anything inside), and he’d prefer the peace of mind of having used epoxy to secure it all together rather than super-glue. That said, it works and hasn’t fallen apart yet; basically the hallmarks of a successful hack.

It’s worth noting that [Arthur] is not the first person to struggle with the Macbook’s propensity for cooking itself alive. A few years back we covered another user who added vents to their Macbook, but not before they were forced to reflow the whole board because some of the solder joints gave up in the heat.

CNC Calculator Does What You Can’t

The Hackaday community — and the greater hacker community — can do absolutely anything. Readers of Hackaday regularly pilot spaceships. The transmutation of the elements is a simple science project here, one easily attainable by a high school student. Hackaday readers have solved international crises, climbed Everest, and one day we’re going to have readers accessing Hackaday from an IP address on Mars. There is almost no limit to what our community can do.

This project does the one thing Hackaday readers are utterly incapable of doing. As a cool little bonus, the enclosure for this device is a beautiful work of milled aluminum, anodized in a deep, beautiful black and engraved with exacting precision.

The guts of this build are in essence an Arduino loaded up with some special code that does what no human is capable of doing. Added onto that is a small lithium battery, charging circuit, character display, and a small keypad. There’s really nothing here that can’t be sourced from your favorite AliDXExtremeDeal shop.

The real show here is the beautiful milled aluminum enclosure. This was designed in Fusion360 and milled away on a Tormach CNC loaded up with a slightly worn endmill. The engraving was done with a Lakeshore carbide engraver. The first prototype was finished with a powder coat because that’s the easiest way for someone in a home shop to put a great finish on a milled enclosure. The production versions of this amazing device (available here, although it’s sold out at the time of this writing) are anodized and look fantastic.

If this is the sort of project that appeals to your desire for logic with just a touch of anti-Americanism, be sure to check out the number one most commented post on Hackaday ever. There are a lot of great opinions in the comments section there, even if the topic being discussed is obtuse and weird to the entire Hackaday community.

Continue reading “CNC Calculator Does What You Can’t”

Sable-Machined Slingshot Is A Composite Marvel

Armed with an overseas CNC machine retrofitted with custom electronics, [Eric] has taken to wowing us with his suite of home-fabricated slingshots. In a more recent stint, he’s just polished off his Enzo Carbon Fiber Hydra Slingshot, complete with a build log that’s loaded with step-by-step insights.

[Eric’s] build started with a few carbon panels laying dormant in his shop for half a year. After epoxying two of these boards together for added thickness, he machines them down with his retrofitted Sable-2015 “Lunchbox CNC.” His final product accepts a few press-fit inserts, a few more machined ABS edge pieces for aesthetics, and behold: a professional slingshot that’s about as beautiful as it is dangerous.

Although the Sable-2015 CNC machine (made in Taiwan) isn’t a frequent flyer here on Hackaday, it had dozens of proud owners on a few hobby machinist forums that will rave about its wares. We’re proud to see a small-but-sturdy machine that we could carry one-handed be put to such delicate work.

[Eric] could’ve had us with his Lunchbox CNC Instructable, but he’s taken his craftsmanship to the next level by leveraging his homebrew tools and living the bootstrapped-machine-shop narrative. Slingshots don’t land here too often on these pages, but if you’re hungry for another machine monster, have a look at [Dennis the Menace’s] Triple Threat.

Homebuilt Laser Engraver Using Salvaged Parts

Now that anyone can go online and get a fairly decent 3D printer for around $200, they’ve officially fallen out of the “Elite Hacker” arsenal and are now normal, if perhaps highly specialized, tools. That’s great for the 3D printing community as a whole, but what about those who want to be on the fringe of technology? Telling people you have a 3D printer at home doesn’t get that wide-eyed response like it used to. What’s a “l33t” hacker to do?

Enter the laser engraver/cutter: it’s like a 3D printer, but easier to build and has a higher capacity for bodily harm! While there are a couple good options for kits and turn-key setups out there, just like the early days of 3D printers, some of the best machines are still home built. In his latest video, YouTuber [MakerMan] takes us through his build which features an impressively low part count.

To start his build, [MakerMan] strips down four printers and salvages seven high quality 8 mm linear rods; a huge cost saving tip in itself. We’ll certainly be picking up any printers we see in the trash for the next couple months hoping to score some rods. With the addition of some cheap LM8UU bearings and 3D printed holders for them, [MakerMan] has a smooth 2D motion platform for just a couple bucks. The frame of the machine is built out of type of aluminum square tubing you can find at the hardware store, no expensive extrusion here.

For the laser itself, [MakerMan] is using a six watt PLH3D-6W-XF from Opt Lasers. This module features integrated driver and cooling, so all you need to do is provide it power and a stable means of moving it over the work piece. They even offer a magnetic “dock” which allows you to remove the laser from the mount without any tools for servicing or tool changes. [MakerMan] reports he’s been able to engrave stainless steel with this laser module, and cut thin wood.

This isn’t the first laser engraver we’ve seen built out of scrap parts, though if you want to save some work you could just upgrade a cheap commercial model.

Continue reading “Homebuilt Laser Engraver Using Salvaged Parts”

Cable Bots, Arise! Domination Of The Universe Is At Hand

Most CNC robots people see involve belts and rails, gantries, lead screws, linear bearings, and so forth. Those components need a rigid chassis to support them and to keep them from wobbling during fabrication and adding imperfections to the design. As a result, the scale is necessarily small — hobbyist bots max out at cabinet-sized, for the most part. Their rigid axes are often laid out at Cartesian right angles.

One of the exceptions to this common configuration is the delta robot. Deltas might be the flashiest of CNC robots, moving the end effector on three arms that move to position it anywhere in the build envelope. A lot of these robots are super fast and precise when charged with carrying a light load, and they get put to work as pick-and-place machines and that sort of thing. It doesn’t hurt that delta bots are also parallel manipulators, which means that the motors work together to move the end effector, with one motor pulling while the matching motor pulls.

But while Cartesian CNC bots are sturdy workhorses, and deltas are fly-weight racehorces, neither can really cut it when you want to go gigantic. In terms of simplicity and scale, nothing beats cable bots.

Cable Bots

Cable bots use wires or strings pulled by reel-mounted motors, with dimensions limited only by the room to mount the motors and the tensile strength of the cables used. When the strings are tensioned you can get a surprising degree of accuracy. Why not? Are they not computer-controlled motors? As long as your kinematic chain accounts for the end effector’s movement in one direction by unwinding another cable (for instance) you can very accurately control the end effector over a very wide scale.

The following are some fun cable bots that have caught my eye.

Continue reading “Cable Bots, Arise! Domination Of The Universe Is At Hand”

Scratch Built Watch Case Is A Work Of Art

The wristwatch was once an absolute necessity, as much fashion statement as it was a practical piece of equipment. Phones in our pockets (and more often than not, in our faces) replaced the necessity of the wristwatch for the majority of people, and the fashion half of the equation really only interests a relatively small  subset of the population. The end result is that, aside from the recent emergence of smartwatches and fitness trackers, walking down the street it’s fairly unlikely you’ll see many people wearing a traditional watch.

But we think the scratch built wristwatch case recently shown off by [Colin Merkel] adds a new justification for wearing a watch: pride. From a chunk of steel rod stock, [Colin] walks through every step of the process to creating a professional looking watch case. This is actually his second attempt at the project; while his first one certainly didn’t look bad, he felt that he learned enough from his earlier mistakes that it was worth starting over from scratch. A man after our own heart, to be sure. Continue reading “Scratch Built Watch Case Is A Work Of Art”