Open World 3D Game Runs On The RP2040 Microcontroller

The Raspberry Pi RP2040 is versatile and cheap, but it’s by no means known as the most powerful microcontroller on the world. Regardless, it is capable of great things, as demonstrated by [Bernhard Strobl], who built a 3D open world game engine that runs on that very platform.

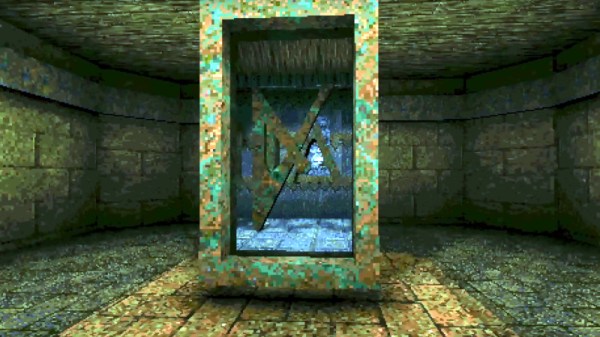
The graphics are simple, but with a compelling low-poly style.

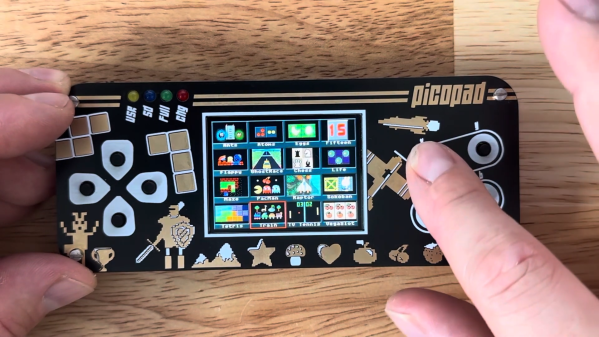
The game engine itself is built to run on the Pimoroni PicoSystem, which is essentially a handheld gaming platform built around the RP2040 chip. The engine takes advantage of the multi-core nature of the RP2040, using the second core as a dedicated rasterizer to keep frames pumping out.

The basic game [Bernhard] built in the engine features 50 NPC characters and 50 further zombies, all running at the same time. Specs are impressive, with the engine’s included game simulating a “world” of 120 x 120 meters in size. As a maximum limit, the engine can handle a 2.56 x 2.56 km world, thanks to the use of 8-bit integers for directional data. However, limited storage space would make it difficult to achieve such a large world in practice.

We don’t get to see much of the gameplay in the YouTube video, but the quality of the graphics is impressive for such a cheap microcontroller. It seems within the bounds of possibility that an actual open-world game could be practical on the PicoSystem if only enough storage were available. Video after the break.

Continue reading “Open World 3D Game Runs On The RP2040 Microcontroller”

photograph of custom PCB assembly of NE555-based electronic dice

NE555-Based Electronic Dice

It has become a bit of a running joke in the Hackaday community to suggest that a project could or should have been done with a 555 timer. [Tim] has rather taken this to heart with his latest Electronic Dice project, which uses three of the venerable devices.

If three seems like a lot of 555s to make an electronic die, then it may be worth considering that the last time we shared his project he was using 22 of them! Since then, [Tim] has been busy optimising his design, whilst keeping within the constraints of an old-school through-hole soldering kit.

Maybe the most surprising thing about this project is the purpose to which the NE555 devices are pressed. Rather than using them for their famous oscillation properties, they are in actual fact just being used as Schmitt Triggers to clean up the three-phase ring oscillator that is constructed from discrete transistors and passives.

scope trace of the electronic dice ring oscillator
Simulation trace of the three-phase ring oscillator before Scmitt Trigger stages

The ring oscillator cleverly produces three phase-shifted square waves such that a binary combination of the three phases offers six unique states. Six being the perfect number for a dice throw, all that then remains is to figure out which LEDs need to be switched on in which state and wire them up accordingly.

To “roll” the dice, a push-button powers up the oscillator, and stops it again when it is released, displaying the random end-state on the LEDs.

It can be fun to see what can be done using old technology, and educational to try to optimise a design down to the fewest parts possible.

[Tim]’s earlier project is here if you want to see how the design has evolved. The documentation on both of these iterations is excellent and well worth a read.

Continue reading “NE555-Based Electronic Dice”

Ultimate Game And Watch Has Support For NES

We’ve talked about feature creep plenty of times around here, and it’s generally regarded as something to be avoided when designing a prototype. It might sound good to have a lot of features in a build, but this often results in more complexity and more difficulty when actually bringing a project to fruition. [Brendan] has had the opposite experience with this custom handheld originally designed for Game and Watch games, though, and he eventually added NES and Game Boy functionality as well.

As this build was originally intended just for Game and Watch games, the screen is about the size of these old games, and while it can easily mimic the monochrome LCD-style video that would have been present on these 80s handhelds, it also has support for color which means that it’s the perfect candidate for emulating other consoles as well. It’s based around a Raspberry Pi Zero 2W and the enclosure is custom printed and painted. Some workarounds for audio had to be figured out, though, since native analog output isn’t supported, but it still has almost every feature for all of these systems.

While we’ve seen plenty of custom portable builds from everything from retro consoles to more modern ones, the Game and Watch catalog is often overlooked. There are a few out there, but in this case we appreciate the feature creep that allowed this build to support Game Boy and NES games as well.

A toy gamepad controlling Super Mario World emulated on a MacBook

Turning A Toy Gamepad Into A Real One, With Bluetooth

It’s important to instill healthy habits in your children when they’re still young. Preferences for sports, snacks and dinosaurs are typically formed in early childhood, as is loyalty to a specific gaming platform. [RetrogradeScene] apparently wished to steer his young daughter towards the Nintendo camp, but wasn’t looking forward to having her grubby hands touch his prized controllers. So he built her her own kid-friendly controller out of a Fisher-Price toy.

The toy in question is an imitation game controller that just makes funny sounds when you press the buttons. Converting it into a real, working game controller was a matter of soldering some wires onto the existing PCB and hooking them up to a microcontroller board, in this case a DFRobot FireBeetle. After loading the ESP32-BLE-Gamepad library and assigning the correct pin-button combinations in software [RetrogradeScene] ended up with a big, brightly-coloured gamepad that actually functioned as one.

Unfortunately, the FireBeetle took up space where the original AAA batteries were sitting, so the hacked gamepad needed a new power source. Classic batteries are heavy and inconvenient anyway, so [RetrogradeScene] installed a modern lithium battery plus a USB-C port for charging. Of course, no Bluetooth gadget is complete without an accompanying smartphone app either: [RetrogradeScene] wrote one for his iPhone that enables him to quickly change the button layout between the Nintendo and Xbox styles.

This might be a rare example of someone making a gamepad from, well, a gamepad. We’ve seen a few more unusual things being converted into game controllers, ranging from a handful of LEGO bricks to entire cars.

Continue reading “Turning A Toy Gamepad Into A Real One, With Bluetooth”

Merry Christmas! Rip And Tear!

If you want a little mayhem on your Christmas tree, you can check out [Sprite_tm]’s tiny PC Christmas ornament. With 3D printing, that isn’t such a tall order, but [Sprite]’s does have a unique ability: it plays DOOM, as you can see in the video below.

The device uses an ESP32, and while [Sprite] had ported the iconic shooter to the microcontroller before, he decided to use a Game Boy port that is more lightweight instead. There were a few reasons for the choice, including the ability to do Bluetooth so you could connect controllers so you can play the game. The only catch was he had to pull off the flash memory and replace it with a larger one (see the second video below).

Granted, the screen is tiny, so it is sort of a novelty. But if you want to have a go, the files are all there. As you might expect, there is a tiny battery and the circuitry required to recharge it, as well. We’d probably make an adapter to let it charge from the Christmas lights, but that can wait for version 2.

The input device handling is a bit strange. Bluetooth BLE devices will automatically grab an input device that is in pairing mode. There is no provision for connecting using the “normal” Bluetooth mechanism. A fun project and you could use the case for some other tiny projects, too. A larger flash on an ESP32 has lots of possibilities, as well.

If you need a primer on the ESP32, we got it. If you want to play DOOM on something truly strange, try seven-segment displays.

Continue reading “Merry Christmas! Rip And Tear!”

A Simon toy with a robot that slaps little hands against it

Silicone-Slapping Servos Solve Simon Says

Most modern computer games have a clearly-defined end, but many classics like Pac-man and Duck Hunt can go on indefinitely, limited only by technical constraints such as memory size. One would think that the classic electronic memory game Simon should fall into that category too, but with most humans struggling even to reach level 20 it’s hard to be sure. [Michael Schubart] was determined to find out if there was in fact an end to the latest incarnation of Simon and built a robot to help him in his quest.

The Simon Air, as the newest version is known, uses motion sensors to detect hand movements, enabling no-touch gameplay. [Michael] therefore made a system with servo-actuated silicone hands that slap the motion sensors. The tone sequence generated by the game is detected by light-dependent resistors that sense which of the segments lights up; a Raspberry Pi keeps track of the sequence and replays it by driving the servos.

We won’t spoil the ending, but [Michael] did find an answer to his question. An earlier version of the game was already examined with the help of an Arduino, although it apparently wasn’t fast enough to drive the game to its limits. If you think Simon can be improved you can always roll your own, whether from scratch or by hacking an existing toy.

Continue reading “Silicone-Slapping Servos Solve Simon Says

Cardboard Game Tokens Become Shiny Click-Clacks With DIY Treatment

Tabletop games and cardboard tokens go hand-in-hand for a good reason: they are economical and effective. However, their tactile attributes leave a little to be desired. There’s something really great about high-quality pieces possessing a shiny, pleasing smoothness and click-clack handling that cardboard simply can’t deliver, but that all changes with [Dzhav]’s simple method for converting cardboard tokens into deluxe versions of themselves with a little work and a resin coating.

The result is a token with a crystal-clear, smooth, and slightly-convex coating of hardened resin on it. They feel (and sound) like plastic, rather than cardboard. The resin used is a two-part clear jewelry resin, used for casting things like pendants. It benefits from a long working time and unlike UV-cured resin (like the SLA 3D printer resin) it won’t be affected by light.

Careful application of resin relies on surface tension to prevent messes.

Like with most things, good results come from careful preparation and technique. [Dzhav] suggests preparing the tokens by sanding the edges completely smooth with fine sandpaper, then using a black marker to color them. Then, tokens are coated one side at a time with a paintbrush and correctly-mixed resin: while holding a token down with a toothpick, resin is brushed right to (but not over) the edges. Then, additional resin can be dropped in the center of the token, and gravity and surface tension will work together to ensure an even coating that doesn’t drip.

After the resin has had plenty of time to cure, the tokens are flipped over and the process repeated. The end result are tokens with both sides coated in a nice, smooth, ever-so-slightly-convex shield of resin.

They look fantastic, and sound even better. Turn up your volume and play the two-second video embedded below to listen for yourself. And when you’re ready for another gamer that didn’t settle for what was in the box, check out this redesigned Catan version.

Continue reading “Cardboard Game Tokens Become Shiny Click-Clacks With DIY Treatment”