Blinkenlights For Your Parallel Port

Most modern equipment is connected over USB, and generally speaking we’re all the better for it. But that’s not to say there aren’t some advantages to using serial and parallel ports. For example, the slower and less complex protocols can be a bit easier to debug when devices aren’t communicating, which [Jeremy Cook] demonstrates in his latest project.

Looking to troubleshoot some communications problems he was having between his computer and CNC router, [Jeremy] came up with a handy little gadget that will allow him to visualize data passing through each pin of the parallel port in real-time. Even from across the room he can tell at a glance if communication is active, and with a keen eye, determine if he’s getting bi-directional traffic or not.

From a technical standpoint, this is a pretty simple project. The custom PCB is essentially just a pass-through, with an array of 3 mm LEDs and matching 10K resistors hanging off the data lines. But [Jeremy] found it to be an excellent excuse to brush up his KiCad skills. As he explains in the video after the break, this project certainly won’t impress the folks that do PCB design on a daily basis; but if you’re still learning the ropes, these are precisely the kind of projects you should be looking for.

Before any of you say it in the comments, we already know devices like this are available commercially for a few bucks. But that’s hardly the point. Things would be awfully slow around these parts if we disregarded any project that had a commercial alternative.

Continue reading “Blinkenlights For Your Parallel Port”

Open-Source 2 GHz Oscilloscope Probe

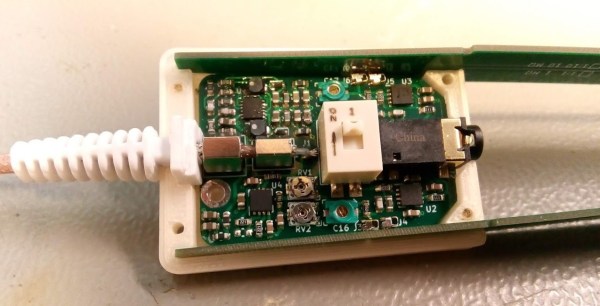
If you do any work with high-speed signals, you quickly realize that probing is an art unto itself. Just having a fast oscilloscope isn’t enough; you’ve got to have probes fast enough to handle the signals you want to see. In this realm, just any old probe won’t do: the input capacitance of the classic RC probe you so often see on low-bandwidth scopes starts to severely load down a circuit well below 1 GHz. That’s why we were really pleased to see [Andrew Zonenberg’s] new open-source design for a 2 GHz resistive probe hit Kickstarter.

The design of this new probe looks deceptively simple. Known as a Z0-probe, transmission-line probe, or resistive probe, the circuit works as a voltage divider, created from the 50-Ohm input impedance of a high-speed oscilloscope input and an external resistor, to reduce loading on the circuit-under-test. In this case, the input resistance has been chosen to be 500 Ohms, yielding a 10x probe. In theory, building such a probe is as simple as soldering a resistor to the end of a piece of coaxial cable. You can do exactly that, but in practice, optimizing a design is much more complex. As you can see in the schematic, just choosing a resistor of the right value doesn’t cut it at these frequencies. Even the tiny 0402-size resistors have parasitic capacitance and inductance that affect the response, and choosing a combination of parts that add to the correct resistance but reduce the overall capacitive loading makes a huge difference.

2 GHz Passive Probe Schematic

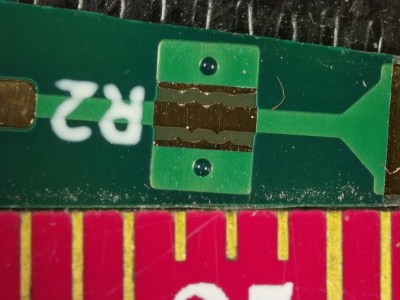
Don’t be fooled: the relatively simple schematic belies the complexity of such a design. At these speeds, the PCB layout is just as much of a component as the resistors themselves, and getting the transmission-line and especially the SMA footprint launch correct is no easy task. Using a combination of modeling with the Sonnet EM simulator and empirical testing, [Andrew] has ended up with a design that’s flat (+/- 1 dB) out to 1.98 GHz, with a 10-90% rise time of 161 ps. That’s a fast probe.

The probe comes in a few options, from fully assembled with traceable specs to a DIY solder-it-yourself version. You probably know which of these options you need.

We really like to see this kind of knowledge and thoroughness go into a project, and we’d love to see the Kickstarter project reach its goals, but perhaps the best part is that the design is permissively open-source licensed. This is a case where having the board layout open-sourced is key; the schematic tells you maybe half of what’s really going on in the circuit, and getting the PCB right yourself can be a long and frustrating exercise. So, have a look at the project, and if you haven’t got probes suitable for your fastest scopes, build one, or better yet, support the development of this exciting design.

We’ve seen [Andrew’s] oscilloscope work before, like glscopeclient, his remote oscilloscope utility program.

Peek At The Off-Ear Speaker Prototypes For Valve’s VR

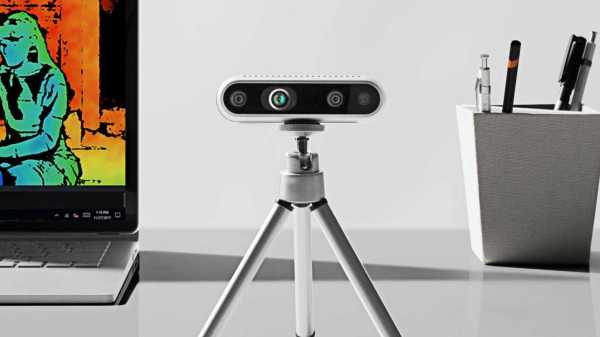
The Valve Index VR headset incorporates a number of innovations, one of which is the distinctive off-ear speakers instead of headphones or earbuds. [Emily Ridgway] of Valve shared the design and evolution of this unusual system in a deep dive into the elements of the Index headset. [Emily] explains exactly what they were trying to achieve, how they determined what was and wasn’t important to deliver good sound in a VR environment, and what they were able to accomplish.

First prototype, a proof-of-concept that validated the basic idea and benefits of off-ear audio delivery.

Early research showed that audio was extremely important to providing a person with a good sense of immersion in a VR environment, but delivering a VR-optimized audio experience involved quite a few interesting problems that were not solved with the usual solutions of headphones or earbuds. Headphones and earbuds are optimized to deliver music and entertainment sounds, and it turns out that these aren’t quite up to delivering on everything Valve determined was important in VR.

The human brain is extremely good at using subtle cues to determine whether sounds are “real” or not, and all kinds of details come into play. For example, one’s ear shape, head shape, and facial geometry all add a specific tonal signature to incoming sounds that the brain expects to encounter. It not only helps to localize sounds, but the brain uses their presence (or absence) in deciding how “real” sounds are. Using ear buds to deliver sound directly into ear canals bypasses much of this, and the brain more readily treats such sounds as “not real” or even seeming to come from within one’s head, even if the sound itself — such as footsteps behind one’s back — is physically simulated with a high degree of accuracy. This and other issues were the focus of multiple prototypes and plenty of testing. Interestingly, good audio for VR is not all about being as natural as possible. For example, low frequencies do not occur very often in nature, but good bass is critical to delivering a sense of scale and impact, and plucking emotional strings.

“Hummingbird” prototype using BMR drivers. Over twenty were made and lent to colleagues to test at home. No one wanted to give them back.

The first prototype demonstrated the value of testing a concept as early as possible, and it wasn’t anything fancy. Two small speakers mounted on a skateboard helmet validated the idea of off-ear audio delivery. It wasn’t perfect: the speakers were too heavy, too big, too sensitive to variation in placement, and had poor bass response. But the results were positive enough to warrant more work.

In the end, what ended up in the Index headset is a system that leans heavily on Balanced Mode Radiator (BMR) speaker design. Cambridge Audio has a short and sweet description of how BMR works; it can be thought of as a hybrid between a traditional pistonic speaker drivers and flat-panel speakers, and the final design was able to deliver on all the truly important parts of delivering immersive VR audio in a room-scale environment.

As anyone familiar with engineering and design knows, everything is a tradeoff, and that fact is probably most apparent in cutting-edge technologies. For example, when Valve did a deep dive into field of view (FOV) in head-mounted displays, we saw just how complex balancing different features and tradeoffs could be.

Tips From A Former Niche Item Etsy Store

Etsy is a service aimed at providing a way for makers of handmade items to sell them online. [Bithead] closed up shop earlier this year and wrote up an interesting perspective on what did and didn’t work out. The main market for [Bithead]’s store was Star Wars cosplayers, because it all started with some Star Wars inspired com pads, some of which are pictured here.

One thing [Bithead] felt worked well overall was to “think big, start small, and scale fast.” In essence, bootstrap things by selling inventory on hand and carefully monitoring demand, then if demand is sustained, ramp up to larger batches, which are more efficient. The risk of making larger part orders and carrying more stock on hand is offset by the reliable demand. Waiting until solid data on reliable demand is available means missing out on early sales, but it’s a low risk approach that works well for niche products that have little or no real competition.

A couple things that didn’t work out were efforts to follow Etsy’s advice to add more products to attract a wider audience, and to try out tools for offering discounts and incentives aimed at turning abandoned carts into sales. Neither went well. The first resulted in adding items that sold poorly, diluted the focus of the store, and incurred a cost for each listing. The second never seemed to have any impact on sales whatsoever. Perhaps there is a place for these efforts, but [Bithead]’s niche market wasn’t it.

It’s a good read about how things went for an Etsy store that served a niche audience over three years. The perspective and experiences might be useful to anyone looking to turn a bright idea into something sold online, so if you’re at all interested, take a few minutes to check it out.

We’ve seen [Bithead]’s work before, this lightsaber-inspired violin bow was one project that went on to become a kit for sale.

Go The Extra Mile For Your LED Driver

Addressable RGB LED strips may be all the rage, but that addressability can come at a cost. If instead of colors you expect to show shades of white you may the find less flickery, wider spectrum light from a string of single color LEDs and a nice supply desirable. Of course there are many ways to drive such a strip but this is Hackaday, not Aliexpressaday (though we may partake in the sweet nectar of e-commerce). [Niklas Fauth] must have really had an itch to scratch, because to get the smoothest fades for his single color LED strips, he built an entire software defined dual 50W switched-mode AC power supply from scratch. He calls it his “first advanced AC design” and we are suitably impressed.

Switched-mode power supplies are an extremely common way of converting arbitrary incoming AC or DC voltage into a DC source. A typical project might use a fully integrated solution in the form of a drop-in module or wall wart, or a slightly less integrated controller IC and passives. But [Niklas] went all the way and designed his from scratch. Providing control he has the ubiquitous ESP-32 to drive the control nodes of the supply and giving the added bonus of wireless connectivity (one’s blinkenlights must always be orchestrated). We can’t help but notice the PCBA also exposes RS485 and CAN transceivers which seem to be unused so far, perhaps for a future expansion into wired control?

Continue reading “Go The Extra Mile For Your LED Driver”

Modular Mouse Packs Features

Not only do console gamers complain about the use of a mouse, but PC users themselves often don’t have kind words to say even about some of the higher-end options. Granted, their gripes aren’t about game experience or balance, they’re usually about comfort, features, or longevity of the mice themselves. So far we haven’t seen many people try to solve these problems, but [benw] recently stepped on the scene with a modular mouse that can fit virtually any need.

Called the RX-Modulus, this mouse has been designed from the ground up to be completely open source from hardware to software. Most of the components can be 3D printed to suit an individual’s particular grip style by making adjustments. The electronics can be custom fitted as well. Users can swap out mouse buttons and wheels in any number of positions, and replace them when they wear out. To that end, one of the goals of this project is also to avoid any planned obsolescence that typically goes along with any current consumer-level product.

While [benw] currently only has a few prototypes under his belt, he’s far enough along with the project that he’s willing to show it off to the community. His hopes are that there are others that see a need for this type of mouse and can contribute to the final design. After all, there are all kinds of other custom mice out there that would have been much easier builds with [benw]’s designs at hand.

How To Keep Unique Equipment Running When Parts Run Out

[JGlass] deals with public-facing technology, which he says includes things like theatre equipment, retail displays, and museum displays. Many of these pieces of technology are literally one-of-a-kind devices, even if they were constructed from what was once off-the-shelf, commercially available parts. When these machines need servicing, replacement parts aren’t always available, and reverse engineering comes in handy. He recently began documenting exactly how to approach this process by using the identification and replacement of an obsolete 7-segment industrial display as an example.

The particular part shown is the Lascar EM32-4-LED, which up and died in a unique piece of equipment. The trouble is that the EM32-4-LED is out of production and unobtainable, and the Programmable Logic Controller (PLC) that drives the whole thing is a black box that cannot be modified. It’s very good news that a datasheet exists, but that’s often just a starting point. To create a one-off, drop-in solution requires a combination of research, troubleshooting, and design work.

To do this, [JGlass] starts off by walking through datasheet elements and explains that it’s important to build a high level understanding of function first, then drill down into details, and always be ready to verify, challenge, or throw out one’s assumptions. After establishing a high level understanding comes matching physical evidence to things like block and functional diagrams, then cracking open the faulty component to see if anything else can be learned. Only then are multimeters and probes taken out for more active research. All of this sleuthing must always be done with the end goal firmly in mind: creating a new device that acts like the one being replaced. Without focus, one can easily get lost in details and unknowns.

Reverse Engineering is a process, and the more tools, the better. If you missed our earlier post about a hacker’s guide to JTAG, here’s your chance to check it out and be all the more prepared for the next time you need to do some electron detective work of your own.