Homebuilt Laser Engraver Using Salvaged Parts

Now that anyone can go online and get a fairly decent 3D printer for around $200, they’ve officially fallen out of the “Elite Hacker” arsenal and are now normal, if perhaps highly specialized, tools. That’s great for the 3D printing community as a whole, but what about those who want to be on the fringe of technology? Telling people you have a 3D printer at home doesn’t get that wide-eyed response like it used to. What’s a “l33t” hacker to do?

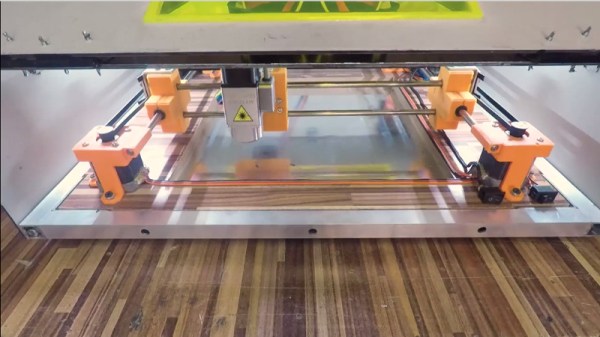
Enter the laser engraver/cutter: it’s like a 3D printer, but easier to build and has a higher capacity for bodily harm! While there are a couple good options for kits and turn-key setups out there, just like the early days of 3D printers, some of the best machines are still home built. In his latest video, YouTuber [MakerMan] takes us through his build which features an impressively low part count.

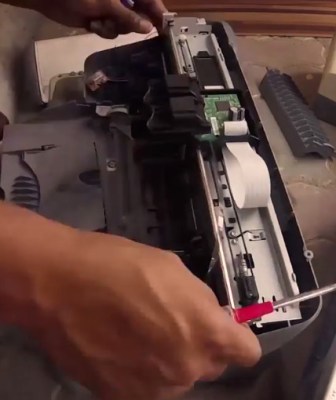
To start his build, [MakerMan] strips down four printers and salvages seven high quality 8 mm linear rods; a huge cost saving tip in itself. We’ll certainly be picking up any printers we see in the trash for the next couple months hoping to score some rods. With the addition of some cheap LM8UU bearings and 3D printed holders for them, [MakerMan] has a smooth 2D motion platform for just a couple bucks. The frame of the machine is built out of type of aluminum square tubing you can find at the hardware store, no expensive extrusion here.

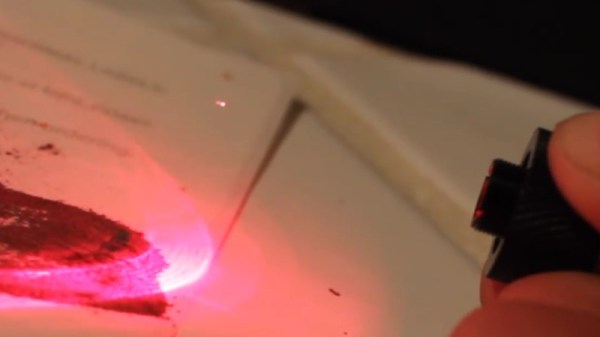
For the laser itself, [MakerMan] is using a six watt PLH3D-6W-XF from Opt Lasers. This module features integrated driver and cooling, so all you need to do is provide it power and a stable means of moving it over the work piece. They even offer a magnetic “dock” which allows you to remove the laser from the mount without any tools for servicing or tool changes. [MakerMan] reports he’s been able to engrave stainless steel with this laser module, and cut thin wood.

This isn’t the first laser engraver we’ve seen built out of scrap parts, though if you want to save some work you could just upgrade a cheap commercial model.

Continue reading “Homebuilt Laser Engraver Using Salvaged Parts”

Interference Scanner With Clear Instructions

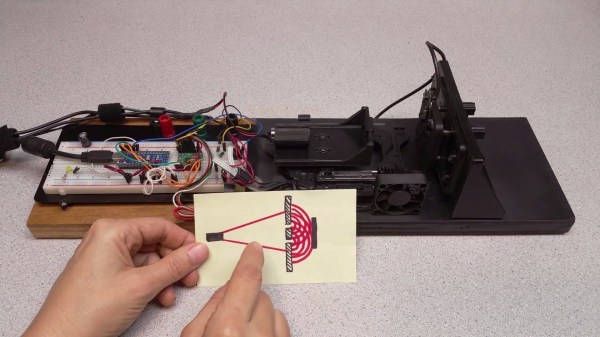
Meticulous. Thorough. Exacting. These are all words we’d use to describe this video by [BrendaEM] about her Homemade 3D Optical Interference Scanner which can be seen after the break. The scanner uses 3D-printed parts and repurposed materials you might find lying around in your spare parts bin. An old optical drive tray acts to move the laser-wielding sled while a stripped-out webcam is an optical sensor. Links to relevant files such as 3D models and Arduino sketches will be found in the video’s author section.

The principle of operation is demonstrated with a water analog in the video at 2:00 with waves in a plastic container. By creating two small apertures between a light source and a sensor, it’s possible to measure the light waves which make it through. [BrendaEM] uses some powerful visualization software to convert her samples into 3D models which look really cool and simultaneously demonstrate the wave nature of light.

On the left side of her device are the control electronics which don’t need any special coatings since light won’t pass over this area. For the right side, where coherent light is measured, to borrow a Rolling Stones lyric: no colors anymore, I want them to turn black. Even the brass strips with apertures are chemically darkened.

Most of the laser hacks here use lasers rather than measure them, like this Laser Clock and a Laser Projector.

Continue reading “Interference Scanner With Clear Instructions”

Making The Best Plywood For Laser Cut Puzzles

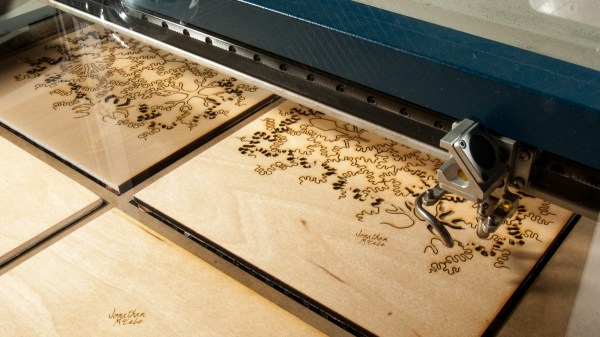
Plywood laser-cuts fairly well but has drawbacks when used in serious production runs, as [Marie] explains in a blog post about a quest for the ultimate laser-cutting plywood. One of the things [Nervous System] makes and sells is generative jigsaw puzzles, and they shared their experience with the challenges in producing them. The biggest issue was the wood itself. They ended up getting a custom plywood made to fit their exact needs, a process that turned out neither as complex nor as unusual as it may sound.

An example of how a dense knot hidden in one of the plywood layers caused the laser to not cut all the way through.

Plywood is great because it’s readily available, but there are some drawbacks that cause problems when trying to do serious production of laser-cut plywood pieces. Laser cutting works best when the material being cut is consistent, but there can be areas of inconsistent density in plywood. If the laser encounters an unexpected knot somewhere in the wood, there is no way to slow down or to increase power to compensate. The result is a small area where the laser perhaps doesn’t quite make it through. A picture of an example from my workshop shows what this looks like.

When doing basic project work or prototyping, this kind of issue is inconvenient but usually some trimming and sanding will sort things out. When doing a production run for puzzles like [Nervous System] was doing, the issue is more serious:

  1. A jigsaw puzzle with a large number of cuts in a relatively small area has a higher chance of running into any problem spots in the material. If they exist, the laser will probably encounter them.
  2. Trouble spots in plywood can be on the inside layers, meaning they can’t be detected visually and are only discovered after they cause an incomplete cut.
  3. Increasing laser power for the whole job is an incomplete solution, as excessive laser power tends to make the cuts uglier due to increased scorching and charring.
  4. An inspection process becomes needed to check each puzzle piece for problems, which adds time and effort.
  5. A puzzle that had even one piece that did not cut properly will probably be scrapped because rework is not practical. That material (and any time and money that went into getting the nice artwork onto it) becomes waste.

Plywood is great stuff and can look gorgeous, but [Marie] says they struggled with its issues for a long time and eventually realized they had gone as far as they could with off-the-shelf plywoods, even specialty ones. They knew exactly what they needed, and it was time for something custom-made to serve those specific needs.

Having your own plywood custom-made may sound a little extreme, but [Marie] assures us it’s not particularly difficult or unreasonable. They contacted a small manufacturer who specialized in custom aircraft plywoods and was able to provide their laser-cut plywood holy grail: a 3-ply sheet, with high quality basswood core with birch veneers, and a melamine-based glue. It cuts better than anything else they have used, and [Marie] says that after four years they had certainly tried just about everything.

Milling A Flow Sensor To Safeguard A Laser Tube

Powerful lasers get powerfully hot and if you don’t keep them cool you’ll pay the price. After two such experiences [NixieGuy] got smart and milled this flow sensor as a failsafe.

Laser cutters are awesome. But acquiring one can be expensive, and keeping them in working order is no small feat. From the gunk that builds up as a byproduct of vaporizing the cutting stock, to keeping the optics focused correctly, it’s a game that forces you to become a laser cutter operator and not merely a user. One of the worst things to deal with is having to replace a burnt out laser tube. They do have a life to them but in this case the filter on the water cooling system clogged and the tube cooked itself. Twice.

Flow sensor shown in the upper right.

This flow sensor now acts as an interconnect with the laser enable line. Starting with an acrylic rod, [NixieGuy] machined out a center hole for a magnetic stopper, then milled three channels for water to pass around it. Each end of the rod was turned on a lathe to interface with plastic tubing of the water cooling system, and a slot was milled on the outside for a reed switch.

The demo video is below. You can see that when water flows it pushes the magnetic stop up (against gravity) where it engages the reed switch, allowing the laser to operate. If something impedes the flow of water (even if the pump still runs) the laser will be disabled and (hopefully) prevent future tube loss.

Want to see some of the oops moments faced by many a laser cutter operator? Check our guide on how to fail at laser cutting.

Continue reading “Milling A Flow Sensor To Safeguard A Laser Tube”

A Thoughtful Variety Of Projects And Failures

Our friends at [The Thought Emporium] have been bringing us delightful projects but not all of them warrant a full-fledged video. What does anyone with a bevy of small but worthy projects do? They put them all together like so many mismatched LEGO blocks. Grab Bag #1 is the start of a semi-monthly video series which presents the smaller projects happening behind the scenes of [The Thought Emporium]’s usual video presentations.

Solar eclipse? There are two because the first was only enough to whet [The Thought Emporium]’s appetite. Ionic lifters? Learn about the favorite transformer around the shop and see what happens when high voltage wires get too close. TEA lasers? Use that transformer to make a legitimate laser with stuff around your house. Bismuth casting? Pet supply stores may have what you need to step up your casting game and it’s a total hack. Failures? We got them too.

We first covered ionocraft (lifters) awhile back. TEA lasers have been covered before. Casting is no stranger to hackaday but [The Thought Emporium] went outside the mold with their technique.

Continue reading “A Thoughtful Variety Of Projects And Failures”

Spell Out The Time With Frickin’ Laser Beams

Clocks are a never-ending source of fascination to hackers. We get all kinds around here, from Steampunk Nixie clocks to retro cool flip clocks to clocks that don’t even look like clocks. But this is something new — a glow-in-the-dark laser tracing clock.

What [tuckershannon]’s clock lacks in practicality it makes up for in the gee-whiz department. The idea is simple: trace the characters out on a phosphorescent screen using a laser. To accomplish this, [tuckershannon] adapted the design of this whiteboard marker robot clock, replacing the drawing surface with glow-in-the-dark stickers. A 405 nm laser diode module is traced over the surface by the two-servo pantograph plotter, charging up the phosphors. He offers no clue as to how long the ghostly image lingers, but from the look of it, we’d bet that it lasts for a good fraction of a minute, especially in a dark room. Then again, you’d want the image totally faded before the next write cycle comes up, to prevent overwriting the previous time.

All in all, it’s a nice design and a clever new clock display modality. And who knows — maybe this whole glowing phosphor display thing could really catch on.

Continue reading “Spell Out The Time With Frickin’ Laser Beams”

Boredom + Lasers = Projector!

[Krazer], a post-doctoral researcher at MIT, loves him some lasers. When out of boredom one afternoon he hatched an idea for a laser projector, it grew until a few years later he wound up with this RGB laser for a projector — Mark IV no less.

In addition to 3D-printing the parts, the major innovation with this version is the ability to re-align the lasers as needed; tweaking the vertical alignment is controlled by a screw on the laser mounts while the horizontal alignment is done the same way on the mirror mounts. This simplifies the design and reduces the possibility of part failure or warping over time. An additional aluminium base epoxied to the projector aims to keep the whole from deforming and adds stability. With the help of a mirror for the final alignment — sometimes you must use what you have— the projector is ready to put on a show.

True to the spirit of the art [Krazer] used all open source software for this iteration, and sharing his designs means you can build your own for around $200. As always with lasers take extra precautions to protect your eyes! This 200mW setup is no joke, but that doesn’t mean fun and games are out of the question.