Put The 3D Printer To Sleep So You Can Rest Easy

At this point you’ve probably already heard the news: cheap Chinese 3D printers sometimes catch fire. Now we can’t say we’re shocked to find out that absolute bottom of the barrel gear wasn’t designed to the highest standards (gotta cut those corners someplace), but that doesn’t change the fact that there are thousands of hackers and makers out there who are in possession of one of these suspect machines. Just tossing them to the curb is hardly the hacker way, so we’ve got to find ways to make the best of the hand dealt to us.

After sleeping with one eye (and maybe one nostril) open during some overnight prints, Hackaday.io user [TheGrim] wanted a way to make sure his Alunar Anet A6 didn’t stay powered on any longer than necessary. So he came up with a way of using the printer’s own endstop switch to detect if the print has completed, and cut the power.

The idea is simple, but of course the real trick is in the implementation. By adding a “Home” command to his ending G-Code in Cura, [TheGrim] reasoned he could use the Y endstop switch to determine if the print had completed. It was just a matter of reading the state of the switch and acting on it.

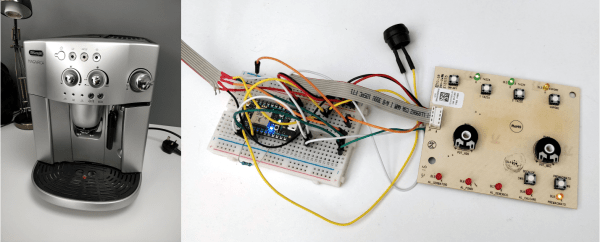
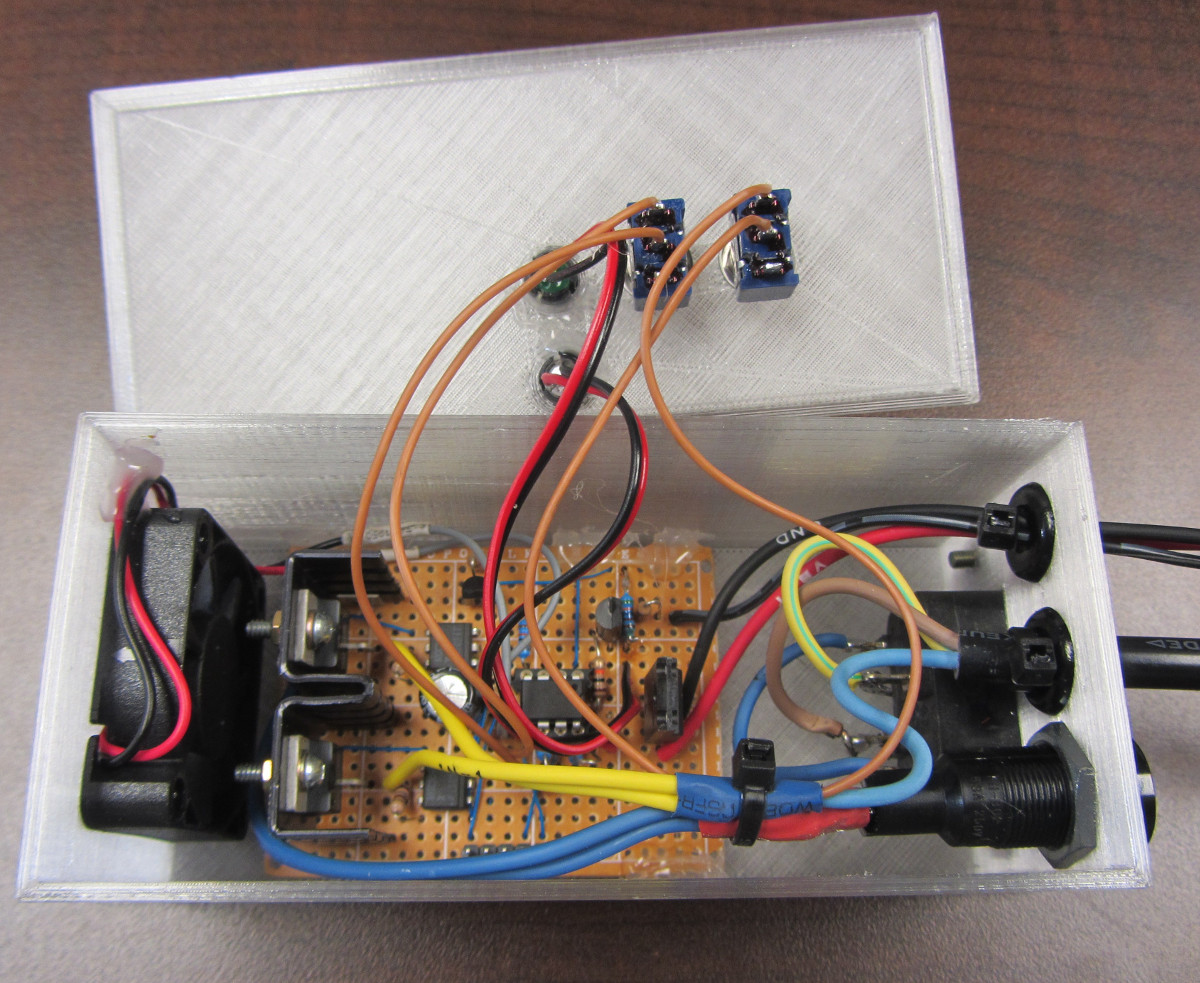
In the most basic implementation, the switch could be used to control a relay on the AC side of the power supply. But [TheGrim] doesn’t trust relays, and he wanted to pack in a couple “smart” features so he ended up using a PIC microcontroller and two 12 amp TRIACs. There’s also a couple of LEDs and toggle switches to serve as the user interface, allowing you to enable and disable the automatic shutdown and get status information about the system.

Will cutting the juice to the PSU prevent another terrible fire? It’s debatable. But it certainly can’t hurt, and if it makes [TheGrim] feel more confident about running his machine, then so be it. We’d still advise anyone with a 3D printer at home to brush up on their fire safety knowledge.

Hacking A Fitness Tracker

When [rbaron] started a new job, he got a goodie bag. The contents included a cheap fitness tracker bracelet that used Bluetooth LE. Since this is Hackaday, you can probably guess what happened next: hacking ensued.

For something cheap enough to give away, [rbaron] claims it cost $10, the device has quite a bit in it. In the very tiny package, there is an OLED display, a battery, a vibration motor, and a Nordic 32-bit ARM with BLE. The FCC ID was key to identifying the device. Opening the case, which was glued down, was pretty difficult, but doable with a hair dryer and a knife.

Continue reading “Hacking A Fitness Tracker”

Talking To Laptop Batteries With The ESP8266

It’s not something you often give a lot of thought to, but the modern consumer laptop battery is a pretty advanced piece of technology. Not only does it pack several dozen watt-hours of energy into a relatively small and lightweight package, but it features integrated diagnostic capability to make sure all those temperamental lithium cells are kept in check. Widely available and extremely cheap thanks to the economies of scale (unless you try to get them from the OEM, anyway), they’re a very compelling option for powering your projects.

Of course, it also helps if, like [teliot] you have a bunch of the things lying around. For reasons we won’t get into, he’s got a whole mess of Acer AL12x32 battery packs which he wanted to use for something other than collecting dust. He had the idea of hooking one up to a solar panel and using it as a power supply for some ESP8266 projects but wanted to be able to talk to the battery for status and diagnostic information. After studying the Smart Battery System (SBS) protocol the batteries use, he was able to come up with some code that lets him pull 37 separate fields of information from the pack’s onboard electronics using his ESP8266.

Battery consumption over time

It took some fiddling with a multimeter to figure out which pin did what on the eight pin interface of the battery. Two of the pins need to be shorted to enable the dual 12 VDC pins to kick in. Technically that’s all you really need to do if you want to utilize the battery in a low-tech sort of way. But to actually get some information from the battery, [teliot] had to identify the two pins which are for the System Management Bus (SMBus) interface where the SBS data lives.

Once he knew which pins to talk to the battery on, the rest was fairly easy. SBS is well documented, and the SMBus interface is very similar to I2C. Like all the cool kids are doing these days, his code publishes the battery info to MQTT where he can plot it and get finely grained info on the performance of his solar power system.

This isn’t the first time we’ve seen a hacker wrangle laptop batteries through SMBus, but it’s always nice to get multiple perspectives on a topic. If you plan on making this kind of thing part of your standard bag of tricks, you might even want to take the time to build a dedicated SMBus scanner.

[via /r/esp8266]

A Custom Keypad With Vision

A combination of cheap USB HID capable microcontrollers, the ability to buy individual mechanical keys online, and 3D printing has opened up a whole new world of purpose-built input devices. Occasionally these take the form of full keyboards, but more often than not they are small boards with six or so keys that are dedicated to specific tasks or occasionally a particular game or program. An easy and cheap project with tangible benefits to anyone who spends a decent amount of time sitting in front of the computer certainly sounds like a win to us.

But this build by [r0ckR2] takes the concept one step farther. Rather than just being a simple 3×3 keypad, his includes a small screen that shows the current assignments for each key. Not only does this look really cool on the desk (always important), but it also allows assigning multiple functions to each key. The screen enables the user to switch between different pages of key assignments, potentially allowing a different set of hot keys or macros for every piece of software they use.

The case is entirely 3D printed, as are the key caps. To keep things simple, [r0ckR2] didn’t bother to design a full enclosure, leaving all the electronics exposed on the back. Some might think it’s a little messy, but we appreciate the fact that it gives you easy access to the internals if you need to fix anything. Rubber feet were added to the bottom so it doesn’t slide around while in use, but otherwise the case is a pretty straightforward affair.

As for the electronics, [r0ckR2] went with an STM32 “Blue Pill” board, simply because it’s what he had on hand. The screen is a ST7735 1.44 inch SPI TFT, and the keys themselves are Cherry MX Red clones he got off of eBay. All in all, most of the gear came from his parts bins or else was only a couple bucks online.

If you’re looking for something a bit bigger, check out this gorgeous Arduino-powered version, or this far more utilitarian version. Both are almost entirely 3D printed, proving the technology is capable of more than making little boats.

[via /r/functionalprint]

Don’t Flake On Your Fish—Feed Them Automatically

We get it. You love your fish, but they can’t bark or gently nip at your shin flesh to let you know they’re hungry. (And they always kind of look hungry, don’t they?) One day bleeds into the next, and you find yourself wondering if you’ve fed them yet today. Or are you thinking of yesterday? Fish deserve better than that. Why not build them a smart fish feeder?

Domovoy is a completely open-source automatic fish feeder that lets you feed them on a schedule, over Bluetooth, or manually. This simple yet elegant design uses a small stepper motor to drive a 3D-printed auger to deliver the goods. Just open the lid, fill ‘er up with flakes, and program up to four feedings per day through the 3-button and LCD interface. You can even set the dosage, which is measured in complete revolutions of the auger.

It’s built around an ATMega328P, but you’ll have to spin your own board and put the feeder together using his excellent instructions. Hungry to see this feeder in action? Just swim past the break.

Can’t be bothered to feed your fish automatically? Train them to feed themselves.

Continue reading “Don’t Flake On Your Fish—Feed Them Automatically”

ESP32 Boards With Displays: An Overview

The ESP8266 has become practically the 555 chip of WiFi connected microcontrollers. Traditionally, you’d buy one on a little breakout board with some pins and a few connectors, and then wire up anything else you need. The ESP8266’s big brother, the ESP32, hasn’t quite taken over from the ESP8266, but it has a lot more power and many more options. [Andreas] has a new video that shows seven new ESP32 boards that have integral displays. These boards can simplify a lot of applications where you need both WiFi and a user interface.

Of the boards examined, six of them have OLED displays, but one has an E-paper display. To summarize results, [Andreas] summarized his findings on these seven along with others in an online spreadsheet.

Continue reading “ESP32 Boards With Displays: An Overview”

Alexa And Particle Modernize Coffee Machine By One Iota

When [Steve Parker]’s girlfriend got a tea kettle that takes voice commands, he suddenly saw his fancy bean-to-cup coffee machine as a technological dinosaur. It may make good coffee, but getting the DeLonghi going is inconvenient, because it runs a self-cleaning cycle each time it’s turned on or off.

Thus began [Steve]’s adventure in trying to turn the thing on with Alexa via Particle Photon. Because of the way the machine is designed, simply adding a relay wouldn’t do—the machine would just turn off and back on, only to start the self-clean again. Once inside, he found it’s controlled by a PIC18LF2520. Further research indicated that it is powered by an off-line switcher that combines a power MOSFET with a power supply controller. [Steve] figured out that the buttons are read via square wave and interpreted by a multiplexer.

The project went into the weeds a bit when [Steve] tried to read the signals with a knock-off Saleae. As soon as he plugged it in, the control board fried because the DeLonghi evidently has no reference to Earth ground. While waiting for a replacement board to arrive, he tried replacing the mux and shift register chips, which actually fixed the board. Then it was more or less a matter of using the DeLonghi’s status LEDs to determine the machine’s state, and then to interface with the Photon and Alexa. Cycle past the break for a ristretto-sized demonstration.

[Steve] didn’t do all this to actually make coffee, just turn the machine on with a voice command. The Photon is totally capable of making coffee, though, as we saw with this closed-loop espresso machine.

Continue reading “Alexa And Particle Modernize Coffee Machine By One Iota”