A Rotary Encoder: How Hard Can It Be?

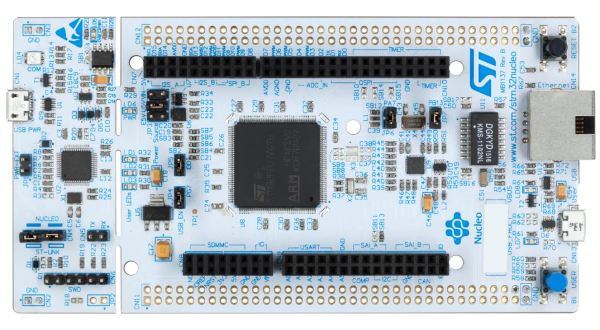
As you may have noticed, I’ve been working with an STM32 ARM CPU using Mbed. There was a time when Mbed was pretty simple, but a lot has changed since it has morphed into Mbed OS. Unfortunately, that means that a lot of libraries and examples you can find don’t work with the newer system.

I needed a rotary encoder — I pulled a cheap one out of one of those “49 boards for Arduino” kits you see around. Not the finest encoder in the land, I’m sure, but it should do the job. Unfortunately, Mbed OS doesn’t have a driver for an encoder and the first few third-party libraries I found either worked via polling or wouldn’t compile with the latest Mbed. Of course, reading an encoder isn’t a mysterious process. How hard can it be to write the code yourself? How hard, indeed. I thought I’d share my code and the process of how I got there.

There are many ways you can read a rotary encoder. Some are probably better than my method. Also, these cheap mechanical encoders are terrible. If you were trying to do precision work, you should probably be looking at a different technology like an optical encoder. I mention this because it is nearly impossible to read one of these flawlessly.

So my goal was simple: I wanted something interrupt driven. Most of what I found required you to periodically call some function or set up a timer interrupt. Then they built a state machine to track the encoder. That’s fine, but it means you eat up a lot of processor just to check in on the encoder even if it isn’t moving. The STM32 CPU can easily interrupt with a pin changes, so that’s what I wanted.

The Catch

The problem is, of course, that mechanical switches bounce. So you have to filter that bounce either in hardware or software. I really didn’t want to put in any extra hardware more than a capacitor, so the software would have to handle it.

I also didn’t want to use any more interrupts than absolutely necessary. The Mbed system makes it easy to handle interrupts, but there is a bit of latency. Actually, after it was all over, I measured the latency and it isn’t that bad — I’ll talk about that a little later. Regardless, I had decided to try to use only a pair of interrupts.

Continue reading “A Rotary Encoder: How Hard Can It Be?”

OLED Display Kicks Knob Up Several Accurate Notches

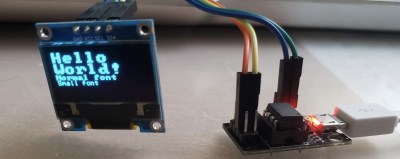
As far as input devices go, the potentiometer is pretty straightforward: turn it left, turn it right, and you’ve pretty much seen all there is to see. For many applications that’s all you need, but we can certainly improve on the experience with modern technology. Enter this promising project from [upir] that pairs a common potentiometer with a cheap OLED display to make for a considerably more engaging user experience.

To save time, the code is fine tuned in a simulator.

The basic idea is to mount the display over the potentiometer knob so you can show useful information such a label that shows what it does, and a readout of the currently detected value. But you’ll likely want to show where the knob is currently set within the range of possible values as well, and that’s where things get interesting.

In the video after the break, [upir] spends a considerable amount of time explaining the math behind details like the scrolling tick marks. The nearly 45 minute long video wraps up with some optimization, as getting the display to move along with the knob in real-time on an Arduino UNO took a bit of extra effort. The final result looks great, and promises to be a relatively cheap way to add an elegant and functional bit of flair to an otherwise basic knob.

With the code and this extensive demonstration of how it all works, adding a similar capability to your next knob-equipped gadget shouldn’t be too much of a challenge. Perhaps it could even be combined with the OLED VU meters we’ve covered previously. Be sure to let us know if you end up using this technique, as we’d love to see it in action.

Continue reading “OLED Display Kicks Knob Up Several Accurate Notches”

Processing Audio With The RP2040

The Raspberry Pi, although first intended as an inexpensive single-board computer for use in education, is now ubiquitous in electronics communities. Its low price as well as Linux platform and accessible GPIO make it useful in many places outside the classroom. But, if you want to abandon the ease-of-use in favor of an even lower price, the Raspberry Pi foundation makes that possible as well with the RP2040 chip, commonly found on the Pico. [Jason] shows us one way to make use of this powerful chip by putting one in an audio digital signal processing board.

While development boards are available for this chip, [Jason] has opted instead for a custom PCB which he designed himself and includes an integrated headphone amplifier and 3.5 mm audio jacks. To do the actual DSP work, the RP2040 chip uses three 12-bit ADC channels and 16 controllable PWM channels. The platform is also equipped with the TLV320AIC3254 codec from Texas Instruments. With all of this put together, he has a functioning open-source platform he calls the DS-Pi.

[Jason] has built this as a platform for guitar effects and as a customizable guitar amp modeler, but with a platform that is Arduino-compatible and fairly easy to program it could be put to use for anything involving other types of music or audio processing, like this specialized MIDI-compatible guitar effects platform which is built around the same processor.

RSS Printer Gives You The Hard Copy News You Desire

The days of yore saw telex machines and dot-matrix printers with continuous feed paper churning out data in hardcopy form in offices around the world. [Jan Derogee] wanted a bit of that old-school charm, and set about building a RSS news printer using a venerable old printer in his possession. 

The build relies on an ESP8266, with the WiFi-enabled microcontroller readily capable of jumping online and querying RSS feeds for content. It scrapes the XML files for title, description, and publication date information, and formats this for output to the printer. The microcontroller then spits out the data over a Commodore serial interface to a Brother HR-5C printer. Unlike dot-matrix printers of its contemporary era, the HR-5C is a thermal printer. Once loaded up with a roll of the appropriate paper, it can print continuously without requiring any hard-to-source ink ribbons.

Armed with a continuous supply of wireless internet and 210 mm rolls of thermal printer paper, [Jan]’s system should provide news summaries to him for years to come. We’ve seen similar retro news ticker projects before, too. Video after the break.

Continue reading “RSS Printer Gives You The Hard Copy News You Desire”

IoT Pool Monitor Helps You Keep It Crystal Clear

Having a pool is great, but it also requires significant monitoring and maintenance to keep it crystal clear and clean. The OPNpool controller from [Coert Vonk] aims to help in this task, integrating neatly into the smart home ecosystem of today.

OPNpool runs on an ESP32, and is capable of monitoring pool controllers, pumps, and chlorinators, as well as working with thermostats and other hardware to control the state of the pool. This allows the system to do useful things like run high-powered pumps when electricity is cheapest, or to find the best timing to run heating circuits. The controller relies on MQTT messaging and can integrate with Home Assistant for those that prefer to run their own cloud-independent smart home systems.

With WiFi onboard the ESP32, there’s no need for a hardwired LAN connection, and the system can be administered remotely over the web. It’s also capable of talking with other hardware over RS-485 and bringing it under its own control. With OPNpool installed, monitoring pool conditions can be done from the leisure of one’s deck chair with a smartphone, rather than squinting and dark LCDs in equipment cabinets.

It’s a useful tool that could be just the ticket for the savvy, IoT-aware pool owner. We’ve seen other DIY pool controllers before, too. With summer just around the corner, it’s the perfect time to get hacking!

This DIY UPDI Programmer Is Nice And Cheap

[Daumemo] likes experimenting with DIY electronics, and like many people, eventually ran across an AVR microcontroller with a Unified Program and Debug Interface (UPDI). One option is of course to purchase an UPDI programmer, but an even better solution was to make a DIY USB version from nice, cheap parts.

Programming an Attiny404 over the UPDI interface.

UPDI is an interface for external programming and on-chip debugging of microcontrollers, and [Daumemo]’s solution is based on the jtag2updi project. It combines an Arduino Nano (in this case, a clone) with a single resistor, a single capacitor, and a six pin angled header (with a cleverly bent pin) to enable programming UPDI devices over a USB connection. [Daumemo] is happy to report that the device works just fine in both Microchip Studio with AVRDUDE, or PlatformIO.

Is an Arduino Nano a bit overpowered in this role? Maybe, but the price is certainly right. There’s no need for a custom PCB either, since everything can be soldered direct to the Nano board. A matching 3D printed enclosure is about all that’s needed to make a robust and reliable DIY USB UPDI programmer out of a handful of parts, and that sounds good to us.

On the other hand, if you do find yourself making custom PCBs, you may be interested in another of [Daumemo]’s DIY projects: a printable structure to turn a rotary tool into a PCB drill press.

Versatile Reflow Oven Controller Uses ESP32-S2

[Maker.Moekoe] wanted a single controller board that was usable with different reflow ovens or hotplates. The result is a versatile board based on the ESP32-S2. You can see a video of the board’s assembly in the video below.

The board sports several inputs and outputs including:

  • 2x MAX6675 thermocouple sensor input
  • 2x Fan output with flyback diodes
  • 2x Solid state relay output
  • 3x Buttons
  • 1x LED
  • 1x Buzzer
  • 1x Servo motor output
  • 0.96 inch OLED display

You could probably find a use for the board for other similar applications, not just ovens.

The video is oddly relaxing, watching parts reflow. It is like watching a 3D printer, no matter how many times we see it, we still find it soothing to watch. You can also see how he integrated the board with a toaster oven.

Overall, the board looks great and the workmanship is also very good. If you’ve never seen anyone set heat-set threaded inserts into a 3D printed piece, be sure to watch around the four minute mark.

We’ve seen plenty of oven projects. You can even use an Easy Bake oven.

Continue reading “Versatile Reflow Oven Controller Uses ESP32-S2”