If you’re anything like us, more than a few of your projects were borne out of the fact that you had some crusty bit of gear that was badly in need of a second lease on life. Whether it was a hand-me-down or pulled out of the garbage, we’ve all at one time or another had some piece of hardware in our hands that might not be worth anything in its current form, but would make an awesome excuse for warming up the soldering iron.
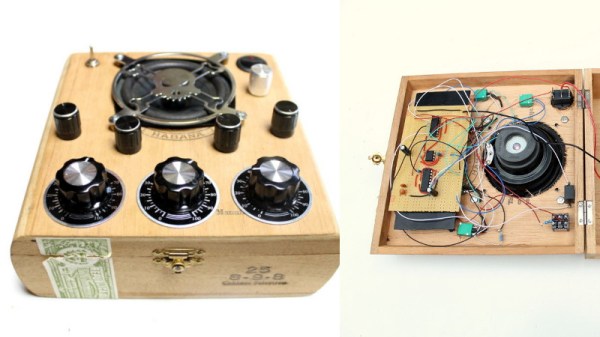
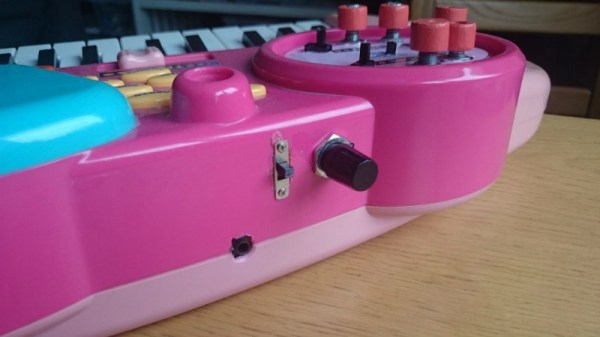
That’s what happened when [joekutz] got his hands on this exceptionally juvenile keyboard toy. In its original state, it was so janky it couldn’t even reliably detect two keys being pressed at the same time; sort of a problem for a keyboard. So he decided to pull it apart and use it as a circuit bending playground. Thanks in part to how much free space was inside of the case, he was able to pack in a number of interesting modifications which he’s kindly detailed on Hackaday.io.
 [joekutz] started by adding a headphone jack to the device, as well as a switch to disable the keyboard’s speaker. That allows not only listening to digital jams in private, but makes it possible to capture high-quality audio when connected to the computer. He then started poking around the PCB with a resistor and listening for changes. When the pitch of the keyboard changed, he soldered a potentiometer into its place and now had a way to adjust it on the fly.
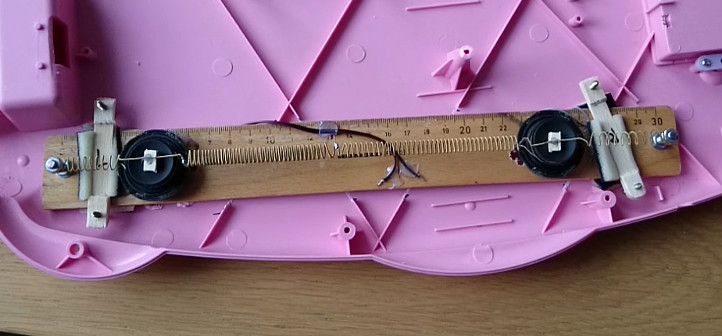
Of particular note is the clever physical reverb he came up with. A microphone and speaker are connected to each other with a spring made out of an old guitar string. Audio from the keyboard’s PCB is played on the speaker and a TDA2022 low-voltage amplifier boosts the signal from the microphone. The end result is a very cool ethereal metallic effect.
If you’re looking for a slightly larger DIY reverb, we’ve covered a few builds in the past which should give you some inspiration. You might want to check the dumpster behind the abandoned local Toys R’ Us for some donor keyboards while you’re at it.