[Starhawk] is a man with a problem. More accurately, he’s a man whose mother has a problem, but ultimately that ends up being the same thing. Her wide-format Canon printer recently stopped working after better than a decade of reliable service, and he wants to know why. Rather than spend the money on buying a new printer, he’s determined to find out if she’s been the victim of planned obsolescence by reverse engineering the Canon i9900 to see what makes it tick (or stop ticking, as the case may be).
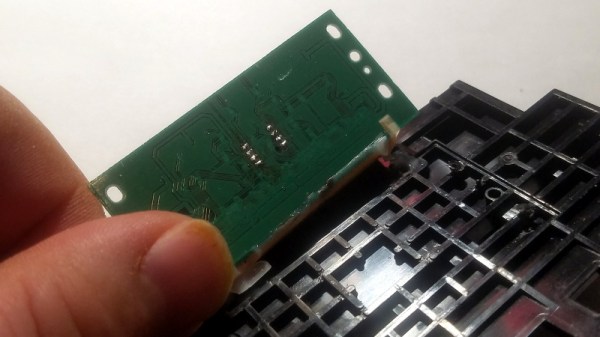
In the absence of any obvious hardware faults, [Starhawk] has suspicions that the machine’s QY6-0055 printhead has run over some internal “odometer” and simply turned itself off. We’ve all seen similar trickery at play when trying to use third party ink cartridges in our printers, so it’s certainly not outside the realm of possibility that the Canon i9900 is designed to reject heads once they’ve seen enough usage. Perhaps the biggest clue is that the QY6-0055 has a Seiko S93C56BR EEPROM on the board that’s keeping track of…something.
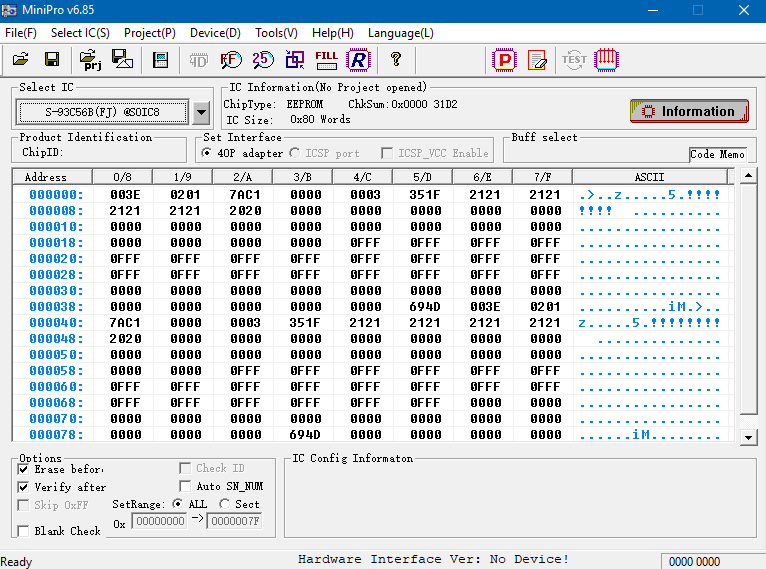 Right now, [Starhawk] is devoting his energies on trying to make sense of the data he pulled from the EEPROM using his TL866A programmer. But that’s no easy feat with a sample size of just one, which is why he’s looking for help. He’s hoping that other hackers with similar printers (and ideally ones that use the same QY6-0055 head) could submit their own EEPROM dumps and the community could get to work trying to decipher what’s stored on the chips. He’s really hoping that somebody at Canon might be willing to sneak him a couple tips on what he should be looking for, but at this point we think he’ll take whatever assistance he can get.
Now to be fair, there’s really no way to know definitively if there’s some flag stored on the EEPROM that’s keeping the printer from working. It could just be good old fashioned hardware failure, which would hardly be a surprise for a piece of consumer electronics from 2005. But even if the effort to understand the Canon’s EEPROM doesn’t get him any closer to a working printer, we still think it’s a fascinating example of real-world reverse engineering that’s worth it for the experience alone.
There’s a long history of hackers doing battle with their printers, from emulating an ink cartridge with a microcontroller to reinking the ribbon of a vintage 1980s behemoth. We’re interested in seeing where this project takes [Starhawk], but no matter what happens there are likely to be some interesting discoveries made along the way.