Raspberry Pi Becomes Cycle Exact Commodore Drive Emulator

The Commodore 1541 disk drive is unlike anything you’ll ever see in modern computer hardware. At launch, the 1541 cost almost as much as the Commodore 64 it was attached to ($400, or about $1040 at today’s value). This drive had a CPU, and had its own built-in operating system. Of course, anyone using a Commodore 64 now doesn’t deal with this drive these days — you can buy an SD2IEC for twenty dollars and load all your C64 games off an SD card. If you’re cheap, there’s always the tape drive interface and a ten dollar Apple Lightning to 3.5mm headphone adapter.

But the SD2IEC isn’t compatible with everything, and hacking something together using the tape drive doesn’t have the panache required of serious Commodoring. What’s really needed is a cycle-accurate emulation of the 1541 disk drive, emulating the 6502 CPU and the two 6522 VIAs in this ancient disk drive. The Raspberry Pi comes to the rescue. [Steve White] created the Pi1541, an emulation of the Commodore 1541 disk drive that runs on the Raspberry Pi 3B.

Pi1541 is a complete emulation of the 6502 and two 6522s found inside the Commodore 1541 disk drive. It runs the same code the disk drive does, and supports all the fast loaders, demos, and copy protected original disk images that can be used with an original drive.

The only hardware required to turn a Raspberry Pi 3 into a 1541 are a few transistors in the form of a bi-directional logic level shifter, and a plug for a six-pin serial port cable. This can easily be constructed out of some Sparkfun, Adafruit, Amazon, or AliExpress parts, although we suspect anyone could whip up a Raspberry Pi hat with the same circuit in under an hour. The binaries necessary to run Pi1541 on the Raspberry Pi are available on [Steve]’s website, and he’ll be releasing the source soon.

This is a great project for the retrocomputing scene, although there is one slight drawback. Pi1541 requires a Raspberry Pi 3, and doesn’t work on the Raspberry Pi Zero. That would be an amazing bit of software, as ten dollars in parts could serve as a complete emulation of a Commodore disk drive. That said, you’re still likely to be under $50 in parts and you’re not going to find a better drive emulator around.

Continue reading “Raspberry Pi Becomes Cycle Exact Commodore Drive Emulator”

A Home Network, Security System, And A Hidden Room Behind A Bookcase

Ok, now this is something special. This is a home network and security system that would make just about anyone stop, and with jaw hanging agape, stare, impressed at the “several months of effort” it took [timekillerjay] to install their dream setup. Just. Wow.

Want a brief rundown of the diverse skill set needed to pull this off? Networking, home security, home automation, woodworking, running two thousand feet(!) of cat 6a cable, a fair hand at drywall work for the dozens upon dozens of patches, painting, staining, and — while not a skill, but is definitely necessary — an amazingly patient family.

Ten POE security cameras monitor the premises with audio recording, infrared, and motion detection capabilities. This is on top of magnetic sensors for five doors, and eleven windows that feed back to an ELK M1-Gold security system which effortlessly  coordinates with an Insteon ISY994i smart home hub; this allows for automatic events — such as turning on lights after dark when a door is opened — to occur as [timekillerjay]’s family moves about their home. The ELK also allows [timekillerjay] to control other things around the house — namely the sprinkler system — via relays. [timekillerjay] says he lost track of how many smart switches are scattered throughout his home, but there are definitely 39 network drops that service the premises.

All of the crucial components are hidden in his office, behind a custom bookshelf. Building it required a few clever tricks to disguise the bookshelf for the secret door that it is, as well as selecting components with attention to how much noise they generate — what’s the point of a hidden security system if it sounds like a bunch of industrial fans?

An uninterruptible power supply will keep the entire system running for about 45 minutes if there is a power outage, with the cameras recording and system logging everything all the while. Not trusting the entrance to his vault to something from Batman, he’s also fitted the bookshelf with a 600lb magnetic lock that engages when the system is armed and the door already closed. A second UPS will keep the door secured for 6+ hours if the house loses power. Needless to say, we think this house is well secured.

[Via /r/DIY]

Commodore 64 To Raspberry Pi Conversion Is Respectful & Complete

We’re big fans of taking old computers and giving them a new lease on life, but only when it is done respectfully. That means no cutting, no hot glue, and no gouging out bits to make the new computer fit. It’s best if it can be done in a way that the original parts can be restored if required.

This Commodore 64 to Raspberry Pi conversion from [Mattsoft] definitely fits our criteria here, as it uses the old keyboard, joystick connectors and output portholes for the required authentic look. It does this through the clever use of a couple of 3D-printed parts that hold the Raspberry Pi and outputs in place, mounting them to use the original screw holes in the case.

Combine the Pi with a Keyrah V2 to connect the C64 keyboard and a PowerBlock to juice up all of the parts, and you’ve got a fully updated C64 that can use the keyboard, joysticks or other peripherals, but which also comes with a HDMI port, USB and other more modern goodies.

[Mattsoft] suggests using Combian 64, a C64 emulator for the Pi for the authentic look and feel. Personally, I might use it as a thin client to the big-ass PC with 16 CPU cores and 32GB of memory that’s hidden in my basement, but that’s just because I enjoy confusing people.

Portable Photo Booth Named Buzz

We’re all used to posing for a picture — or a selfie — but there’s something about photo booths that make getting your photo taken an exciting and urgent affair. To make this experience a bit easier to tote about, Redditor [pedro_g_s] has laboriously built, from the ground up, a mobile photo booth named Buzz.

He needed a touchscreen, a Raspberry Pi, almost definitely a webcam, and a 3D printer to make a case — although any medium you choose will do — to build this ‘booth.’ That said, he’s built the app in a way that a touchscreen isn’t necessary, but carting around a mouse to connect to and operate your portable photo booth seems a bit beside the point. On the back end, he used Electron to code the photo booth app, React helped him build a touchscreen UI, and Yarn kept the necessary dependencies in order.

Operation is simple, and every time a photo is taken it is sent to and collated within a previously set-up email service. To set it up, [pedro_g_s] is here to guide you through the process.

Continue reading “Portable Photo Booth Named Buzz”

3D Printering: Which Raspberry Pi Is Best At Slicing In Octoprint?

OctoPrint is arguably the ultimate tool for remote 3D printer control and monitoring. Whether you simply want a way to send G-Code to your printer without it being physically connected to your computer or you want to be able to monitor a print from your phone while at work, OctoPrint is what you’re looking for. The core software itself is fantastic, and the community that has sprung up around the development of OctoPrint plugins has done an incredible job expanding the basic functionality into some very impressive new territory.

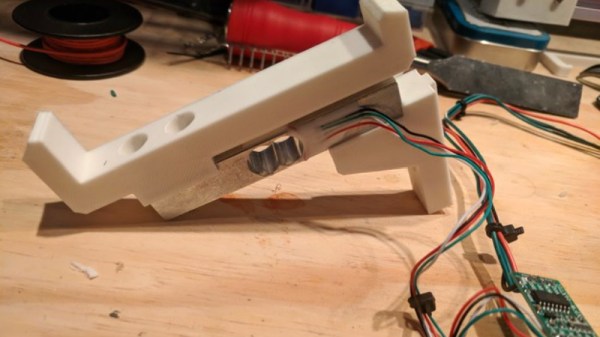
RAMBo 3D controller with Pi Zero Integration

But all that is on the software side; you still need to run OctoPrint on something. Technically speaking, OctoPrint could run on more or less anything you have lying around the workshop. It’s cross platform and doesn’t need anything more exotic than a free USB port to connect to the printer, and people have run it on everything from disused Windows desktops to cheap Android smartphones. But for many, the true “home” of OctoPrint is the Raspberry Pi.

As I’ve covered previously, the Raspberry Pi does make an exceptional platform for OctoPrint. Given the small size and low energy requirements of the Pi, it’s easy to integrate into your printer. The new Prusa i3 MK3 even includes a header right on the control board where you can plug in a Raspberry Pi Zero.

But while the Raspberry Pi is more than capable of controlling a 3D printer in real-time, there has always been some debate about its suitability for slicing STL files. Even on a desktop computer, it can sometimes be a time consuming chore to take an STL file and process it down to the raw G-Code file that will command the printer’s movements.

In an effort to quantify the slicing performance on the Raspberry Pi, I thought it would be interesting to do a head-to-head slicing comparison between the Pi Zero, the ever popular Pi 3, and the newest Pi 3 B+.

Continue reading “3D Printering: Which Raspberry Pi Is Best At Slicing In Octoprint?”

Raspberry Pi Is Up Up And Away

BACAR — Balloon Carrying Amateur Radio — is just what it sounds like. A high-altitude balloon carries experiments and communicates via amateur radio. [ZR6AIC] decided to fly a payload in a local BACAR experiment. The module would send its GPS position via the APRS network and also send a Morse code beacon every seven minutes. It also sends other data such as temperature, and has an optional camera fitted.

The hardware used was the ubiquitous Raspberry Pi along with an associated daughterboard for transmitting on the 2 meter ham band. An RTL dongle took care of the receive portion and another dongle provided GPS. A DS18B20 temperature sensor provides the temperature data.

Continue reading “Raspberry Pi Is Up Up And Away”

Battery Backup Conceals A Pentesting Pi

Over the last few years one thing has become abundantly clear: hackers love cramming the Raspberry Pi into stuff. From classic game systems to mirrors, there’s few places that haven’t been invaded by everyone’s favorite Linux SBC. From the inspired to the bizarre, we’ve brought such projects to your attention with minimal editorialization. As we’ve said before: it’s not the job of Hackaday to ask why, we’re here to examine how.

That said, some builds do stand out from the crowd. One such project is the “Pentesting BBU Dropbox” which [b1tbang3r] has recently posted to Hackaday.io. Noticing the battery bay in a cheap Cyberpower 350VA battery backup was just about the same size as the Raspberry Pi, he decided to convert it into a covert penetration testing device. Of course the illusion isn’t perfect as the battery backup function itself doesn’t work anymore. But if you hid this thing in an office or server room, there’s very little chance anyone would ever suspect it didn’t belong.

The key to the final device’s plausibility is that from stock it had dual RJ-11 jacks for analog modem surge protection. Swapping those jacks out for RJ-45 network connectors gives the BBU Dropbox an excuse to be plugged into the network. At a cursory glance, at least. Internally there is a TRENDnet Ethernet switch which allows the Pi to get on the network when an Ethernet cable is plugged into the battery backup.

We especially like the little details [b1tbang3r] put in to make the final device look as real as possible. The “Reset” button and “Wiring Fault” LED have been connected to the GPIO pins of the Pi, allowing for an exceptionally discrete user interface. For instance the LED could be setup to blink when a scan is complete, or the button could be used to wipe the device in an emergency.

This build reminds us of the Power Pwn released back in 2012 by Pwnie Express. That device was based around a relatively bulky power strip, and the only “feature” it looks like this DIY build is missing from the professional version is the $1,300 price.