Join The Movement With This Mini Cyberdeck

The global pandemic has given many people a lot more time at home, which has undoubtedly pushed an untold number of projects over the finish line. Unfortunately, it’s also disrupted global commerce and shipping to the point that getting parts can be a lot harder than we’d like. Which is why [facelesstech] decided to put together this exceptionally mobile cyberdeck out of things he already had laying around.

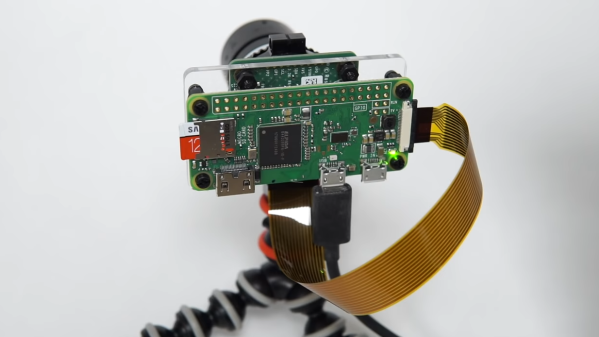
Now to be fair, his parts bin is perhaps a bit better stocked for this kind of thing than most. He’s built a couple of Raspberry Pi portables already, so the Pi Zero W, display, and battery management board were already kicking around. He just had to come up with a new 3D printed enclosure that holds it all together with a little bit of cyberpunk flair.

To that end, he’s done an excellent job of documenting the build and has released the STL files for the 3D printed components. All things considered, we’d say this is probably the most approachable cyberdeck design currently available; if you’ve been wondering what all the fuss is about with these bespoke little computers, this is an ideal project to get started with.

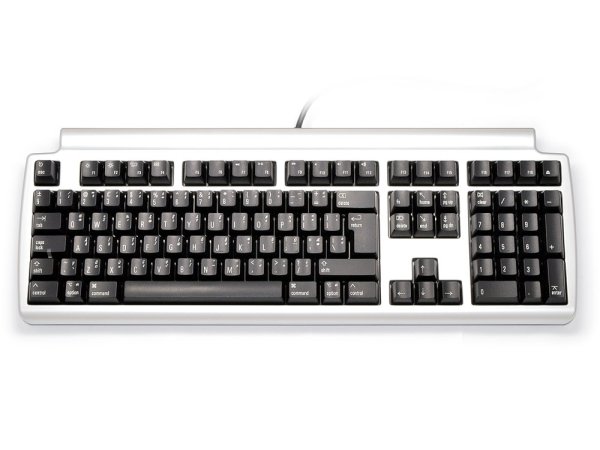
Keep in mind that the idea of a cyberdeck is to build something custom for yourself, so there’s no need to copy this build exactly. If you’re short on parts, you could forgo the battery powered aspect and just keep it tethered. The superfluous (but very cool) GX12 connectors could certainly be deleted as well, although at serious stylistic cost. You’ll probably need to order the specific keyboard that [facelesstech] designed the lower half of the device around, but it’s common enough that it shouldn’t be hard to track down. No matter which way you take it, this design is a great base to start from.

If you’re looking for something a bit more substantial and have the filament to burn, you might take a look at the VirtuScope to fulfill your offset screen needs.

Continue reading “Join The Movement With This Mini Cyberdeck”

A Dual Screen Luggable With Integrated RTL-SDR

It’s been fascinating to watch the development of bespoke mobile computers go from a few sheets of foam board and a Raspberry Pi into hardware that looks like it’s actually been transported here from an alternate reality. Granted a Raspberry Pi is more often than not still onboard, but the overall design and construction techniques of these very personal computers has improved by leaps and bounds.

The latest of these cyberdecks, a dual screen “luggable” reminiscent of classic computers like the Compaq Portable or Kaypro, comes our way from [dapperrogue]. Powered by the Raspberry Pi 4 and featuring a scratch-built mechanical keyboard to perfectly fit the machines’s specific dimensions, this is easily one of the more practical builds we’ve seen. As visually striking as they may be, few would argue that the small offset display that seems characteristic of most decks are ideal from a usability standpoint.

While the keyboard plate was milled out on a CNC, [dapperrogue] says the design of the HDPE body panels and rear polycarbonate viewing window were simple enough they could be done by hand on a band saw. The PETG internal frame uses a Voronoi pattern that not only reduces the amount of time and material required to print it, but maximizes airflow. The fact that it looks like some kind of alien biological life form only helps the retro-futuristic aesthetics.

There’s still plenty of room inside the enclosure, which is good, as [dapperrogue] says there’s more goodies to come. Adding internal battery power is a logical next step, and now that the Pi 4 can boot to external drives, and SSD is also on the list of future upgrades.

For readers who might be getting a sense of déjà vu from this project, [dapperrogue] notes this design was inspired by the phenomenal Reviiser that [Dave Estes] released earlier this year.

Linux Fu: Raspberry Pi Desktop Headless

It seems to me there are two camps when it comes to the Raspberry Pi. Some people use them as little PCs or even laptops with a keyboard and screen connected. But many of us use them as cheap Linux servers. I’m in the latter camp. I have probably had an HDMI plug in a Pi only two or three times if you don’t count my media streaming boxes. You can even set them up headless as long as you have an Ethernet cable or are willing to edit the SD card before you boot the machine for the first time.

However, with the Raspberry Pi 4, I wanted to get to a desktop without fishing up a spare monitor. I’ll show you two ways to get a full graphical KDE desktop running with nothing more than a network connection.

The same principle applies to most other desktop environments, but I am using KDE and Ubuntu on the Pi, even though something lighter would probably perform better. But before we get there, let’s talk about how X11 has had a big identity crisis over the years.

The Plan

There are many ways to remotely access X programs, many of which are rarely used today. However, for this purpose, we are going to use SSH tunneling along with some special tricks to get the entire desktop running. It is easy to just run a single X program over SSH, and you’ve probably done that often. If so, you can skip to the next section.

Continue reading “Linux Fu: Raspberry Pi Desktop Headless”

This Old Console Stereo Hides A Liquor Cabinet

There was a time when consumer electronics were statement items, designed to resemble quality furniture that would be shown off as a centerpiece of the home. Televisions in ornate wooden cabinets, or stereos looking for all the world like sideboards. [Zethus] had just such a huge record player and radio combo in a sideboard, and having little use for the cream of 1950s home entertainment technology, he rebuilt it as a concealed liquor cabinet with electronic controls and a much more modern stereo that forms part of a Logitech Media Server multi-room system.

After removing the tube-based radio chassis and Garrard jockey-wheel turntable it was time to gut their supporting woodwork and install the platform derived from a standing desk. With suitably impressive lighting and a pair of VFD displays for the music choice, there is the inevitable Raspberry Pi running the show. Control is achieved by a set of hidden capacitive buttons, and there’s a Web interface to allow both music and magical appearance of alcohol from the comfort of a smartphone. The whole can be seen in the video below the break.

Whenever a piece of vintage electronics is gutted in this way there will always be people who find it disquieting, but the truth is that these all-in-one stereos were made in huge quantities during the mid-century period and do not have a significant value. This one may have lost its original electronics, but it lives on safe from the dump that has claimed so many of its brethren. Happily this isn’t the first one we’ve seen saved with a Pi.

Continue reading “This Old Console Stereo Hides A Liquor Cabinet”

Build Your Own Dial-Up ISP – Now With Modem Pool!

When it was the only viable option, the screech and squeal of dial-up internet was an unwelcome headache to many. But now that its time has passed, it’s gained a certain nostalgia that endears it to the technophiles of today. [Doge Microsystems] is just one such person, who has gone all out to develop their very own dial-up ISP for multiple clients.

The retro network is based on an earlier single-device experiment, with a Raspberry Pi 3B acting as the dial-up server. It’s hooked up to four modems, three of which are connected over USB-serial adapters implementing hardware flow control.

Obviously, four analog phone lines are hard to come by in this day and age, so [Doge] uses Asterisk along with a series of Linksys SIP devices to create their own PBX network.  Each modem gets a phone line, with four left over for clients to dial in.

To connect, users can either call a certain modem directly, or dial a special number which rings the whole pool. Thanks to mgetty, each modem is set up to answer on a different number of rings to allow the load to be shared. Once connected, a PPP daemon handles connecting the user to the Internet at large.

While it’s unlikely we’ll all be ringing [Doge]’s house to get our next YouTube fix, owning your own dial-up ISP is certainly an admirable feat. We’d love to see it deployed in the field sometime, perhaps at a hacker conference or Burning Man-type event. Of course, if you’ve got your own old-school network pumping data, be sure to let us know! Video after the break.

Continue reading “Build Your Own Dial-Up ISP – Now With Modem Pool!”

Raspberry Pi 4 Gets Its 8 Gigs

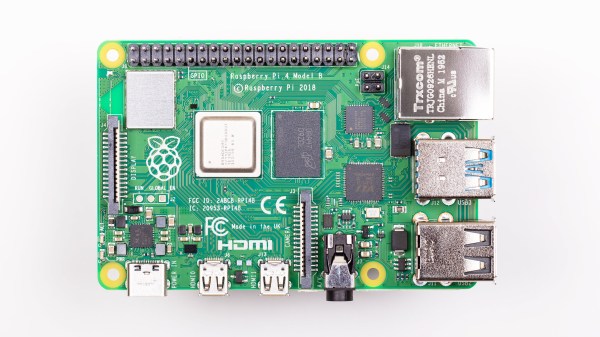
What began as a rumor becomes reality. This morning [Eben Upton] announced that the newest flavor of the Raspberry Pi 4 comes with 8 gigabytes of RAM and a sticker price of $75, roughly twice that of the base model which is now pegged at 2 GB of ram.

Originally released on June 23rd of last year, the Pi 4 came with three different options for 1, 2, or 4 GB of memory. But just a few days later, Hackaday reported on an Easter egg in the user guide that referenced an 8 GB option.

So why didn’t this version get released in 2019? That’s the crazy thing about this story. In the announcement [Eben] mentions that the Pi’s design is capable of addressing up to 16 GB of LPDDR4 SDRAM (we say bring it, but that’s a discussion for a different day). It took a year to get here because there wasn’t a source available for this 8 gig version until Micron began manufacturing the chip earlier this year.

Also addressed in this announcement is a looming changeover that was bound to happen eventually: the move from 32-bit to 64-bit operating systems on the Pi. While a 32-bit image can access all of this larger memory across multiple process, it can’t devote more than 3 GB to a single Linux process because of address space limitations. Simply put, you need more bits to access the higher addresses. Moving to a 64-bit system accomplishes that, something you can do by running unofficial builds on the Pi, but the official build didn’t support it until today’s announcement of a 64-bit beta image.

This is inevitable, not purely because of this memory limitation, but because we’ve seen examples where the juggernaut of Linux development has its own eye on a 64-bit future. Official images for Raspberry Pi have always been 32-bits, and remain so for now, but the wind is beginning to blow for this and future hardware offerings that are bumping up against limitations. Along with the news of this impending architecture switch over, the official operating system has also gotten a name change: Raspbian will henceforth be known as Raspberry Pi OS.

When [Jenny List] first reported on the 8 GB rumors last June, she speculated that today’s announcement would happen on February 29th of this year. Why the leap day? It happened to be the 8th birthday of Raspberry Pi and synced up nicely with an 8 GB surprise. Today’s announcement drops the morsel of trivia that the foundation was indeed planning on that date, but missed it by three months due to supply chain disruption associated with the coronavirus pandemic that prevented them from sourcing all the parts necessary for the new power supply design included in this revision.

We’d love to hear your thoughts on this move. Do you need 8 GB on your Pi, and does the 3 GB limitation of a 32-bit kernel matter to you? Let us know in the comments below.

Ewon Is An Expressive Robot With Google Assistant

Had too much self-quarantine? [Sharathnaik] had, so he decided to build a robot companion named Ewon. Using a Raspberry Pi, Ewon isn’t a robot that moves around, but rather an expressive Google assistant. Using some servo-driven ears and a display, Ewon reacts to you based on keywords you use in your queries. For example, it might perk up and smile at the mention of ice cream. Or look unhappy if you mention sadness.

The project is simple because of the Google Assistant API. However, we liked the 3D printed body and some of the additional features the robot adds.

Continue reading “Ewon Is An Expressive Robot With Google Assistant”