An image describing parts of a Tesla modem board

LTE Modem Transplant For A Tesla Imported Into Europe

When modern connected cars cross continents, novel compatibility problems crop up. [Oleg Kutkov], being an experienced engineer, didn’t fret when an USA-tailored LTE modem worked poorly on his Tesla fresh off its USA-Europe import journey, and walks us through his journey of replacing the modem with another Tesla modem module that’s compatible with European LTE bands.

[Oleg]’s post goes through different parts on the board and shows you how they’re needed in the bigger picture of the Tesla’s Media Computer Unit (MCU), even removing the LTE modem’s shield to describe the ICs underneath it, iFixit teardown diagram style! A notable highlight would be an SIM-on-chip, essentially, a SIM card in an oh-so-popular DFN package, and thankfully, replacing it with a socket for a regular SIM card on some extender wires has proven fruitful. The resulting Tesla can now enjoy Internet connectivity at speeds beyond those provided by EDGE. The write-up should be a great guide for others Tesla owners facing the same problem, but it also helps us make electric cars be less alike black boxes in our collective awareness.

Not all consequences of Tesla design decisions are this minor; for instance, this year, we’ve described a popular eMMC failure mode of Tesla cars and how Tesla failed to address it. Thankfully, Tesla cars are becoming more of a hacker community target, whether it’s building a computer-vision-assisted robot to plug in a charging cable, getting it repaired for a fraction of the dealership cost, or even assembling your own Tesla from salvage parts!

A CH341 programmer dongle with a stack of adapters on top (one for 1.8V and one for clip connection), and a test clip to the right of it

BIOS Flashing Journey Writeup Puts Tutorials To Shame

A couple of weeks ago, [Doug Brown] bought a Ryzen motherboard, advertised as “non-working” and discounted accordingly. He noticed that the seller didn’t test it with any CPUs old enough to be supported by the board’s stock BIOS revision, and decided to take a gamble with upgrading it.

Not having a supported CPU in hand either, he decided to go the “external programmer” route, which succeeded and gave this board a new life. This is not why we’re writing this up, however. The reason this article caught our eye is because [Doug]’s research leaves no stone unturned, and it’s all there to learn from. Whether through careful observation or thorough research, this article covers all the important points and more, serving as an example to follow for anyone looking to program their BIOS.

For instance, [Doug] correctly points out a design issue with these common programmers resulting in 5 V getting onto the 3.3 V data lines, and fixes it by rewiring the board. Going through all the letters in the ICs part number, something that many of us would dismiss, [Doug] notices that the flash chip is 1.8 V-only and procures a 1.8 V adapter to avoid the possibility of frying his motherboard. After finding out that the 1.8 V adapters don’t work for some people, he reverse-engineers the adapter’s schematics and confirms that it, indeed, ought to work with the specific parts on adapter he received.

Noting another letter in the part number implying the flash chip might be configured for quad-SPI operation, he adds series resistors to make sure there’s no chance of the programmer damaging the BIOS chip with its hardwired pinout. This is just an example of the insights in [Doug]’s article, there’s way more that we can’t mention for brevity, and we encourage you to check it out for yourself.

With this level of care put into the process, it’s no surprise that the modification was successful. The kind of inquisitiveness shared here is worth aspiring to, and writeups like this often surpass general-purpose tutorials in their insights and usefulness. What’s your “successfully making use of something sold as non-working” story?

If you’re looking for other insightful BIOS stories, we’ve covered someone reverse-engineering their BIOS to remove miniPCIe card whitelisting. We’ve typically covered BIOS modification stories in laptops, since there’s more incentives to modify these, but a lot of laptop BIOS articles will apply to desktop motherboards too, such as this supervisor password removal story or this LibreBoot installation journey by our own [Tom Nardi].

Thank you [Sidney] for sharing this with us!

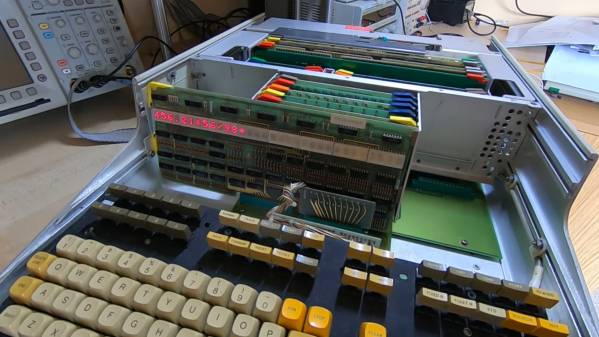
A briefcase sized electronic machine with many indicator lamps and switches

Restoring A Vintage IBM I/O Tester

By now, [CuriousMarc] and his team of volunteers are well versed in 1960s hardware restoration. So when a vintage IBM I/O Tester came into their possession, a full machine makeover was all but inevitable.

The I/O Tester dates from around 1965, which roughly coincides with the introduction of IBM’s lauded System/360 computer mainframe. In addition to the computer itself, business customers could order a variety of peripherals with their computing system. These included storage devices, printers, additional operator consoles, and so on. Since these peripherals shared the same I/O design, a portable hardware testing rig was a sensible design choice. One portable low-voltage tester could be paired with any number of IBM peripherals, doing away with the need to have unique debugging panels on every piece of computing hardware.

Fast forward to the present day, and the IBM I/O Tester looks positively antique with its blinkenlight lamp panel and switches. To use the tester, simply connect up one (or both) of its chunky 104-pin connectors to your IBM peripheral of choice, insert the accompanying paper overlay, and voilà. Operators could then observe the status of the many lamps to evaluate the inner digital workings of the connected peripheral. Depending on the connected hardware, the tester could reveal the contents of data registers, printing status, disk and tape transfer status, and probably much more. The purpose of the tester’s ninety indicator lights is completely dependent on the attached peripheral, and the paired paper overlays are essential to comprehend their meaning.

After [Ken Shirriff] deciphered the documentation, it wasn’t long before the tester could be powered up using 24 VAC (normally supplied by the equipment being tested). Several burned out lamps were noted for replacement. The lamp assemblies required minor surgery due to a dubious design choice, and at least one of the toggle switches needed a new guide and a heavy dose of contact cleaner before it came back to life.

For the moment, [CuriousMarc] is using the blinkenlights panel as a surprisingly striking retro clock. With a literal truckload of vintage IBM hardware sitting in his storage, it’ll be exciting to see whether this restored tester will be pulled back into operational service someday. Readers should also check out our coverage of his previous major project, restoring an Apollo Guidance Computer.

Continue reading “Restoring A Vintage IBM I/O Tester”

PCB internal bodge

PCB Microsurgery Puts The Bodges Inside The Board

We all make mistakes, and there’s no shame in having to bodge a printed circuit board to fix a mistake. Most of us are content with cutting a trace or two with an Xacto or adding a bit of jumper wire to make the circuit work. Very few of us, however, will decide to literally do our bodges inside the PCB itself.

The story is that [Andrew Zonenberg] was asked to pitch in debugging some incredibly small PCBs for a prototype dev board that plugs directly into a USB jack. The six-layer boards are very dense, with a forest of blind vias. The Twitter thread details the debugging process, which ended up finding a blind via on layer two shorted to a power rail, and another via shorted to ground. It also has some beautiful shots of [Andrew]’s “mechanical tomography” method of visualizing layers by slowly grinding down the surface of the board.

[Andrew] has only tackled one of the bodges at the time of writing, but it has to be seen to be believed. It started with milling away the PCB to get access to the blind via using a ridiculously small end mill. The cavity [Andrew] milled ended up being only about 480 μm by 600 μm and only went partially through a 0.8-mm thick board, but it was enough to resolve the internal short and add an internal bodge to fix a trace that was damaged during milling. The cavity was then filled up with epoxy resin to stabilize the repair.

This kind of debugging and repair skill just boggles the mind. It reminds us a bit of these internal chip-soldering repairs, but taken to another level entirely. We can’t wait to see what the second repair looks like, and whether the prototype for this dev board can be salvaged.

Thanks to [esclear] for the heads up on this one.

What Really Goes Wrong With Your Tablet

We’ve all seen our share of consumer electronic devices that need repair. It’s inevitable that, however well-cared-for it will be, there’s always the unforseen that brings its life to an end. Many of us will be using devices we’ve repaired ourselves, because often other people’s useless broken electronics can be our free stuff when we know how to fix them and they don’t. This is the arena the Restart Project operate in, as through their Restart Parties they provide repair services to save unnecessary landfill. Over nearly a decade in operation they’ve fixed a huge number of faulty items, and now they’re releasing some data and have analysed common fault modes and barriers to repair for some categories.

We’re restricted to tablets, printers, and batteries, and while many of the problems  are the wear-and-tear such as tablet screens, power supplies, charging connectors, and paper feeds that most of us would expect, it’s the barriers to repair which the Restart Project are keen to draw attention to. Products that are near-impossible to open without damage, parts such as batteries which are difficult to remove, and unavailability of spares. It’s to become part of their campaigning for legal repairability standards across Europe.

Aside from their own analysis, the full data is all available for download should you have any extra insights. We’ve made our position on this matter very clear indeed.

Oh Deere, Is That Right To Repair Resolution Troubling You?

Over the years a constant in stories covering the right to repair has come from an unexpected direction, the farming community. Their John Deer tractors, a stalwart of North American agriculture, have become difficult to repair due to their parts using DRM restricting their use to authorised Deere agents. We’ve covered farmers using dubious software tools to do the job themselves, we’ve seen more than one legal challenge, and it’s reported that the price of a used Deere has suffered as farmers abandon their allegiance to newer green and yellow machines. Now comes news of a new front in the battle, as a socially responsible investment company has the tractor giant scrambling to block their shareholder motion on the matter.

Deere have not been slow in their fight-back against the threat of right-to-repair legislation and their becoming its unwilling poster-child, with CTO Jahmy Hindman going on record stating that 98% of repairs to Deere machinery can be done by the farmer themself (PDF, page 5) without need for a Deere agent. The question posed by supporters of the shareholder action is that given the substantial risk to investors of attracting a right-to-repair backlash, why would they run such a risk for the only 2% of repairs that remain? We’d be interested to know how Deere arrived at that figure, because given the relatively trivial nature of some of the examples we’ve seen it sounds far-fetched.

It’s beyond a doubt that Deere makes high-quality agricultural machinery that many farmers, including at least one Hackaday scribe, have used to raise a whole heap of crops. The kind of generational brand loyalty they have among their customers simply can’t be bought by clever marketing, it’s been built up over a century and a half. As spectators to its willful unpicking through this misguided use of their repair operation we hope that something like this shareholder move has the desired effect of bringing it to a close. After all, it won’t simply be of benefit to those who wish to repair their tractor, it might just rescue their now-damaged brand before it’s too late.

Curious about previous coverage on this ongoing story? This article from last year will give context.

Header image: Nheyob / CC BY-SA 4.0

Controller Swaps Can Save An HDD If You Do It Right

Hard drives are fragile and reliable all at once. It’s entirely possible to have a hard drive fail, even if your data is still in perfect condition on the magnetic platters inside. [Keith Sherry] was recently trying to recover data for a friend off a damaged hard drive, and demonstrated that modern twists on old tricks can still work.

The drive in question was an old 160GB disk that itself was being used as a backup. Of course, a backup you haven’t tested is no backup at all, and this one failed in the hour it was most needed.

The suspicion was that the controller board was the culprit, and that swapping the board out might bring things back to life. Back in the day, this was a common hacker trick. However, it often fails with modern drives, which store a great deal of drive-specific calibration data on the controller board. Without this specific data, another controller will be unable to access the data on the drive, and could even cause damage.

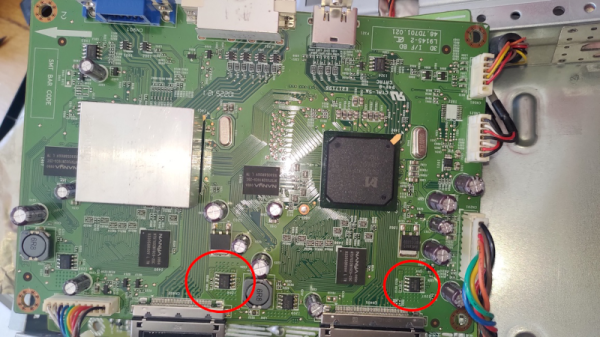
However, as [Keith] demonstrates, there is a way around this. A controller from a similar drive was sourced, albeit from a SATA version of the drive versus the original which used USB. A single chip is then removed from the original controller, containing the calibration data specific to that drive. Soldering this chip onto the new controller got everything up and running, and the files could be recovered.

If your data is invaluable, it’s likely worth paying a professional. As [Keith] demonstrates though, the old tricks can still come in handy as long as your techniques are up to date. DIYing your own data recovery can be done, it’s just risky is all.

Oh, and don’t forget — once you’ve recovered the files, throw the drive away. Don’t keep using it! Video after the break.

Continue reading “Controller Swaps Can Save An HDD If You Do It Right”