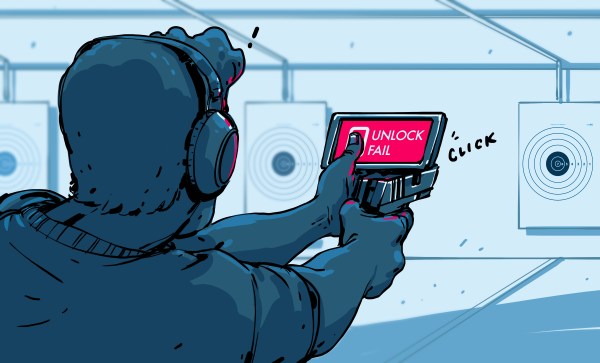
Effortlessly Send Antenna Wires Skywards With A Spud Gun

The heroes of action films always make it look so easy. Need to climb a tall building? Simply fire a grapnel hook from a handy harpoon gun, it’ll always land exactly where you want it and gain a perfect purchase so you can shin up the rope and arrive at the top barely having raised a sweat. If Hackaday ran Q Branch, we can tell you, we’d make ’em work a bit harder. If only because nobody likes a smartass.

If you’ve ever had to get a real line over something tall, you’ll know it’s a lot more difficult than that. You can only make it work with the lightest of lines that you can then use to pull up something more substantial, and you would be amazed how poor a thrower you are when you’re trying to throw upwards. Try attaching fishing line to a weight, try a bow and arrow, and nine times out of ten you won’t make it. There’s a serious amount of skill and luck involved in this line-throwing game.

[WB5CXC] has an interesting solution to this problem, at least as far as the application of throwing antenna wires over tall obstacles. He’s made a spud gun from PVC pipe, powered by compressed air. It takes the form of a U-shaped tube with one side of the U being a pressure vessel separated from the other by a ball valve.. Place a close-fitting puck with your wire attached in the open side with the valve closed, pump the pressure vessel full of air with a bicycle pump, and open the valve to send both puck and wire skywards. He says it will clear 100′ trees, counsels the user not to go higher than 100psi, and warns that the speeding puck can be dangerous. We like it already.

We’ve covered many spud guns here at Hackaday in the past, but it seems this is the first wire launching one. We’ve had a steam one for example, or this bolt-action spud gun, but pride of place has to go to the spud gun to end all spud guns.

Via DXZone.

Crowdfunding: A Wireless Oscilloscope

One of the most ingenious developments in test and measuring tools over the last few years is the Mooshimeter. That’s a wireless, two-channel multimeter that can measure voltage and current simultaneously. If you’ve ever wanted to look at the voltage drop and power output on a souped up electrified go-kart, the Mooshimeter is the tool for you.

A cheap, wireless multimeter was only the fevered dream of a madman a decade ago. We didn’t have smartphones with Bluetooth back then, so any remote display would cost much more than the multimeter itself. Now this test and measurement over Bluetooth is bleeding over into the rest of the electronics workbench with the Aeroscope,  a wireless Bluetooth oscilloscope.

[Alexander] and [Jonathan], the devs for the Aeroscope got the idea for this device while debugging a mobile robot. The robot would work on the bench, but in the field the problem would reappear. The idea for a wireless troubleshooting tool was born out of necessity.

The specs for the Aeroscope are about equal to the quite capable ‘My First Oscilloscope’ Rigol DS1052E. Analog bandwidth is 100MHz, sample rate is 500 Msamples/second, and the memory depth is 10k points. Resolution per division is 20mV to 10V, and the Aeroscope “Deluxe Package” that includes a few leads, tip, clip, USB cable, and case is about the same price as the Rigol 1052E. The difference, of course, is that the Aeroscope is a single channel, and wireless. That’s fairly impressive for two guys who aren’t a team of Rigol engineers.

As is the case with all Bluetooth test and measurement devices, the proof is in the app. Right now, the Aeroscope only supports iOS 9 devices, but according to the crowdfunding campaign, Android support is coming. Since the device is Open Source, you can always bang something out in Python if you really need to.

While this is a crowdfunding campaign, it’s hosted on Crowd Supply. Crowd Supply isn’t Indiegogo or Kickstarter; there are people at Crowd Supply vetting projects. The campaign still has a month to go, but the first few pledges are putting the Aeroscope right on track to a successful campaign.

Reverse Engineering The McDonald’s French Fry

McDonald’s is serious about their fries. When they were forced by shifting public opinion (drunkenly swaggering around as it always does) to switch from their beef tallow and cottonseed oil mixture to a vegetable oil mixture; they spent millions to find a solution that retained the taste. How they make the fries is not the worlds most closely guarded secret, but they do have a unique flavor, texture, and appearance which is a product of lots of large scale industrial processes. [J. Kenji López-Alt] decided to reverse engineer the process.

His first problem was of procurement. He could easily buy cooked fries, but he needed the frozen fries from McDonald’s to begin his reverse engineering. McDonald’s refused to sell him uncooked fries, “They just don’t do that,” one employee informed him. He reached out to his audience, and one of them had access to a charlatan. The mountebank made quick work of the McDonald’s employees and soon [J. Kenji] had a few bags of the frozen potato slivers to work with.

What follows next was both entertaining and informative. At one point he actually brought out a Starrett dial caliper to measure the fries; they were 0.25in squares in cross section. Lots of research and experimentation was done to get that texture. For example, McDonald’s fries aren’t just frozen raw potatoes. They are, in fact; blanched, flash fried, frozen and then fried again. Getting this process right was a challenge, but he arrived at similar fries by employing his sous vide cooker.

He then wanted to see if he could come up with a french fry recipe that not only allowed the home chef to make their own McDonald’s fries, but improve on them as well. It gets into some food chemistry here. For example he found that the same effect as blanching could be produced by boiling the fries; if you added vinegar to keep the cell walls from disintegrating.

The article certainly shows how knowledge of the chemistry behind cooking can improve the results.

Driving BB-8 - More than one way to move this bot

Driving BB-8: More Than One Way To Move This Bot

BB-8 is the much loved new droid introduced in the 2016 movie Star Wars: The Force Awakens, though in my case from the very first trailer released in 2014 I liked it for the interesting engineering problems it posed. How would you make a robot that’s a ball that rolls along, but with a head that stays on top while the ball rolls under it?

To make the ball roll, the answer most people found obvious at first was to use the analogy of a hamster wheel. The hamster running inside makes the wheel turn. In the BB-8 building world, which is quite large, the drive mechanism has come to be called a hamster drive, or just a hamster.

Magnets holding the head on

For the head, it seemed obvious that there would be magnets inside the ball, perhaps held in place near the top of the ball by a post extending up from the hamster. Corresponding magnets in attraction would then be attached to the underside of the head, and balls (also mounted under the head) would keep the head moving smoothly over the ball.

The magnet approach for the head has turned out to be the method used by all BB-8 builders that I’ve seen. However, the hamster has turned out to be only one of multiple solutions. Since the original debut many different methods have been used in builds and we’re going to have a lot of fun looking at each separate approach. It’s almost like revealing a magic trick; but really it’s all just clever engineering.

Note that for the actual movie, a combination of 7 or 8 props and CGI were used. The official working BB-8s that are shown at various promotional events were built after the movie was made and as of this writing, few details of their construction have been released. One notable detail, however, is that they aren’t using hamster drives.

Below are details of all the different BB-8 drive systems I’ve seen so far that have been built along with how they work.

Continue reading “Driving BB-8: More Than One Way To Move This Bot”

Fail Of The Week: Arachno∙fail∙ia

Going down the list (FCC, CE, UL, etc.) we can’t think of a regulating body that will test for this failure mode. Reportedly, a $1M irrigation system was taken down by a spider. And an itsy-bitsy spider at that.

This fail turned up as a quick image post over on /r/mildlyinteresting but I wasn’t the only electronics person attracted like a moth to a flame. Our friend [Sprite_TM] popped in to answer a question about conformal coating. Seems this board was sealed in a waterproof enclosure but was obviously not conformally coated.

fotw-spider-short-relay-diagram[Sprite_TM] also helped out with some armchair-engineering to guess at what happened. It’s not hard to tell that the footprint on the board looks like a set of mechanical relays all in a line. He looked up the most likely pinout for the relay.

We’ve superimposed that pinout on the board to help illustrate the failure. High voltage comes in on the pin shown with the red trace leading away from it. On either side of that pin are the connections for the low voltage coil which switches from normally closed (the pin in the upper right that is not connected to anything) to the normally open pin (which has the wide trace leading away from it).

So there sat the high voltage pin in between the coil pins when, along came a spider. It shorted the pins and presumably all the way back to the power supply for the low voltage rail. [Fugly_Turnip] (the OP) share some additional detail about the system and this failure; in addition to this card it fried the control module as well.

Another comment on the same thread shares a different story of two boards mounted next to each other with a bug shorting a 1/4″ air gap between two boards and causing similar carnage. Have you encountered Arachno-fail-ia of your own? Let us know below.


2013-09-05-Hackaday-Fail-tips-tileFail of the Week is a Hackaday column which celebrates failure as a learning tool. Help keep the fun rolling by writing about your own failures and sending us a link to the story — or sending in links to fail write ups you find in your Internet travels.

150,000 Members Strong, Hackaday.io Flies Past Another Milestone

We’re growing so fast that soon your mom will be on Hackaday.io. That’s fine, everyone who loves hardware is welcome. 150,000 members have made Hackaday.io a home for their creativity — looking for inspiration in the work of others, sharing successes and temporary failures, and building their dream team to take on amazing new challenges. There is no place in the world that can come close to matching the Open Hardware ecosystem that is Hackaday.io.

What is in that one number, 150k? It is a monumental chunk of a much bigger picture: the thriving Hackaday ecosystem that spans from staking down your own workshop full of projects and skills, to following the editorial pulse of hardware used in new and creative ways. Looking over the last twelve months on all of the Hackaday sites we’ve seen about 18.5 Million visitors and registered nearly 85 Million views. Hackaday is not a passive community. We all have an insatiable hunger to delve into the next big trick, and to celebrate the accomplishments that made it happen.

Want to find a new and unique way to use the tech you find most interesting? Your leap forward needs input to pollinate the idea. Hackaday has a critical mass of hackers, designers, and engineers waiting with excitement to hear and help out in exploring and expanding the frontier. These interaction are what has packed Hackaday.io with interesting people. Most would say: I came for a specific hack or to see what a particular hacker was up to, but then I felt at home and decided to stick around and share what I’ve spent way to much time doing (but I wouldn’t have it any other way).

As we continue to knock down one membership milestone after another I want to thank you all for being involved, for valuing the free and open sharing of information and ideas, and for sharing your own time and talent. You are what moves this community of hardware hackers to dizzying heights of excellence and awesome.

This is all too good to be a secret. Talk to your hardware-loving friends, colleagues, family, and acquaintances and invite them to Hackaday.io if they’re not already with us.

Espressif Releases ESP8266-Killer!

It’s no secret that we love the ESP8266 chip, and the community of hackers that have contributed to making it useful. We often joke about this or that new WiFi-enabler being an ESP8266 killer, but so far none have stepped up. Here we go again!

Espressif has released a chip that’s going to be an ESP8266 killer, and no, it’s not the ESP32. The ESP8285 went into mass production in March, and should start to appear in the usual outlets fairly soon.

What makes it an ESP8266 killer? It’s an ESP8266, but with the flash memory onboard. Nothing more, but also nothing less. What does this mean? Tiny, tiny designs are possible. And, if the street price ends up being right, there’s no reason you wouldn’t opt for built-in flash. (Unless you were planning on doing some ROM hacking.)

Continue reading “Espressif Releases ESP8266-Killer!”