Fail Of The Week: Teddy Top And Fourteen Fails

Last summer, [Quinn] made the trip out to KansasFest, the annual Apple II convention in Kansas City, MO. There, she picked up the most modern Apple II system that wasn’t an architecturally weird IIGS: she lugged home an Apple IIc+, a weird little machine that looks like an old-school laptop without a screen.

Not content with letting an old computer just sit on a shelf looking pretty, [Quinn] is working on a project called the Teddy Top. ‘Teddy’ was one of the code names for the Apple IIc, and although add-ons to turn this book-sized computer into something like a laptop existed in the 80s, these solutions have not withstood the test of time. [Quinn] is building her own clamshell addition to her IIc+, and somehow failing at something she’s done hundreds of times before.

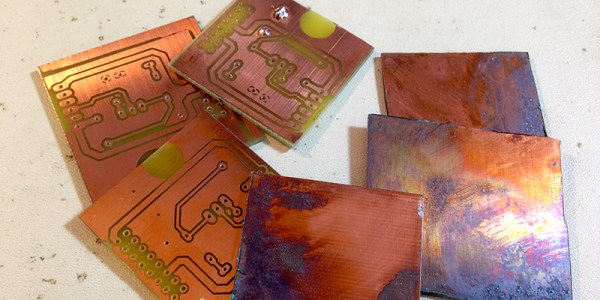
While the IIc+ has an NTSC composite output, the super-special video add-ons for the IIc+ used a DB15 expansion connector. Here, any add-on could access video sync signals, the a sound signal from the audio circuit, and even a +12V line that could drive loads up to 300 mA. It just so happened the display [Quinn] is using for this project runs at 12V, 200 mA. Everything was great, but as a worthy trustee of this computer’s Earthly existence, [Quinn] thought a bit of current limiting should be included in her addon. She designed a circuit around an NPN power transistor, that would allow the display to draw power until the load was around 250mA. After that, the transistor would start dumping excess power as heat. Yes, a fuse would be better. [Quinn] calls this Fail #1. There are thirteen more to go.

Continue reading “Fail Of The Week: Teddy Top And Fourteen Fails” →
A Calculator With Free Software And Open Hardware

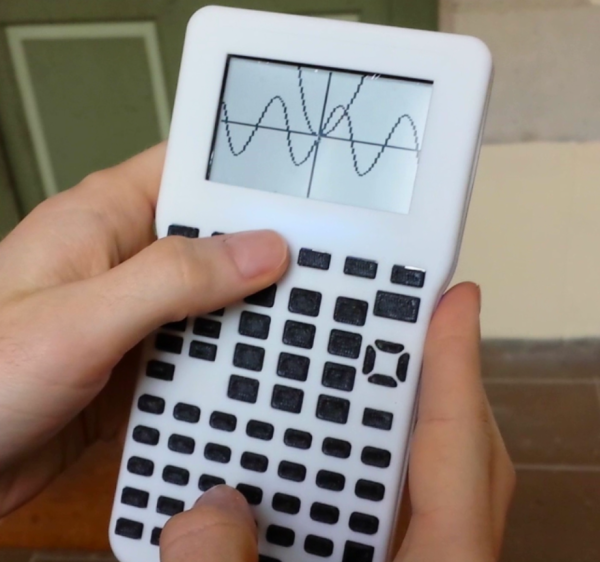
We’re fond of open source things here. Whether it’s 3D printers, circuit modeling software, or a global network of satellite base stations, the more open it is the more it improves the world around us. [Pierre Parent] and [Ael Gain] have certainly taken these values to heart with their open handheld graphing calculator.

While the duo isn’t giving away the calculators themselves, they are releasing all of the hardware designs so that anyone can build this calculator. It’s based on a imx233 processor because this chip (and most everything else about this calculator) is easy to source and easy to use. That, and there is a lot of documentation on it that is in the public domain. All of the designs, including the circuit board and CAD files for the case, are available to anyone who is curious, or wants to build their own.

The software on the calculator (and the software that was used to design the calculator) is all free software too. The calculator runs Linux (of course) and a free TI simulator environment in the hopes of easing the transition of anyone who grew up using TI’s graphing calculators. The project is still in a prototype phase, but it looks very promising. Even though the calculator can already run Pokemon, maybe one day it will even be able to run Super Smash Bros as well!

Compiling Your Own Programs For The ESP8266

When the ESP8266 was first announced to the world, we were shocked that someone was able to make a cheap, accessible UART to WiFi bridge. Until we get some spectrum opened up and better hardware, this is the part you need to build an Internet of Things thing.

It didn’t stop there, though. Some extremely clever people figured out the ESP8266 had a reasonably high-power microcontroller on board, a lot of Flash, and a good amount of RAM. It looked like you could just use the ESP8266 as a controller unto itself; with this chip, all you need to do is write some code for the ESP, and you have a complete solution for your Internet connected blinking lights or WiFi enabled toaster. Whatever the hip things the cool kids are doing these days, I guess.

But how do you set up your toolchain for the ESP8266? How do you build projects? How do you even upload the thing? Yes, it’s complicated, but never fear; [CNLohr] is here to make things easy for you. He’s put together a video that goes through all the steps to getting the toolchain running, setting up the build environment, and putting some code on the ESP8266. It’s all in a git, with some video annotations.

The tutorial covers setting up the Xtensa toolchain and a patched version of GCC, GDB, and binutils. This will take a long, long time to build, but once it’s done you have a build environment for the ESP8266.

With the build environment put together, [CNLohr] then grabs the Espressif SDK from the official site, and puts together the example image. Uploading to the module requires pulling some of the pins high and some low, plugging in a USB to serial module to send the code to the module, standing well back, and pressing upload.

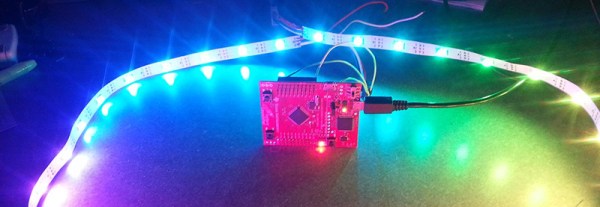
For his example image, [CNLohr] has a few WS2812 RGB LEDs connected to the ESP8266 WiFi module. Uploading the image turns the LEDs into something controllable with UDP packets on port 7777. It’s exactly what you want in a programmable, WiFi chip, and just the beginning of what can be done with this very cool module.

If you’re looking around for some sort of dev board with an ESP8266 on it, [Mathieu] has been playing around with some cool boards, and we’ve been looking into making a Hackaday version to sell in the store. The Hackaday version probably won’t happen because FCC.

Continue reading “Compiling Your Own Programs For The ESP8266” →

An Expanding Wooden Table

A few years ago, the world of fine woodworking was presented with the Fletcher Capstan table. It’s a round table, able to expand its diameter merely by rotating the top. A gloriously engineered bit of mechanics move the leaves of the tables out while simultaneously raising the inner part of the table. It’s a seriously cool table, very expensive, and something that will probably be found in museums 100 years from now.

[Scott Rumschlag] thought his woodworking skills were up to the task of creating one of these expanding tables and managed to build one in his workshop. Like the Fletcher Capstan table, it’s a table that increases its diameter simply by rotating the table top. Unlike the commercial offering, this one doesn’t cost as much as a car, and you can actually see the internal mechanism inside this table.

The top of [Scott]’s table is made of three pieces. The quarter-circle pieces are the only thing showing when the table is in its minimum position, and are arranged on the top of the ‘leaf stack’. When the table expands, four additional leaves move up from beneath with the help of a linear bearing made of wood and a roller that slides along the base of this mechanical contraption.

The center of the table – the star – is a bit more difficult to design. While the leaves move up the stack of table tops with the help of a ramp, this is an impractical solution for something so close to the center of the table. Instead of a ramp, [Scott] is using a lifting lever and metal hinge that brings the star of the table up to the right level. Even though it’s a crazy amount of woodworking and fine tuning to get everything right, it’s not too terribly difficult to get your head around.

Videos, including one of the assembly of the table, below.

Continue reading “An Expanding Wooden Table” →

MicroDMA And LEDs

[Jordan] has been playing around with WS2812b RGB LED strips with TI’s Tiva and Stellaris Launchpads. He’s been using the SPI lines to drive data to the LED strip, but this method means the processor is spending a lot of time grabbing data from a memory location and shuffling it out the SPI output register. It’s a great opportunity to learn about the μDMA available on these chips, and to write a library that uses DMA to control larger numbers of LEDs than a SPI peripheral could handle with a naive bit of code.

DMA is a powerful tool – instead of wasting processor cycles on moving bits back and forth between memory and a peripheral, the DMA controller does the same thing all by its lonesome, freeing up the CPU to do real work. TI’s Tiva C series and Stellaris LaunchPads have a μDMA controller with 32 channels, each of which has four unique hardware peripherals it can interact with or used for DMA transfer.

[Jordan] wrote a simple library that can be used to control a chain of WS2812b LEDs using the SPI peripheral. It’s much faster than transferring bits to the SPI peripheral with the CPU, and updating the frames for the LED strip are easier; new frames of a LED animation can be called from the main loop, or the DMA can just start again, without wasting precious CPU cycles updating some LEDs.

Scope Noob: Bridge Rectifier

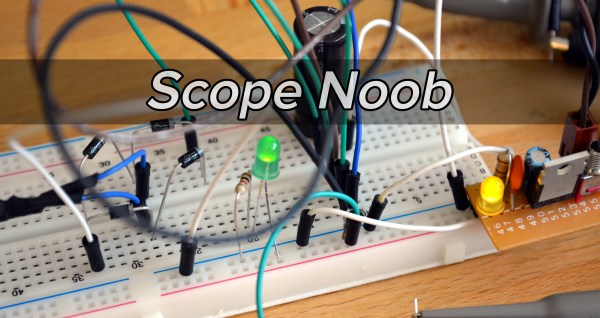
Welcome back to this week’s installment of Scope Noob where I’m sharing my experiences learning to use my first oscilloscope. Last week I started out measuring mains frequency using an AC-AC wall wart adapter. Homework, for those following along, was to build a bridge rectifier and probe the signals from it. Let’s take a look.

Continue reading “Scope Noob: Bridge Rectifier” →

Astrophotography And Data-Analysis Sense Exoplanets

[David Schneider] was reading about recent discoveries of exoplanets. Simply put these are planets orbiting stars other than the sun. The rigs used by the research scientists include massive telescopes, but the fact that they’re using CCD sensors led [David] to wonder if a version of this could be done on the cheap in the backyard. The answer is yes. By capturing and processing data from a barn door tracker he was able to verify a known exoplanet.

Barn Door trackers are devices used to move a camera to compensate for the turning of the earth. This is necessary when taking images throughout the night, as the stars will not remain “stationary” to the camera’s frame without it. The good news is that they’re simple to build, we’ve seen a few over the years.

Other than having to wait until his part of the earth was pointed in the correct direction (on a clear night) at the same time as an exoplanet transit, [David] was ready to harvest all the data he needed. This part gets interesting really quickly. The camera needed to catch the planet passing in between the earth and the star it revolves around (called a transit). The data to prove this happened is really subtle. To uncover it [David] needed to control the data set for atmospheric changes by referencing several other stars. From there he focused on the data for the transit target and compared points across the entire set of captured images. The result is a dip in brightness that matches the specifications of the original discovery.

[David] explains the entire process in the clip after the break.

Continue reading “Astrophotography And Data-Analysis Sense Exoplanets” →