A ruler seems like a pretty simple device; just a nice straight piece of material with some marks on it. There are some improvements out there to the basic design, like making it out of something flexible or printing a few useful crib notes and formulas on it so you have a handy reference. But for the most part, we can all agree that ruler technology has pretty much plateaued.
 Well, not if [Brad] has anything to say about it. His latest creation, the Digirule2, is essentially an 8-bit computer like those of the 1970’s that just so happens to be a functional ruler as well. Forget lugging out the Altair 8800 next time you’re in the mood for some old school software development, now you can get the same experience with a piece of hardware that lives in your pencil cup.
Even if you’ve never commanded one of the blinkenlight behemoths that inspired the Digirule2, this is an excellent way to get some hands-on experience with early computer technology. Available for about the cost of a large pizza on Tindie, it represents one of the easiest and most cost-effective ways to tell your friends that as a matter of fact you have programmed a computer in binary.
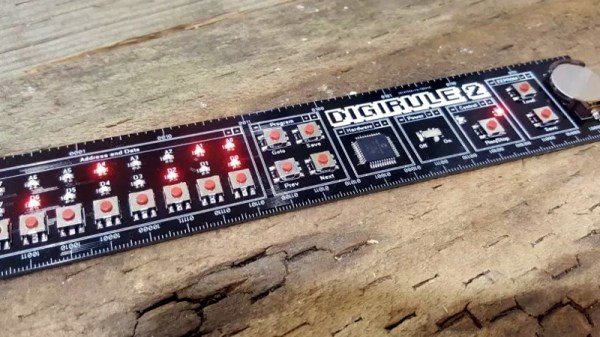
The Digirule2 is powered by a Microchip PIC18F43K20, and is programmed by punching binary in one byte at a time with a bank of eight tactile switches. To make things a little easier, programs can be saved to the internal EEPROM and loaded back up just as easily thanks to the handy buttons next to the power switch. Now all you’ve got to do is figure out what all those blinking LEDs mean, and you’ll be in business.
The original Digirule was a logic gate simulator that we first covered back in 2015. We’re always happy to see projects grow and evolve over time, and think this new retro-computer themed variant is going to be quite popular with those who still love toggle switches and blinking lights.
Continue reading “Programmable Ruler Keeps 1970’s Computing Alive”