A fan to remove fumes is a handy thing to have when soldering, even better is a fan furnished with a filter. Better still is a fan that activates only when the iron is in use, turning off when the iron is in its stand. Now that’s handy!
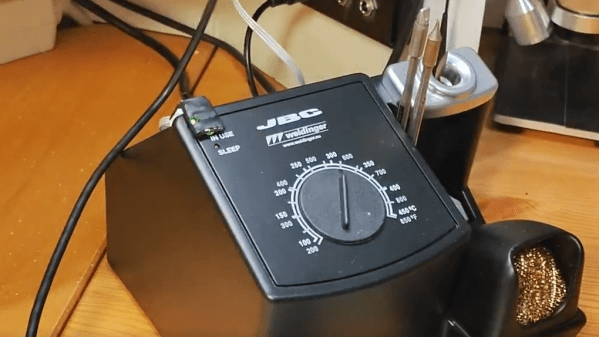
 [Petteri Aimonen] made exactly such a device when he noticed his JBC BT-2BWA soldering station could detect when the iron is removed from its stand, and indicate its operating mode via status LEDs. Broadly speaking, when the iron is removed from its cradle the green “in use” LED is on. By turning the fan on whenever that LED is lit (and turning it off when it becomes unlit), fume extraction gets a little more elegant and efficient.
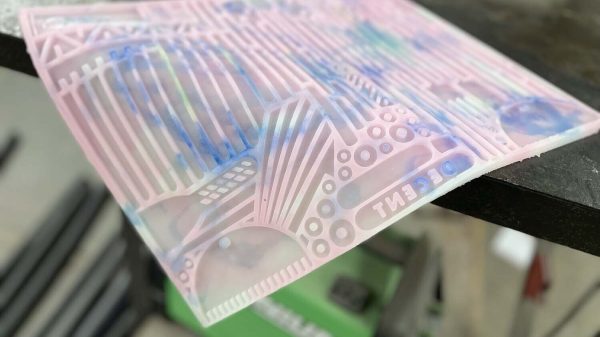
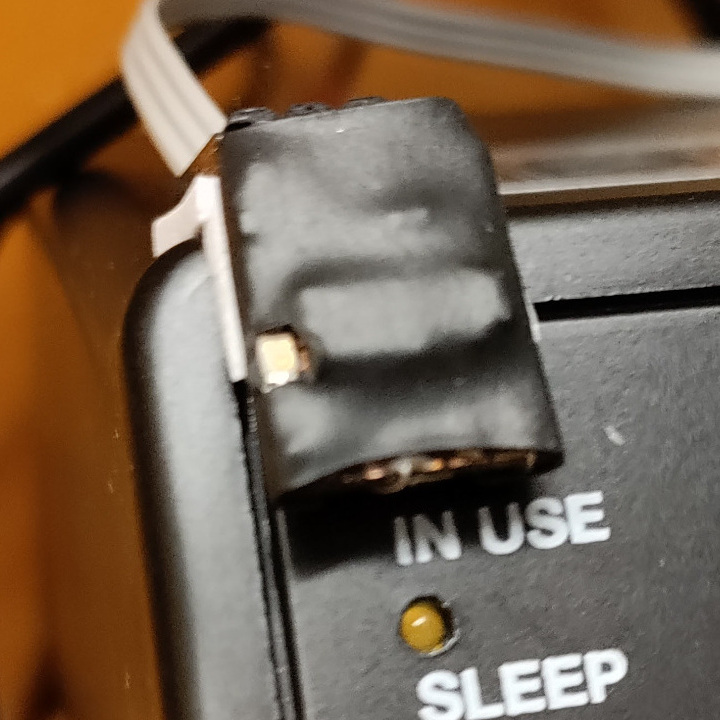
Instead of tapping directly into the soldering station’s hardware to detect the LED’s state, [Petteri] went for a completely noninvasive solution that made good use of a few spare parts and a small bit of copper-clad board. The PCB is nothing more than piece of copper-clad board with lands scratched out with a hobby knife.
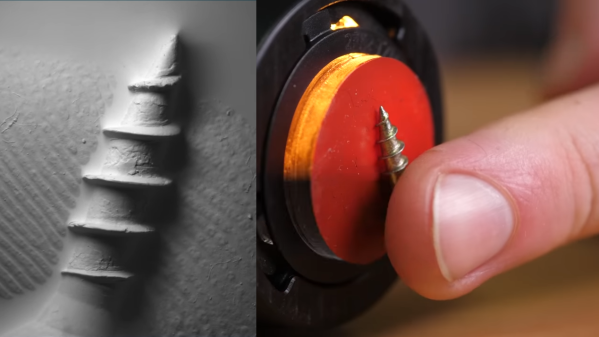
This tiny board sits atop the soldering station, parking a photodiode directly above the “in use” LED. The circuit is a simple comparator whose output controls fan power via a MOSFET, and a top-facing LED provides as a duplicate “in use” indicator, since the original is hidden under the tiny board.
Even for one-off designs like this, creating a PCB layout in an EDA program like KiCad is still worth doing because one can use it to scratch out lands on a copper-clad board, a technique with similarities to Manhattan-style circuit construction.