Video Streaming Like Your Raspberry Pi Depended On It

The Raspberry Pi is an incredibly versatile computing platform, particularly when it comes to embedded applications. They’re used in all kinds of security and monitoring projects to take still shots over time, or record video footage for later review. It’s remarkably easy to do, and there’s a wide variety of tools available to get the job done.

However, if you need live video with as little latency as possible, things get more difficult. I was building a remotely controlled vehicle that uses the cellular data network for communication. Minimizing latency was key to making the vehicle easy to drive. Thus I set sail for the nearest search engine and begun researching my problem.

My first approach to the challenge was the venerable VLC Media Player. Initial experiments were sadly fraught with issues. Getting the software to recognize the webcam plugged into my Pi Zero took forever, and when I did get eventually get the stream up and running, it was far too laggy to be useful. Streaming over WiFi and waving my hands in front of the camera showed I had a delay of at least two or three seconds. While I could have possibly optimized it further, I decided to move on and try to find something a little more lightweight.

Continue reading “Video Streaming Like Your Raspberry Pi Depended On It”

Handheld Gimbal With Off-The-Shelf Parts

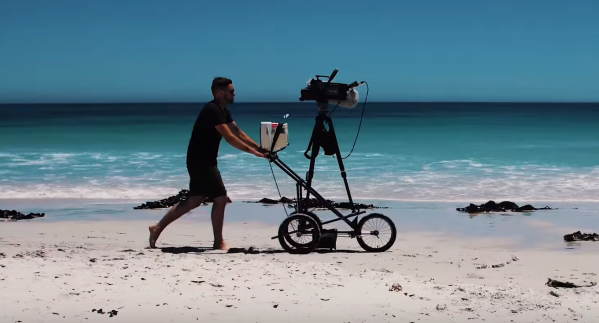
For anything involving video capture while moving, most videographers, cinematographers, and camera operators turn to a gimbal. In theory it is a simple machine, needing only three sets of bearings to allow the camera to maintain a constant position despite a shifting, moving platform. In practice it’s much more complicated, and gimbals can easily run into the thousands of dollars. While it’s possible to build one to reduce the extravagant cost, few use 100% off-the-shelf parts like [Matt]’s handheld gimbal.

[Matt]’s build was far more involved than bolting some brackets and bearings together, though. Most gimbals for filming are powered, so motors and electronics are required. Not only that, but the entire rig needs to be as balanced as possible to reduce stress on those motors. [Matt] used fishing weights to get everything calibrated, as well as an interesting PID setup.

Be sure to check out the video below to see the gimbal in action. After a lot of trial-and-error, it’s hard to tell the difference between this and a consumer-grade gimbal, and all without the use of a CNC machine or a 3D printer. Of course, if you have access to those kinds of tools, there’s no limit to the types of gimbals you can build.

Continue reading “Handheld Gimbal With Off-The-Shelf Parts”

I Am An Iconoscope

We’d never seen an iconoscope before. And that’s reason enough to watch the quirky Japanese, first-person video of a retired broadcast engineer’s loving restoration. (Embedded below.)

Quick iconoscope primer. It was the first video camera tube, invented in the mid-20s, and used from the mid-30s to mid-40s. It worked by charging up a plate with an array of photo-sensitive capacitors, taking an exposure by allowing the capacitors to discharge according to the light hitting them, and then reading out the values with another electron scanning beam.

The video chronicles [Ozaki Yoshio]’s epic rebuild in what looks like the most amazingly well-equipped basement lab we’ve ever seen. As mentioned above, it’s quirky: the iconoscope tube itself is doing the narrating, and “my father” is [Ozaki-san], and “my brother” is another tube — that [Ozaki] found wrapped up in paper in a hibachi grill! But you don’t even have to speak Japanese to enjoy the frame build and calibration of what is probably the only working iconoscope camera in existence. You’re literally watching an old master at work, and it shows.

Continue reading “I Am An Iconoscope”

Movie Encoded In DNA Is The First Step Toward Datalogging With Living Cells

While DNA is a reasonably good storage medium, it’s not particularly fast, cheap, or convenient to read and write to.

What if living cells could simplify that by recording useful data into their own DNA for later analysis? At Harvard Medical School, scientists are working towards this goal by using CRISPR to encode and retrieve a short video in bacterial cells.

CRISPR is part of the immune system of many bacteria, and works by storing sequences of viral DNA in a specific location to identify and eliminate viral infections. As a tool for genetic engineering, it’s cheaper and has fewer drawbacks than previous techniques.

Besides generating living rickrolls and DMCA violations, what is this good for? Cheap, self-replicating sensors. [Seth Shipman], part of the team of scientists at Harvard, explains in an interview below a number of possible applications. His focus is engineering cells to act as a noninvasive data acquisition tool to study neurobiology, for example by using engineered neurons to record their developmental history.

It’s possible to see how this technique can be used more broadly and outside an academic context. Presently, biosensors generally use electric or fluorescent transducers to relay a detection event. By recording data over time in the DNA of living cells, biosensors could become much cheaper and contain intrinsic datalogging. Possible applications could include long-term metabolite (e.g. glucose) monitors, chemical detectors, and quality control.

It’s worth noting that this technique is only at the proof of concept stage. Data was recorded and retrieved manually by the scientists into the bacterial genome with 90% accuracy, demonstrating that if cells can be engineered to record data themselves, accuracy and capacity are high enough for practical applications.

That being said, if anyone is working on a MEncoder or ffmpeg command line option for this, let us know in the comments.

Continue reading “Movie Encoded In DNA Is The First Step Toward Datalogging With Living Cells”

Game Gear, Console Edition

What if the Game Gear had been a console system? [Bentika] answered that question by building a consolized version of this classic handheld. For those not in the know when it comes to 1980s Sega consoles, the Game Gear is technically very similar to the Master System. In fact, the Game Gear can even play Master System games with a third-party adapter. However, the reverse isn’t the case as the screen aspect ratios were different and the Game Gear had a larger palette, which meant the Master System wasn’t compatible with Game Gear titles.

Sega’s decision to omit an AV connection meant that Game Gear games were forever locked into a tiny LCD screen. [EvilTim] changed that with his AV board, so [Bentika] decided to take things to their natural conclusion by building a proper console version of the Game Gear.

He started by ditching the screen and wiring in [EvilTim’s] video adapter board. The cartridge slot was then removed and reconnected atop the PCB. This turned the system into a top loader. [Bentika] then went to work on the case. He used Bondo to fill in the holes for the d-pad and buttons. After a spray paint finish failed, [Bentika] went back to the drawing board. He was able to get paint color matched to the original Game Gear gray at a household paint store. Careful priming, sanding, and painting resulted in a much nicer finish for this classic build. Check out [Bentika’s] video after the break!

Continue reading “Game Gear, Console Edition”

Shoot Video In 26 Different Directions

[Mark Mullins] is working on a project called Quamera: a camera that takes video in every direction simultaneously, creating realtime 3D environments on the fly.

[Mark] is using 26 Arducams, arranging them in a rhombicuboctahedron configuration, which consists of three rings of 8 cameras with each ring controlled by a Beaglebone; the top and bottom rings are angled at 45 degrees, while the center ring looks straight out. The top and bottom cameras are controlled by a fourth Beaglebone, which also serves to communicate with the Nvidia Jetson TX1 that runs everything. Together, these cameras can see in all directions at once, with enough overlap for provide a seamless display for viewers.

In the image to the right, [Mark] is testing out his software for getting the various cameras to work together. The banks of circles and the dots and lines connecting to them represent the computer’s best guess on how to seamlessly merge the images.

If you want to check out the project in person, [Mark] will be showing off the Quamera at the Dover Mini Maker Faire this August. In the meantime, to learn more about the Jetson check out our thorough overview of the board.

Sega’s Game Gear Gets A Video Output

[EvilTim] dug deep into a classic system to finally give the Game Gear a proper video output.  The Game Gear was Sega’s answer to Nintendo’s Gameboy. Rushed to market, the Game Gear reused much of the hardware from the very popular Master System Console. The hardware wasn’t quite identical though – especially the cartridge slot. You couldn’t play Game Gear games on a Master System, and the game gear lacked an AV output, which meant gamers were stuck playing on a small fluorescent backlit LCD screen.

[EvilTim] wanted to play some of those retro titles on a regular TV using the original hardware. To accomplish this he had to start digging into the signals driving the Game Gear’s LCD. The Master System lineage was immediately apparent, as Game Gear’s LCD drive signals were similar in timing to those used to drive a TV. There was even a composite sync signal, which was unused on in the Game Gear.

[EvilTim] first designed a circuit using discrete ’74 series logic which would convert the LCD drive signals to SCART RGB. Of note is the construction technique used in this circuit. A tower of three 74HC374 chips allows [EvilTim] to create R, G, and B outputs without the need for a complex circuit board.

As pretty as a three-story chip tower is, [EvilTim] knew there was a better way. He re-spun the circuit with a 32 macrocell CPLD. This version also has an NTSC and PAL video encoder so those without a SCART interface can play too. If you’re not up to building your own, [EvilTim] sells these boards on his website.

We’ve seen some incredible retro gaming hacks over the years. From a NES inside a cartridge to incredible RetroPi builds. Hit the search bar and check it out!