Freeforming The Atari Punk Console

This stunning piece of art is [Emily Velasco’s] take on the Atari Punk Console. It’s a freeform circuit that synthesizes sound using 555 timers. The circuit has been around for a long time, but her fabrication is completely new and simply incredible!

This isn’t [Emily’s] first rodeo. She previously built the mini CRT sculpture project seen to the left in the image above. Its centerpiece is a tiny CRT from an old video camera viewfinder, and it is fairly common for the driver circuit to understand composite video. And unlike CRTs, small video cameras with composite video output are easily available today for not much money. Together they bring a piece of 1980s-era video equipment into the modern selfie age. The cubic frame holding everything together is also the ground plane, but its main purpose is to give us an unimpeded view. We can admire the detail on this CRT and its accompanying circuitry representing 1982 state of the art in miniaturized consumer electronics. (And yes, high voltage components are safely insulated. Just don’t poke your finger under anything.)

With the experience gained from building that electrically simple brass frame, [Emily] then stepped up the difficulty for her follow-up project. It started with a sound synthesizer circuit built around a pair of 555 timers, popularized in the 1980s and nicknamed the Atari Punk Console. Since APC is a popular circuit found in several other Hackaday-featured projects, [Emily] decided she needed to add something else to stand out. Thus in addition to building her circuit in three-dimensional brass, two photocells were incorporated to give it rudimentary vision into its environment. Stimulus for this now light-sensitive APC were provided in the form of a RGB LED. One with a self-contained circuit to cycle through various colors and blinking patterns.

These two projects neatly bookend the range of roles brass rods can take in your own creations. From a simple frame that stays out of the way to being the central nervous system. While our Circuit Sculpture Contest judges may put emphasis the latter, both are equally valid ways to present something that is aesthetic in addition to being functional. Brass, copper, and wood are a refreshing change of pace from our standard materials of 3D-printed plastic and FR4 PCB. Go forth and explore what you can do!

Continue reading “Freeforming The Atari Punk Console”

High-Speed Camera Plus Lawnmower Equals Destructive Fun

I hate gratuitous destruction videos. You know, the ones that ask “what happens if we drop a red-hot ball of Plutonium onto a bag of Cheetos?” There’s a lot of smoke, flames and a big pile of ad revenue for the idiots behind it.

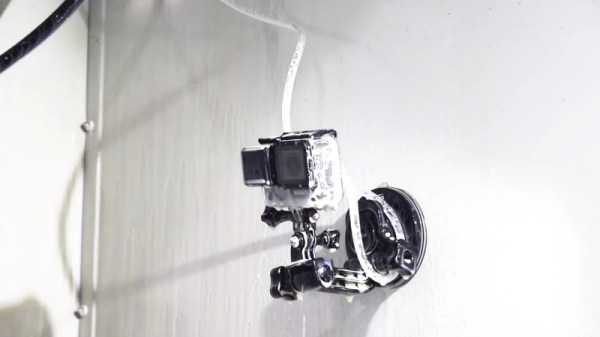
This destruction video is a little different, though. [Tesla 500] wanted to mount his high-speed camera onto a rotating blade, but without destroying the camera. In this video, he documents the somewhat nerve-wracking process of building a rig that spins a $3000 camera at several thousand revolutions per second minute. It’s all about the balance, about building a rig that balances the weight of the camera and the blade properly at high speed.

It took several attempts to get it right, and [Tesla 500] shows how he tested and refined each version, including shifting weights to account for the different densities of the camera itself, which has the heavy batteries at one side. And then he drops things onto the blade to see what they look like when sliced. Naturally.

Continue reading “High-Speed Camera Plus Lawnmower Equals Destructive Fun”

Open Data Cam Combines Camera, GPU, And Neural Network In An Artisanal DIY Cereal Box

The engineers and product designers at [moovel lab] have created the Open Data Cam – an AI camera platform that can identify and count objects as they move through its field of view – along with an open source guide for making your own.

Step one: get out your ruler and utility knife. In this world of ubiquitous 3D-printers they’ve taken a decidedly low-tech approach to the project’s enclosure: a cut, folded, and zip-tied plastic box, with a cardboard frame inside to hold the electronic bits. It’s “splash proof” and certainly cheap to make, but we’re a little worried about cooling and physical protection for the electronics inside, as they’re not exactly cheap and rugged components.

So what’s inside? An Nvidia Jetson TX2 board, a LiPo battery with some charging circuitry, and a standard webcam. The special sauce, however, is the software, which is available on GitHub. [Moovel lab]’s engineers have put together a nice-looking wifi-accessible mobile UI for marking the areas where you’d like the software to identify and tally objects. The actual object detection and identification tasks are performed by the speedy YOLO neural network, a task the Nvidia board’s GPU is of course well suited for.

As the Open Data Cam’s unblinking glass eye gazes upon our urban environments, it will log its observations in an ancient and mysterious language: CSV. It’s up to you, human, to interpret this information and use it for good.

A summary video and build time lapse are embedded after the break.

Continue reading “Open Data Cam Combines Camera, GPU, And Neural Network In An Artisanal DIY Cereal Box”

AV Synth Is Psychedelic Analog Mayhem

Digital video is cool and all, but it can’t compete with analog in terms of smooth, creamy glitches and distortion. [gieskes] has developed an analog audio-visual synthesizer that is a great example of the old-school retro visuals you can create with a handful of simple components.

Known as the 3TrinsRGB+1c, it’s available both assembled and in kit form. It’s probably best to start with the manual. Synthesis is achieved through the use of a HEF40106 hex inverting buffer – a cheap and readily available part that nonetheless provides for excellent results. Video can be switched between RGB oscillators and a series of inputs, and there are various controls to create those classic scrolling effects and other visual oddities.

Additionally, a series of connections to the underlying circuitry are broken out on a header connector. This allows for extra modules to be plugged in, and several designs are available to expand the unit’s capabilities.

Analog video isn’t used so much on a day-to-day basis anymore, but it’s a great technology to tinker and experiment with. We’ve seen some of [gieskes] experiments in this arena before, too – like this Arduino video sampler. Video after the break.

Continue reading “AV Synth Is Psychedelic Analog Mayhem”

Circuit Bending A TV For Better Input

If you haven’t noticed, CRTs are getting hard to find. You can’t get them in Goodwill, because thrift stores don’t take giant tube TVs anymore. You can’t find them on the curb set out for the trash man, because they won’t pick them up. It’s hard to find them on eBay, because no one wants to ship them. That’s a shame, because the best way to enjoy old retrocomputers and game systems is with a CRT with RGB input. If you don’t already have one, the best you can hope for is an old CRT with a composite input.

But there’s a way. [The 8-Bit Guy] just opened up late 90s CRT TV and modded it to accept RGB input. That’s a monitor for your Apple, your Commodore, and a much better display for your Sega Genesis.

There are a few things to know before cracking open an old CRT and messing with the circuits. Every (color) CRT has three electron guns, one each for red, green, and blue. These require high voltage, and in CRTs with RGB inputs you’re looking at a circuit path that takes those inputs, amplifies them, and sends them to the gun. If the TV only has a composite input, there’s a bit of circuitry that takes that composite signal apart and sends it to the guns. In [8-bit guy]’s TV — and just about every CRT TV you would find from the mid to late 90s — there’s a ‘Jungle IC’ that handles this conversion, and most of the time there’s RGB inputs meant for the on-screen display. By simply tapping into those inputs, you can add RGB inputs with fancy-schmancy RCA jacks on the back.

While the actual process of adding RGB inputs to a late 90’s CRT will be slightly different for each individual make and model, the process is pretty much the same. It’s really just a little bit of soldering and then sitting back and playing with old computers that are finally displaying the right colors on a proper screen.

Continue reading “Circuit Bending A TV For Better Input”

Dirty Video Mixing With The Raspberry Pi Zero

Don’t get too excited now, we aren’t talking about that kind of dirty video. There’s plenty of other places on the Internet you can go to find that sort of thing. No, this video mixer is “dirty” because it combines two composite video streams into one garbled up mess that’s best viewed on an old CRT TV. Why, you may ask? Because rock and roll, that’s why.

Created by [Luke Blackford] as a visual for his band’s performances, the “Dirty Pi” is an exceptionally simple way to create some wild imagery with two Raspberry Pi Zeros. It might not be the most practical of devices, but if you want so throw some creepy looking video up on screens all over the house (say for an upcoming Halloween party), this is a fantastic way to do it on the cheap.

The idea is simple: connect the oft-forgotten composite video outputs of two Pi Zeros to a potentiometer, which then leads to the display. Play different videos on the Pis with the media player of your choice, and twiddle the potentiometer to create ghosting and interference. If you want to get that true 1980’s retro feel, put the whole thing into an old VHS cassette like [Luke] did, and you’re ready to rock.

Those who’ve been around the block a few times might recognize this trick as a variation of the [Karl Klomp] Dirty Video Mixer, and [Luke] tells us he likes this project because he was able to pull it off without writing any code or even doing any complex wiring, though he does imagine a future version where he adds some remote control functionality.

If you like your video mixers with more smarts and less dirt, we’ve covered a very slick build using the LM1881 in the past.

Continue reading “Dirty Video Mixing With The Raspberry Pi Zero”

GE Record Player and TV 1600x900

VinylVideo Is Literally Video On Vinyl

It’s often said that the music etched into a vinyl record takes on a transcendent quality that you simply can’t find in a digital recording, but does that still apply when you add motion picture? The collaboration of [Sengmüller and Diamant] sure think so, because they are offering a new experience for the turntable with the introduction of their VinylVideo pre-amplifier. No tape reels here, this project shows the extend of what is possible through analog video.

Vinyl Video Amp

While all record players capable of playing back 7 in. 45 RPM are compatible with the system, the VinylVideo records themselves specially cut in order to generate the video signal. Each of the custom records has room for a 4-minute music video on the A-side, and the single on the B-side. Videos play back in black & white, sub-standard definition with mono audio, and run around 12 frames per second. The pre-amp takes in the analog signal from regular audio cables via RCA jacks or 3.5mm headphone jack, and then a Raspberry Pi model A+ handles the analog-to-digital conversion. Video out options include HDMI and composite video via a 3.5mm TRSS jack.

The current VinylVideo pre-amp is actually a refinement of the original project from the mid ’90s where it was a part of folk art exhibits. The legacy website (circa 1999) is still live, so you can give it a visit. However, for the most authentic experience you may want to fire-up a virtual machine with Netscape Navigator and Real Player installed.

For a more in-depth look at the VinylVideo in action there is a great video below from [Techmoan]:

Continue reading “VinylVideo Is Literally Video On Vinyl”