5-Axis 3D Printing For The Rest Of Us

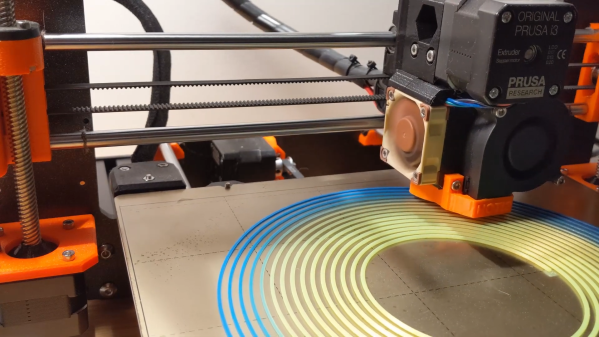
By now we’re all used to the idea of three dimensional printing, as over the last fifteen years or so it’s become an indispensable tool for anyone with an interest in making things without an industrial scale budget. There are still a few limitations to the techniques used in a common 3D printer though, in particular being tied to layers in a single orientation. It’s something that can be addressed by adding tilt and rotational axes to the printer to deliver a five-axis device, but this has not been available in an affordable form. [Freddie Hong] and colleagues have tackled the production of an affordable printer, and his solution fits neatly on the bed of a Prusa i3 to convert it to five-axis machine without breaking the bank.

The quantity and quality of the work is certainly impressive, with suitable slicing software being developed alongside the 3D printed parts to fit the two extra axes. For now all we can do is look at the pictures and the video below the break, but once the work has been presented the promise that all the necessary files will be made public. We can see versions of the hardware finding their way onto printers other  than the Prusa, and we can see this becoming yet another piece of the regular armory available to those of us who make things.

Continue reading “5-Axis 3D Printing For The Rest Of Us”

The Metal 3D Printing Hack Chat Brings The Heat

At this point, it’s safe to say the novelty of desktop 3D printing has worn off. The community has largely come to terms with the limitations of extruded plastics, and while we still vehemently believe that it’s a transformative technology, we’ll admit there aren’t too many applications where a $200 USD printer squirting out PLA is truly the best tool for the job.

But rather than looking at today’s consumer 3D printer market as the end of the line, what if it’s just the beginning? With the problems of slicing, motion control, and extrusion more or less solved when it comes to machines that print in plastic, is it finally time to turn our attention to the unique problems inherent in building affordable metal printers? Agustin Cruz certainly thinks so, which is why he took to the Hack Chat this week to talk about his personal vision for an open source 3D printer that can turn powdered metals into solid objects by way of a carefully controlled electron beam.

To be clear, Agustin isn’t suggesting you toss out your Creality anytime soon. Metal 3D printing will always be a niche within a niche, but for applications where even advanced engineering plastics like PEI and PEEK simply won’t do, he argues the community needs to have a cheap and accessible option. Especially for developing and low income countries where traditional manufacturing may be difficult. The machine he’s been working on wouldn’t be outside the capabilities of an individual to build and operate, but at least for right now the primary target is hospitals, colleges, and small companies.

The Chat was full of technical questions about Agustin’s design, and he wasn’t shy about tackling them. Some wondered why he decided to sinter the metal powder with an electron gun when solid-state lasers are cheap, easily available, and relatively straightforward to work with. But while the laser might seem like the easier solution on the surface, Agustin points out that using a magnetically focused electron beam gives his printer some unique capabilities.

For example, he can easily defocus the beam and pass it over the entire build plate to pre-heat the powder. The steerable beam doesn’t require mirrors either, which not only reduces the weight and complexity of the machine, but in theory should allow for faster print speeds. The beam can be moved in the X/Y dimensions with an accuracy of 0.01 mm, and while the beam diameter is currently a respectable 0.5 mm, Agustin says he’s working on bringing that down to 0.1 mm for high detail work. The temperature at the focal point of the beam is between 1,400 and 1,500 °C, which he notes is not only hot enough to melt the powdered metal, but can also weld stainless steel.

Continue reading “The Metal 3D Printing Hack Chat Brings The Heat”

Row of white 3D printed shoes in different styles

CAD Up Some Shoes, But Don’t Start From Scratch

Nothing helps a project get off the ground better than a good set of resources, and that’s what led [DaveMakesStuff] to release his Digital Shoe Design Kit, which is a set of 3D models ready to customize into a basic running shoe.

This is exactly what is needed for people who are interested in designing a custom shoe, but perhaps not interested in modeling every element entirely from scratch. [DaveMakesStuff]’s resources allows one to mix outsoles, midsoles, uppers, and other basic shoe elements into a finished model, ready to be resized or even 3D printed if desired. The files are all in stl format, but resizing stl files is trivial, and more advanced editing is possible with mesh sculpting programs like Blender.

If the gears in your head are starting to turn and you are wondering whether it is feasible to 3D scan your feet for some experiments in DIY custom footwear, take a few minutes and read up on 3D scanning and what to expect from the process to hit the ground running.

3D Printed Shoes Make Bigfoot Tracks

[Stephan Henrich] is probably going to set off a wave of bigfoot sightings if his new shoe, the Cryptide sneaker takes off. The shoe is completely 3D printed in flexible TPE using a laser sintering printer from Sintratec. The shoe takes a name from cryptozoology and, in fact, would leave a puzzling footprint due to its articulated toes and scaly-looking sole.

Judging from the look of the sole, it should be pretty cushy and we presume if you were 3D printing these, you’d scan or precisely measure the intended foot for a perfect fit. You can see a video about the shoe below.

Continue reading “3D Printed Shoes Make Bigfoot Tracks”

3D Printed Climbing Holds, Now With Texture

Technology enables all kinds of possibilities to mold our environments in the way we best see fit. Plenty of ski resorts use snowmaking to extend their seasons, there are wave pools for surfing hundreds of miles away from oceans, and if you don’t live near any mountains you can build your own climbing wall as well. For the latter, many have turned to 3D printers to create more rock-like climbing grips but plastic doesn’t tend to behave the same as rock unless you do what [Giles Barton-Owen] did and incorporate salt into the prints.

For small manufacturers, typically the way that the rock texture is mimicked is by somehow incorporating sand, permanently, into the grip itself. This works well enough but is often too rough on climbers’ hands or otherwise doesn’t faithfully replicate a rock climbing experience. For these grips, instead of including sand, salt crystals of a particular size were added to a resin that was formed over the 3D printed grip. Once the resin cures substantially, the water-soluble salt can be washed away leaving a perfect texture to grab onto with chalked hands.

While this might not be a scalable method for large-scale climbing grip manufacturers, [Giles] hopes this method will help smaller operations or even DIY climbers to build more realistic grips without having to break the bank. In fact, he has already found some success at his local climbing gym using these grips. The method may be more difficult to scale for larger manufacturers but for anyone who wants to try it out themselves, all that’s needed for this build is a 3D printer, salt, and time.

Continue reading “3D Printed Climbing Holds, Now With Texture”

Bend Your Vase Mode Prints By Hacking The GCode

[Stefan] from CNCKitchen wanted to make some bendy tubes for a window-mountable ball run, and rather than coming up with some bent tube models, it seemed there might be a different way to achieve the desired outcome. Starting with a simple tube model designed to be quickly printed in vase mode, he wrote a Python script which read in the G-Code, and modified it allow it to be bent along a spline path.

Vase mode works by slowly ramping up the Z-axis as the extruder follows the object outline, but the slicing process is still essentially the same, with the object sliced in a plane parallel to the bed. Whilst this non-planar method moves the Z-axis in sync with the horizontal motion (although currently limited to only one plane of distortion, which simplifies the maths a bit) it is we guess still technically a planar solution, but just an inclined plane. But we digress, non-planar in this context merely means not parallel to the bed, and we’ll roll with that.

[Stefan] explains that there are quite a few difficulties with this approach. The first issue is that on the inside of the bend, the material flow rate needed to be scaled back to compensate. But the main problem stems from the design of the extruder itself. Intended for operating parallel to the bed, there are often a few structures in the way of operating at an angle, such as fan mounts, and the hotend itself. By selecting an appropriate machine and tweaking it a bit, [Stefan] managed to get it to work at angles up to 30 degrees off the horizontal plane. One annoyance was that the stock nozzle shape of his E3D Volcano hotend didn’t lend itself to operating at such an inclination, so he needed to mount an older V6-style tip with an adapter. After a lot of tuning and fails, it did work and the final goal was achieved! If you want to try this for yourselves, the code for this can be found on the project GitHub.

If you want to learn more about non-planar printing, we’ve covered the process of non-planar slicing a while back, and if you think your 2.5D printer doesn’t quite have the range for really funky print paths, then you may want to look into a robot arm based printer instead.

Continue reading Bend Your Vase Mode Prints By Hacking The GCode”

Building A High-Capacity Linear Servo Actuator

Linear actuators are useful things, moving things in straight lines rather than annoying circles like so many motors. [Retsetman] recently built a linear servo actuator of his own design with accurate positional control.

The design relies on a carriage that moves along a threaded rod, perhaps the most rudimentary design of linear actuator. A large brushed DC motor is used to turn the threaded rod through a 3D-printed 9:1 herringbone geartrain, shifting the actuator back and forth. End stop switches are used to disengage the motor to avoid damage to the mechanism. Feedback is via a ten-turn potentiometer driven off the output geartrain to match the range of the actuator to the rotational range of the pot.

The final build has a stroke of approximately 100 mm, and can lift and hold a 15 kg weight with ease. In a pull test, the actuator failed at a load just shy of 100 kg. If you’re looking for something smaller, though, you can try building a linear actuator out of old DVD drive parts instead. Video after the break.

Continue reading “Building A High-Capacity Linear Servo Actuator”