Freeform ESP8266 Network Attached Data Display

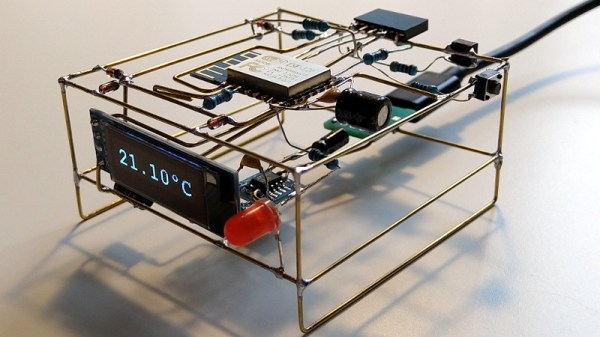
Like many of us, [Josef Adamčík] finds himself fascinated with so-called “freeform” electronic designs, where the three dimensional circuit makes up sections of the device’s structure. When well executed, such designs really blur the line between being a practical device and an artistic piece. In fact his latest design, an ESP8266 MQTT client, would seem to indicate there might not be much of a “line” at all.
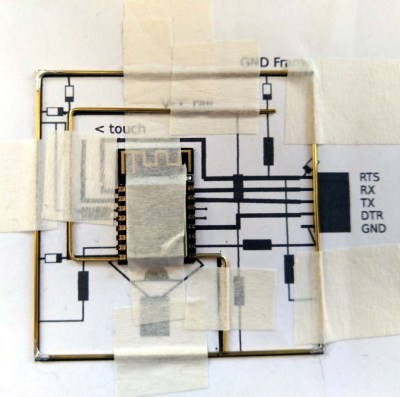
The inspiration for this project actually comes from something [Josef] had worked on previously: an ESP8266-based environmental monitoring system. That device had sensors to pick up on things such as humidity and ambient light level, but it didn’t have a display of its own; it just pushed the data out onto the network using MQTT. So he thought a companion device which could receive this environmental data and present it to him in a unique and visually appealing way would be a natural extension of the idea.

As the display doesn’t need any local sensors of its own, it made the design and construction much easier. Which is not to say it was easy, of course. In this write-up, [Josef] takes the reader through the process of designing each “layer” of the circuit in 2D, printing it out onto paper, and then using that as a guide to assemble the real thing. Once he had the individual panels done, he used some pieces of cardboard to create a three dimensional jig which helped him get it all soldered together.

On the software side it’s pretty straightforward. It just pulls the interesting bits of information off of the network and displays it on the OLED. Right now it’s configured to show current temperature on the display, but of course that could be changed to pretty much anything you could imagine if you’re looking to add a similar device to your desktop. There’s also a red LED on the device which lights up to let [Josef] know when the batteries are getting low on the remote sensor unit; a particularly nice touch.

If you’d like to see more of these freeform circuits, we’d advise you to checkout the finalists for our recently concluded “Circuit Sculpture” contest. Some of the finalists are truly beyond belief.

A Sonoff Switch Repurposed As A Thermostat

Underfloor heating is a wonderfully luxurious touch for a bedroom and en-suite bathroom, and [Andy] had it fitted so that he could experience the joy of walking on a toasty-warm floor in the morning. Unfortunately after about a year it stopped working and the culprit proved to be its thermostat. A replacement was eye-wateringly expensive, so he produced his own using an ESP8266-powered Sonoff wireless switch.

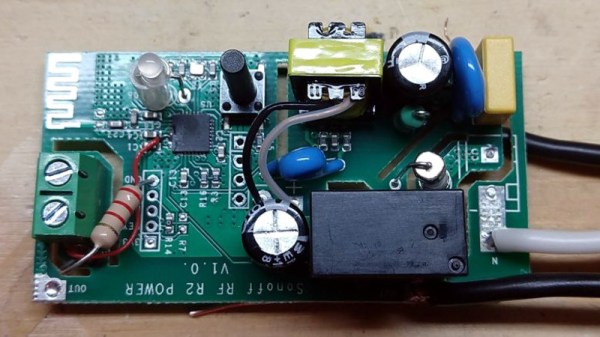
The thermostat has a thermistor as its temperature sensor, embedded in the floor itself. This could be brought to the ESP’s solitary ADC pin, but not without a few challenges along the way. The Sonoff doesn’t expose the pin, so some very fine soldering was the first requirement. A simple voltage divider allowed the pin to be fed, but through it he made the unfortunate discovery that the ESP’s analogue input has a surprisingly low voltage range. A new divider tying it to ground solved the problem, and he was good to go.

Rather than using an off-the-shelf firmware he created his own, and with a bit of board hacking he was able to hard wire the mains cabling and use one set of Sonoff terminals as a sensor connector. The whole fit neatly inside an electrical fitting box, so he’s back once more to toasty-warm feet.

This isn’t the first ESP thermostat we’ve featured, nor will it be the last. Here’s a particularly nice build from 2017.

A DIY Sprinkler Controller Using An ESP8266

There is something strangely amusing about the idea of a sprinkler system relying on a cloud. But it was this limitation in some commercial offerings that led [Zack Lalanne] to create his own controller when it was time to upgrade his aging irrigator.

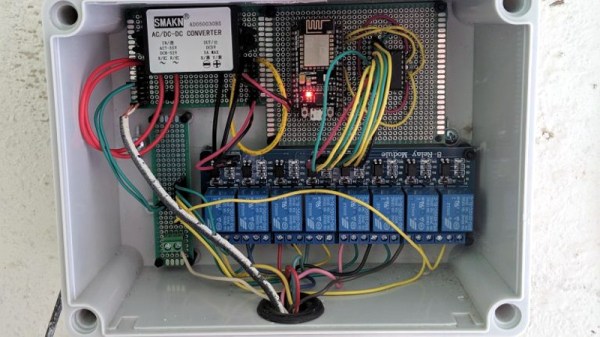
It’s a straightforward enough device, he’s taken an ESP8266 on the ubiquitous NodeMCU board, and added a shift register for some output line expansion to drive a set of relays. The interest here lies with the software, in which he’s used the ESPHome firmware and added his own custom part for the shift register. This change alone should be useful for many other experimenters with the ‘8266 and ESPHome combination.

The ESP8266 end of the device ties in with his instance of the Home Assistant home automation hub software. On this he’s been able to tie in all his various sprinkler outputs he added, and apply whatever automation scripts he chooses. The result is a freshly watered lawn, with not a cloud in the sky (or backend).

The value of this project lies only partly in its use for sprinkler owners, for us it also lies in the clear write-up showing the way for others with similar home automation tasks. It’s not the only way to make an ESP sprinkler controller, you should also see this one from 2017.

Better Debating Through Electronics

Watch any news panel show these days, and you’ll see that things can very quickly become unruly. Guests compete for airtime by shouting over one another and attempting to derail their opponent’s talking points. [cutajar.sacha] had encountered this very problem in the workplace, and set about creating a solution.

The result is the Debatable Deliberator, and it combines the basics of “Talking Stick” practices with behavioural training through humiliation. Two participants each wear a headband, fitted with electronics. The holder of the magic ball may speak for as long as the timer counts down. If their opponent speaks during this time, their headband reprimands them with gentle slapping to the face. If the holder speaks over their assigned time, they are similarly treated to mechanical slapping.

It’s an amusing way to help police a discussion between two parties, and it’s all made possible with a trio of WeMos D1 ESP8266 boards. The headbands act as clients, while the ball acts as a server and keeps track of how many times each speaker has broken the rules.

WiFi projects such as this one have become much easier in the past few years with the wide availability of chips like the ESP8266. Of course, if you need more grunt, you can always upgrade to the ESP32.

Continue reading “Better Debating Through Electronics”

Web Interface Controls Nixie Tube Clock

We love our clocks around here and we love nixie tubes as well. The combination of the two almost seems to be a no-brainer. With the modern twist of an ESP8266, Reddit user [vladco] built a minimalist nixie tube clock.

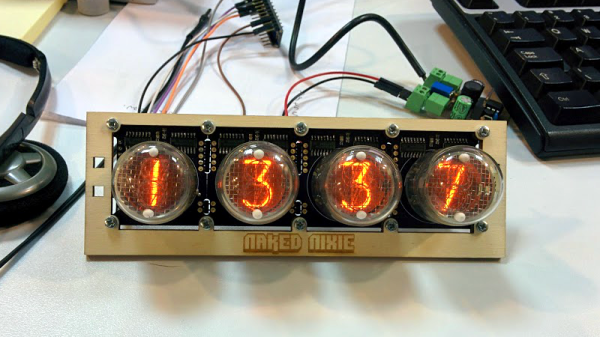
The build starts with the nixie tubes, Russian In4s, each one mounted on its own small circuit board. Each board is chained together and they’re mounted on a wooden frame. The frame is mounted inside a nice wooden case which was designed in Fusion 360 and milled out of oak at a local hackerspace.

There are no controls on the case. No buttons or knobs. This clock is set via the EPS8266 which gets the time and updates the shift registers that set the numbers on each of the tubes. The clock dims at night so it’s not as bright. [vladco] wrote a web UI to set the time and interact with the  tubes.

The code and files for the case and circuit board are available online. The result is a nice, minimalist clock for your desk. There are plenty of clock builds on the site, several built from nixie tubes, including another nixie tube clock with an ESP8266, and another.

via Reddit

How-To: Mapping Server Hits With ESP8266 And WS2812

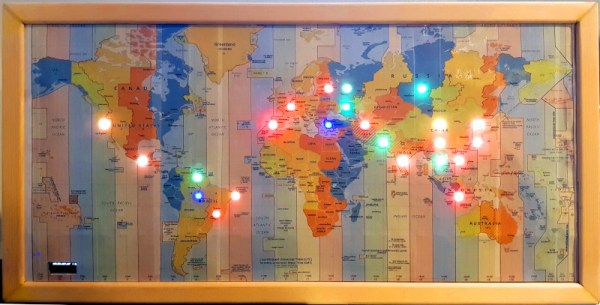
It has never been easier to build displays for custom data visualization than it is right now. I just finished one for my office — as a security researcher I wanted a physical map that will show me from where on the planet my server is being attacked. But the same fabrication techniques, hardware, and network resources can be put to work for just about any other purpose. If you’re new to hardware, this is an easy to follow guide. If you’re new to server-side code, maybe you’ll find it equally interesting.

I used an ESP8266 module with a small 128×32 pixel OLED display connected via an SSD1306 controller. The map itself doesn’t have to be very accurate, roughly knowing the country would suffice, as it was more a decorative piece than a functional one. It’s a good excuse to put the 5 meter WS2812B LED strip I had on the shelf to use.

The project itself can be roughly divided into 3 parts:

  1. Physical and hardware build
  2. ESP8266 firmware
  3. Server-side code

It’s a relatively simple build that one can do over a weekend. It mashes together LED strips, ESP8266 wifi, OLED displays, server-side code, python, geoip location, scapy, and so on… you know, fun stuff.

Continue reading “How-To: Mapping Server Hits With ESP8266 And WS2812”

Hack My House: UL Certification And Turning The Lights On With An ESP8266

It’s hard to imagine a smart house without smart lighting. Maybe it’s laziness, but the ability to turn a light on or off without walking over to the switch is a must-have, particularly once the lap is occupied by a sleeping infant. It’s tempting to just stuff a relay in the electrical boxes and control them with a Raspberry Pi or micro-controller GPIO. While tempting, get it wrong and you have a real fire hazard. A better option is one of the integrated WiFi switches. Sonoff is probably the most well known brand, producing a whole line of devices based on the ESP8266. These devices are powered from mains power and connect to your network via WiFi. One disadvantage of Sonoff devices is they only work when connected to Sonoff’s cloud.

Light switches locked in to a cloud provider are simply not acceptable. Enter Tasmota, which we’ve covered before. Tasmota is an open source firmware, designed specifically for Sonoff switches, but supporting a wide range of ESP8266 based devices. Tasmota doesn’t connect to any cloud providers unless you tell it to, and can be completely controlled from within a local network.

Certifications, Liability, and More

We’re well acquainted with some of the pitfalls of imported electronics, but one of the lesser known problems is the lack of certification. In the United States, there are several nationally recognized testing laboratories: Underwriters Laboratories (UL) and Intertek (ETL) are the most prominent. Many  imported electronic devices, including Sonoff devices, do not have either of these certifications. The problem with this is liability, should the worst ever happen and an electrical fire break out. The Internet abounds with various opinions on the importance of the certification — a missing certification mark is somewhere between meaningless and a total hazard. The most common claim is that a house fire combined with non-certified equipment installed would result in an insurance company refusing to pay.

Rather than just repeat this surely sage advice from the Internet, I asked my insurance agent about uncertified equipment in the case of a fire. I discovered that insurance agencies avoid giving definite answers about claim payments. The response that came back was “it depends”: homeowner’s insurance covers events that are accidental and sudden. If a homeowner was aware that they were using uncertified equipment, then it could be categorized as “not an accident”. So far, the myth seems plausible. The final answer from the insurance agency: it’s possible that a non UL-certified device could result in denial of payment on a claim, but it depends on the policy and other details– why take the risk? Certification marks make insurance companies happier.

I also talked to my city’s electrical inspector about the issue. He commented that non-certified equipment is a violation of electrical code when it is hard-wired into a house. He echoed the warning that an insurance company could refuse to pay, but added that in the case of injury, there could be even further liability issues. I’ve opted to use certified equipment in my house. You’ll have to make your own decision about what equipment you’re willing to use.

There are some devices on Amazon that claim to have certification, but searching the certification database leads me to believe that not all of those claims are valid. If in doubt, there is a searchable UL database, as well as a searchable Intertek database.
Continue reading “Hack My House: UL Certification And Turning The Lights On With An ESP8266”