Need A Thousand Extra PWM Pins?

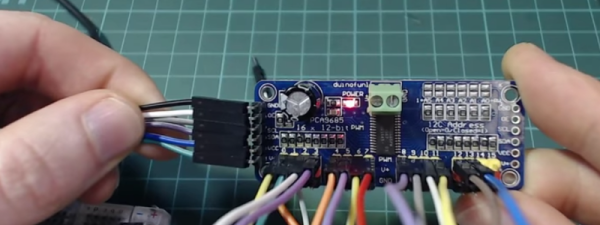
If your Arduino runs out of I/O lines, you can always add one of the several I/O expander chips that takes a serial interface to set its several pins. Or perhaps you could buy something like an Arduino Mega, with its extra sockets to fulfil your needs. But what would you do if you really needed more pins, say a thousand of them? Perhaps [Brian Lough] has the answer. OK, full disclosure: If you really need a thousand, the video isn’t exactly for you, as he shows you how to add up to 992 PWM outputs. The chip he uses works with any microcontroller (the video shows an ESP8266), and we suppose you could use two daisy chains of them and break the 1,000 barrier handily.

We like how short the video is (just two minutes; see below) as it gets right to the point. The PCA9685 chip gives you 16 12-bit PWM channels via an I2C interface. You can daisy chain up to 62 of the boards to get the 992 outputs promised.

Continue reading “Need A Thousand Extra PWM Pins?”

Kniwwelino Is An ESP8266 Micro:Bit

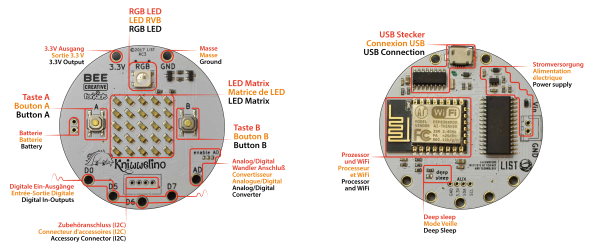
Kniwwelino is the latest in a line of micro:bit-inspired projects that we’ve seen, but this one comes with a twist: it uses an ESP8266 and WiFi at the core instead of the nR51 ARM/BTLE chip. That means that students can connect via laptop, cellphone, or anything else that can get onto a network.

That’s not the only tradeoff, though. In order to get the price down, the Kniwwelino drops the accelerometer/magnetometer of the micro:bit for a programmable RGB LED. With fewer pins to break out, the Kniwwelino is able to ditch the love-it-or-hate-it card-edge connector of the micro:bit as well. In fact, with all these changes, it’s hard to call this a micro:bit clone at all — it’s more like a super-blinky ESP8266 development kit.
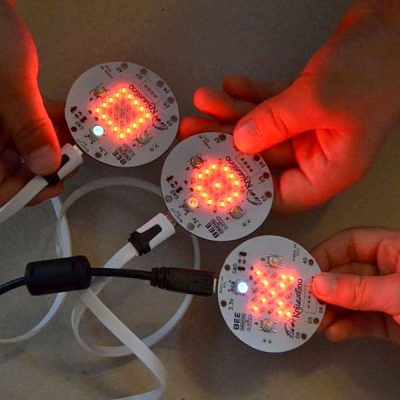
So what have they got left in common? The iconic 5×5 LED matrix in the center, and a Blockly visual programming dialect dedicated to the device. Based on the ESP8266, the Kniwwelino naturally also has an Arduino dialect that students can “graduate” to when they’re tired of moving around colored blobs, and of course you could flash the chip with anything else that runs on an ESP8266.

We don’t have one in our hands, but we like the idea. An RGB LED is a lot of fun on Day One, and the fact that the Kniwwelino fits so neatly into existing bodies of code makes the transition from novice to intermediate programmer a lot easier. These things are personal preference, but WiFi beats Bluetooth LE in our book, for sheer ubiquity and interoperability. Finally, the Kniwwelino comes in at about half the manufacturing cost of a micro:bit, which makes it viable in schools without large manufacturer subsidies. They’re estimating $5 per unit. (Retail is higher.) On the other hand, the Kniwwelino is going to use more juice than its ARM-based competitor, and doesn’t have an accelerometer.

Kniwwelino is apparently derived from a luxembourgish word “kniwweln” that apparently means to craft something. The German Calliope Mini is named after Zeus’ daughter, the programmer’s muse. We’re stoked to see so many cute dev boards getting into the hands of students, no matter what you call them.

Persistence Of Phosphorescence Clock Displays YouTube Stats Too

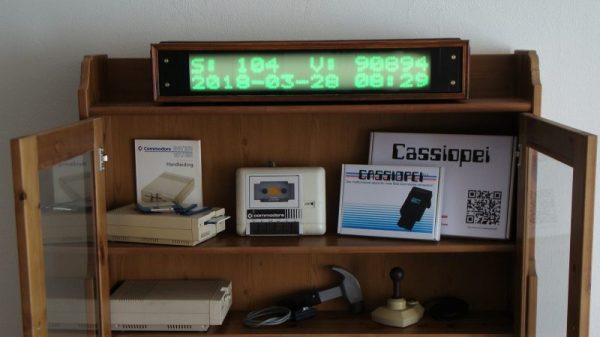
Looking for an eye-catching and unique way to display the time and date? Want the flexibility to add other critical information, like the number of YouTube subs you’ve got? Care to be able to read it from half a block away, at least at night? Then this scrolling glow-in-the-dark dot-matrix display could be right up your alley.

Building on his previous Morse code transcriber using a similar display, [Jan Derogee] took the concept and went big. The idea is to cover a PVC pipe with phosphorescent tape and rotate it past a row of 100 UV LEDs. The LEDs are turned on as the glow-in-the-dark surface passes over them, charging up a row of spots. The display is built up to two rows of 16 characters by the time it rotates into view, and the effect seems to last for quite a while. An ESP8266 takes care of driving the display and fetching NTP time and YouTube stats.

We’ve seen “persistence of phosphorescence” clocks before, but not as good looking and legible as this one. We like the approach, and we can’t help but think of other uses for glow-in-the-dark displays.

Continue reading “Persistence Of Phosphorescence Clock Displays YouTube Stats Too”

Assess Your Output With A Cheap DIY Urine Flowmeter

Some things about the human body are trivial to measure. Height, weight, blood pressure, pulse, temperature — these are all easily quantifiable with the simplest of instruments and can provide valuable insights into our state of health. Electrical activity in the heart and the brain can be captured with more complex instruments, too, and all manner of scopes can be inserted into various orifices to obtain actionable information about what’s going on.

But what about, err, going? Urine flow can be an important leading indicator for a host of diseases and conditions, but it generally relies on subjective reports from the patient. Is there a way to objectively measure how well urine is flowing? Of course there is.

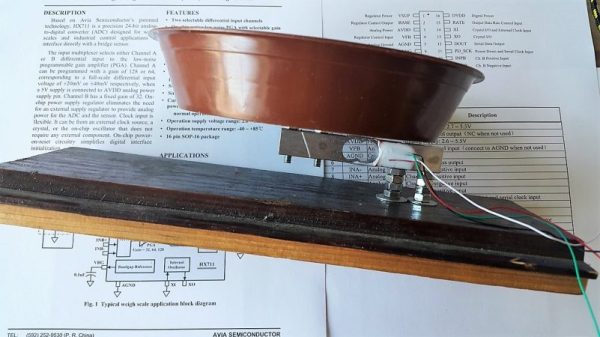
The goal for [GreenEyedExplorer]’s simple uroflowmeter is simple: provide a cheap, easy to use instrument that any patient can use to quantify the rate of urine flow while voiding. Now, we know what you’re thinking — isn’t liquid flow usually measured in a closed system with a paddlewheel or something extending into the stream? Wouldn’t such a device for urine flow either be invasive or messy, or both? Rest assured, this technique is simple and tidy. A small load cell is attached to an ESP8266 through an HX711 load cell amp. A small pan on the load cell receives urine while voiding, and the force of the urine striking the pan is assessed by the software. Reports can be printed to share with your doctor, and records are kept to see how flow changes over time.

All kidding aside, this could be an important diagnostic tool, and at 10€ to build, it empowers anyone to take charge of their health. And since [GreenEyedExplorer] is actually a urologist, we’re taking this one seriously.

Continue reading “Assess Your Output With A Cheap DIY Urine Flowmeter”

Simple Decoder Serves As Solo Ham’s Test Buddy

For a hobby that’s ostensibly all about reaching out to touch someone, ham radio can often be a lonely activity. Lots of hams build and experiment with radio gear much more than they’re actually on the air, improving their equipment iteratively. The build-test-tweak-repeat cycle can get a little tedious, though, especially when you’re trying to assess signal strength and range and can’t find anyone to give you a report.

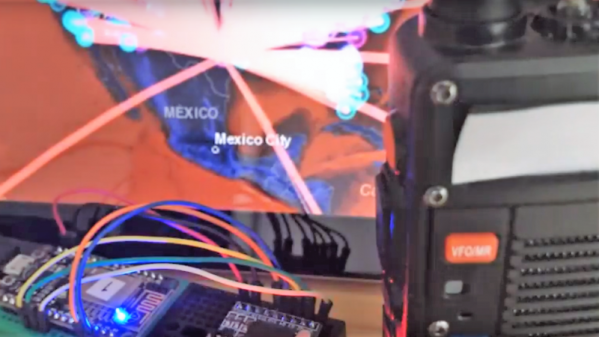
To close the loop on field testing, [WhiskeyTangoHotel] threw together a simple ham radio field confirmation unit that’s pretty slick. It relies on the fact that almost every ham radio designed for field use incorporates a DTMF encoder in the microphone or in the transceiver itself. Hams have used Touch Tones for in-band signaling control of their repeaters for decades, and even as newer digital control methods have been introduced, good old analog DTMF hangs in there. The device consists of a DTMF decoder attached to the headphone jack of a cheap handy talkie. When a DTMF tone is received, a NodeMCU connected to the decoder calls an IFTTT job to echo the key to [WTH]’s phone as an SMS message. That makes it easy to drive around and test whether his mobile rig is getting out. And since the receiver side is so portable, there’s a lot of flexibility in how tests can be arranged.

On the fence about ham as a hobby? We don’t blame you. But fun projects like this are the perfect excuse to go get licensed and start experimenting.

Continue reading “Simple Decoder Serves As Solo Ham’s Test Buddy”

Dumb Down Your Xiaomi Smart Lamp With A Custom Firmware

Undoubtedly, the ESP8266’s biggest selling point is its WiFi capability for a ridiculously low price. Paranoid folks probably await the day its closed-source firmware bits will turn against humanity in a giant botnet, but until then, hobbyists and commercial vendors alike will proceed putting them in their IoT projects and devices. One of those devices is the Yeelight desk lamp that lets you set its color temperature and brightness via mobile app.

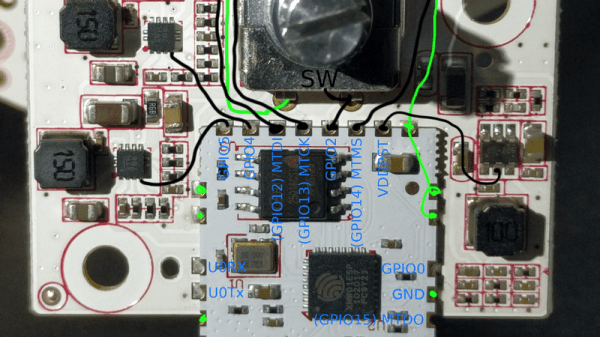
[fvollmer] acquired such a lamp, and while he appreciated its design and general concept, he wasn’t happy that it communicates with external servers. So he did the only reasonable thing and wrote his own firmware that resembles the original functionality, but leaves out the WiFi part. After all, the ESP8266 has still a lot to offer in its core essence: a full-blown 32-bit microcontroller with support for the most common, hobbyist-friendly SDKs.

The lamp’s color temperature and brightness are set with a rotary encoder / push button combo switch, and the LEDs themselves are controlled via PWM. All things considered, it’s a rather straightforward endeavour, for which [fvollmer] chose the standalone C SDK. And in the end, it’s not like he’s unreasonably cautious to keep some control over his household items.

Evolution Of The ESP8266 Party Button

Sometimes the best part of building something is getting to rebuild it again a little farther down the line. Don’t tell anyone, but sometimes when we start a project we don’t even know where the end is going to be. It’s a starting point, not an end destination. Who wants to do something once when you could do it twice? Maybe even three times for good measure?

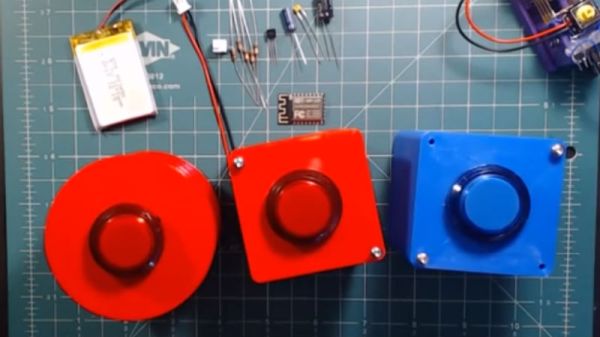
Original version of the Party Button

That’s what happened when [Ryan] decided to build a wireless “party button” for his kids. Tied into his Home Assistant automation system, a smack of the button plays music throughout the house and starts changing the colors on his Philips Hue lights. His initial version worked well enough, but in the video after the break, he walks through the evolution of this one-off gadget into a general purpose IoT interface he can use for other projects.

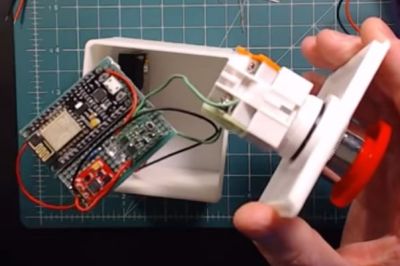
The general idea is pretty simple, the big physical button on the top of the device resets the internal ESP8266, which is programmed to connect to his home WiFi and send a signal to his MQTT server. In the earlier versions of the button there was quite a bit of support electronics to handle converting the momentary action of the button to a “hard” power control for the ESP8266. But as the design progressed, [Ryan] realized he could put the ESP8266 to deep sleep after it sends the signal, and just use the switch to trigger a reset on the chip.

Additional improvements in the newer version of the button include switching from alkaline AA batteries to a rechargeable lithium-ion pack, and even switching over to a bare ESP8266 rather than the NodeMCU development board he was using for the first iteration.

For another take on MQTT home automation with the ESP8266, check out this automatic garage door control system. If the idea of triggering a party at the push of a button has your imagination going, we’ve seen some elaborate versions of that idea as well.

Continue reading “Evolution Of The ESP8266 Party Button”