Google Sheet showing wins and losses of sports team. Data automated by IFTTT, Alexa, and Particle

An Overly Complicated Method Of Tracking Your Favorite Sports Team

Much of the world appears to revolve around sports, and sports tracking is a pretty big business. So how do people keep up with their favorite team? Well, [Jackson] and [Mourad] decided to devise a custom IoT solution.

Their system is a bit convoluted, so bear with us. First, they tell Alexa whether or not the team won or lost that week. Alexa then sends that information to IFTTT where two different Particle Argon boards are constantly polling the results to decide how to respond next. One Particle responds by lighting up an LED, green for a win and red for a loss. Another Particle board displays the results on an LCD screen. But this is where things get tricky. One of the more confusing aspects of their design is one of the Particle boards then signals back to IFTTT, telling it to tally the number of wins and losses. This seems a bit roundabout since the system started with IFTTT in the first place. Regardless, they seemed to be happy with the result and I’m sure they learned something in the process.

This project might not fulfill any functional need given that Alexa knows everything about all our lives already and you could just ask her how your favorite team is doing whenever you want to. But hey, we’re all about learning by doing here at Hackaday and we’re all guilty of building useless projects here and there just because we can. In any case, their project could serve as a good intro to integrating your Particle with IFTTT or Alexa since there appears to be quite a bit of probably unnecessary handshaking going on here.

Continue reading “An Overly Complicated Method Of Tracking Your Favorite Sports Team”

Wall of video games

Consoles, Consoles On The Wall, Can Alexa Help Me Play Them All?

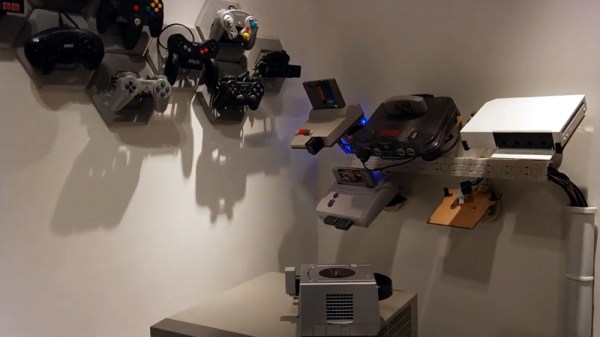
If you’ve got a collection of classic game consoles, finding the space to set them all up can be a challenge. But the bigger problem is figuring out how to hook them all up to a TV that, at best, might only have two or three inputs. [odelot] recently wrote in to tell us how he solved both problems with his voice-controlled wall of gaming history.

To mount the systems to the wall, [odelot] designed and printed angled brackets that attach to specially shaped pieces of 3 mm MDF. They do a pretty good job of holding the systems at a visually interesting angle while making themselves scarce, with only the notoriously slick-bottomed Wii needing some extra clips on the front to keep it from sliding off. He also printed up a series of blocks and pipes, no doubt a reference to Mario Bros., to hold the power and video cables for each system.

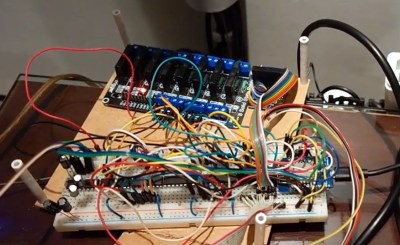
Prototype version of electronics on breadboardAs to connecting them all up to his TV, [odelot] picked up an eight-device Extron VGA switch that features a serial port for remote control. After getting all the systems adapted over to the appropriate video standard, he then wired an ESP8266 to the switch and wrote some code that ties it into Amazon’s Alexa voice assistant.

By just saying the name of the system he wants to play, the microcontroller will flick the switch over to the appropriate input and turn on a ring of blue LEDs under the appropriate shelf to signify which console has been selected. There’s even an array of solid state relays that will eventually control the mains power going to each system, though [odelot] hasn’t fully implemented it yet. Currently the electronics for this project live on a fairly packed breadboard, but it looks like he’s in the early stages of designing a proper PCB to clean it all up.

Not content to simply control a commercial A/V switch? In the past we’ve seen truly dedicated console collectors design their own custom switches from the ground up, complete with a display to show the currently selected system’s logo.

Continue reading “Consoles, Consoles On The Wall, Can Alexa Help Me Play Them All?”

Alexa, Bring Me A Beer!

Voice controlled home assistants are the wonder of our age, once you’ve made peace with the privacy concerns of sharing the intimacies of your life with a data centre owned by a massive corporation, anyway. They provide a taste of how the future was supposed to be in those optimistic predictions of decades past: Alexa and Siri can crack jokes, control your lights, answer questions, tell you the news, and so much more.

But for all their electronic conversational perfection, your electronic pals can’t satisfy your most fundamental needs and bring you a beer. This is something [luisengineering] has fixed, an he’s provided the appropriate answer to the question “Alexa: bring mir ein bier!“. The video which we’ve also put below the break is in German with YouTube’s automatic closed captions if you want them, but we think you’ll be able to get the point of it if not all his jokes without needing to learn to speak a bit of Deutsch.

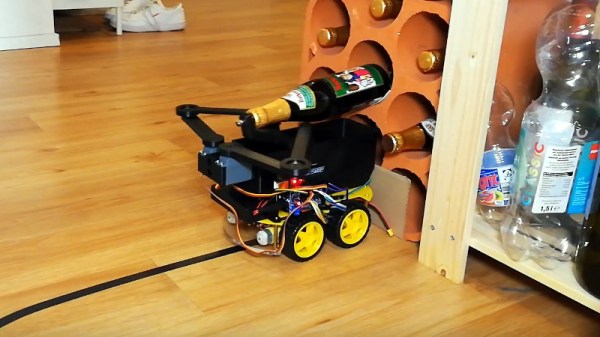
As he develops his beer-delivery system we begin to appreciate that what might seem to be a relatively straightforward task is anything but. He takes an off-the-shelf robot and gives it a beer-bottle grabber and ice hopper, but the path from fridge to sofa still needs a little work. The eventual solution involves a lot of trial and error, and a black line on the floor for the ‘bot to follow. Finally, his electronic friend can bring him a beer!

We like [Luis]’s entertaining presentational style, and the use of props as microphone stands. We’ll be keeping an eye out for what he does next, and you should too. Meanwhile it may not surprise you that this is not the first beer-delivery ‘bot we’ve brought you.

Continue reading “Alexa, Bring Me A Beer!”

Speech Recognition On An Arduino Nano?

Like most of us, [Peter] had a bit of extra time on his hands during quarantine and decided to take a look back at speech recognition technology in the 1970s. Quickly, he started thinking to himself, “Hmm…I wonder if I could do this with an Arduino Nano?” We’ve all probably had similar thoughts, but [Peter] really put his theory to the test.

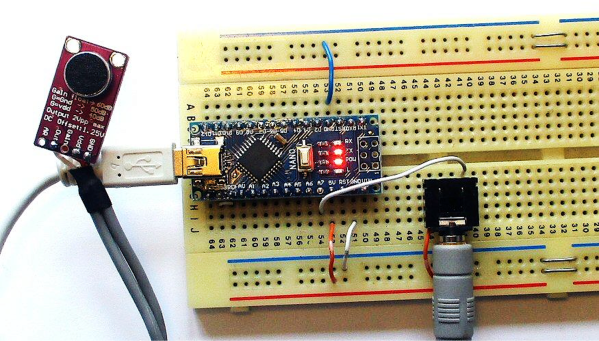
The hardware itself is pretty straightforward. There is an Arduino Nano to run the speech recognition algorithm and a MAX9814 microphone amplifier to capture the voice commands. However, the beauty of [Peter’s] approach, lies in his software implementation. [Peter] has a bit of an interplay between a custom PC program he wrote and the Arduino Nano. The learning aspect of his algorithm is done on a PC, but the implementation is done in real-time on the Arduino Nano, a typical approach for really any machine learning algorithm deployed on a microcontroller. To capture sample audio commands, or utterances, [Peter] first had to optimize the Nano’s ADC so he could get sufficient sample rates for speech processing. Doing a bit of low-level programming, he achieved a sample rate of 9ksps, which is plenty fast for audio processing.
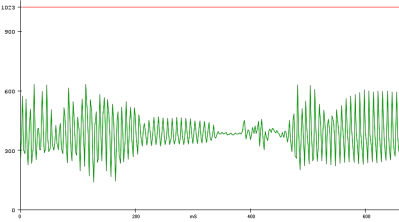
To analyze the utterances, he first divided each sample utterance into 50 ms segments. Think of dividing a single spoken word into its different syllables. Like analyzing the “se-” in “seven” separate from the “-ven.” 50 ms might be too long or too short to capture each syllable cleanly, but hopefully, that gives you a good mental picture of what [Peter’s] program is doing. He then calculated the energy of 5 different frequency bands, for every segment of every utterance. Normally that’s done using a Fourier transform, but the Nano doesn’t have enough processing power to compute the Fourier transform in real-time, so Peter tried a different approach. Instead, he implemented 5 sets of digital bandpass filters, allowing him to more easily compute the energy of the signal in each frequency band.

The energy of each frequency band for every segment is then sent to a PC where a custom-written program creates “templates” based on the sample utterances he generates. The crux of his algorithm is comparing how closely the energy of each frequency band for each utterance (and for each segment) is to the template. The PC program produces a .h file that can be compiled directly on the Nano. He uses the example of being able to recognize the numbers 0-9, but you could change those commands to “start” or “stop,” for example, if you would like to.

[Peter] admits that you can’t implement the type of speech recognition on an Arduino Nano that we’ve come to expect from those covert listening devices, but he mentions small, hands-free devices like a head-mounted multimeter could benefit from a single word or single phrase voice command. And maybe it could put your mind at ease knowing everything you say isn’t immediately getting beamed into the cloud and given to our AI overlords. Or maybe we’re all starting to get used to this. Whatever your position is on the current state of AI, hopefully, you’ve gained some inspiration for your next project.

“Alexa, Stop Listening To Me Or I’ll Cut Your Ears Off”

Since we’ve started inviting them into our homes, many of us have began casting a wary eye at our smart speakers. What exactly are they doing with the constant stream of audio we generate, some of it coming from the most intimate and private of moments? Sure, the big companies behind these devices claim they’re being good, but do any of us actually buy that?

It seems like the most prudent path is to not have one of these devices, but they are pretty useful tools. So this hardware mute switch for an Amazon Echo represents a middle ground between digital Luddism and ignoring the possible privacy risks of smart speakers.  Yes, these devices all have software options for disabling their microphone arrays, but as [Andrew Peters] relates it, his concern is mainly to thwart exotic attacks on smart speakers, some of which, like laser-induced photoacoustic attacks, we’ve previously discussed. And for that job, only a hardware-level disconnect of the microphones will do.

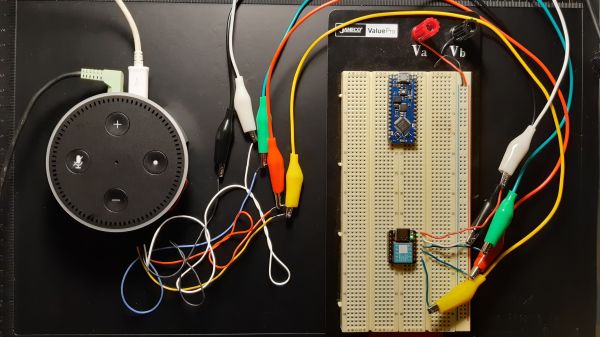
To achieve this, [Andrew] embedded a Seeeduino Xiao inside his Echo Dot Gen 2. The tiny microcontroller grounds the common I²S data line shared by the seven (!) microphones in the smart speaker, effective disabling them. Enabling and disabling the mics is done via the existing Dot keys, with feedback provided by tones sent through the Dot speaker. It’s a really slick mod, and the amount of documentation [Andrew] did while researching this is impressive. The video below and the accompanying GitHub repo should prove invaluable to other smart speaker hackers.

Continue reading ““Alexa, Stop Listening To Me Or I’ll Cut Your Ears Off””

On-Air Sign Helps Keep Your Broadcasts G-Rated

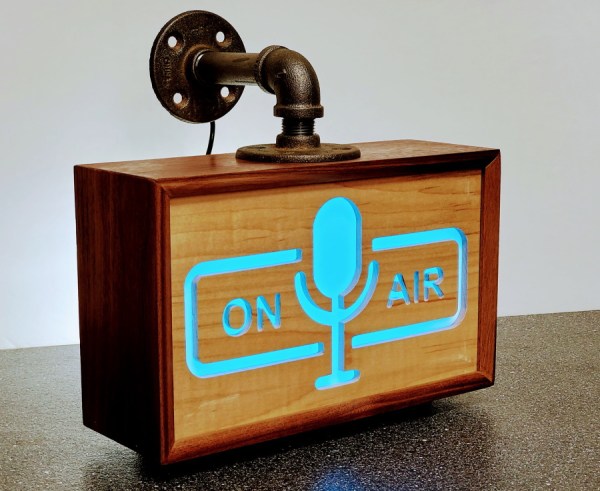
Like many of us, [Michael] needed a way to let the family know whether pants are required to enter the room — in other words, whenever a videoconference is in progress. Sure he could hang a do not disturb sign, but those are easy to forget. There’s no need to worry about forgetting to change status because this beautiful wall-mounted sign can be controlled with Alexa.

Inside the gorgeous box made from walnut, curly maple, and oak is an ESP32, some RGB LEDs, and three MOSFETs. [Michael] is using the fauxmoESP library to interface the ESP32 with Alexa, which emulates a Phillips Hue bulb for the sake of using a protocol she already knows. [Michael] can change the color and brightness percentage with voice commands.

The sign is set up as four different devices — one default, and one for each color. Since talking to Alexa isn’t always appropriate, [Michael] can also change the color of the LEDs using sliders on a website that’s served up by the ESP. Check out the full build video after the break.

Need something quick and dirty that works just as well? Our own [Bob Baddeley] made a status indicator that’s simple and effective.

Continue reading “On-Air Sign Helps Keep Your Broadcasts G-Rated”

Automating Your Car With A Spare Fob And An ESP8266

Despite the name, home automation doesn’t have to be limited to only the devices within your home. Bringing your car into the mix can open up some very interesting possibilities, such as automatically getting it warmed up in the morning if the outside air temperature drops below a certain point. The only problem is, not everyone is willing to start hacking their ride’s wiring to do it.

Which is exactly why [Matt Frost] went the non-invasive route. By wiring up an ESP8266 to a cheap aftermarket key fob for his Chevrolet Suburban, he’s now able to wirelessly control the door locks and start the engine without having to make any modifications to the vehicle. He was lucky that the Chevy allowed him to program his own fob, but even if you have to spend the money on getting a new remote from the dealer, it’s sure to be cheaper than the repair bill should you cook something under the dash with an errant splice or a misplaced line of code.

The hardware for this project is about as simple as it gets. The fob is powered by the 3.3 V pin on the Wemos D1 Mini, and the traces for the buttons have been hooked up to the GPIO pins. By putting both boards into a custom 3D printed enclosure, [Matt] came up with a tidy little box that he could mount in his garage and run off of a standard USB power supply.

On the software side of things [Matt] has the device emulating a smart light so it can easily be controlled by his Alexa, with a few helpful routines sprinkled in that allow him to avoid the awkward phraseology that would be required otherwise. There’s also a minimal web server running on the microcontroller that lets him trigger various actions just by hitting the appropriate URLs, which made connecting it to Home Assistant a snap. One downside of this approach is that there’s no acknowledgement from the vehicle that the command was actually received, but you can always send a command multiple times to be sure.

This isn’t the first time we’ve seen an ESP8266 used to “push” buttons on a remote. If you’ve got a spare fob for your device, or can get one, it’s an excellent way to automate it on the cheap.