Keeping track of your 3D-printer filament use can be both eye-opening and depressing. Knowing exactly how much material goes into a project can help you make build-versus-buy decisions, but it can also prove gut-wrenching when you see how much you just spent on that failed print. Stock filament counters aren’t always very accurate, but you can roll your own filament counter from an old mouse.
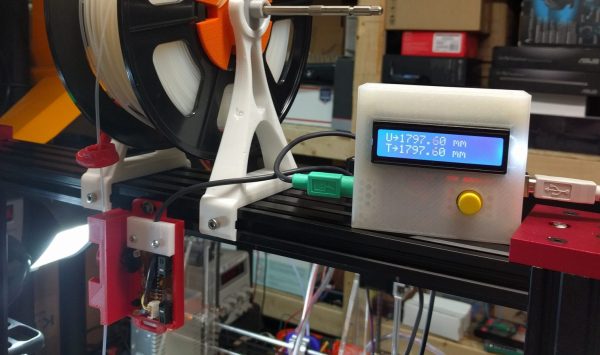
[Bin Sun]’s build is based around an old ball-type PS/2 mouse, the kind with the nice optical encoders. Mice of this vintage are getting harder to come by these days, but chances are you’ve got one lying around in a junk bin or can scrounge one up from a thrift store. Stripped down to its guts and held in place by a 3D-printed bracket, the roller that used to sense ball rotation bears on the filament on its way to the extruder. An Arduino keeps track of the pulses and totalizes the amount of filament used; the counter handily subtracts from the totals when the filament is retracted.
Simple, useful, and cheap — the very definition of a hack. And even if you don’t have a 3D-printer to keep track of, harvesting encoders from old mice is a nice trick to file away for a rainy day. Or you might prefer to just build your own encoders for your next project.
Continue reading “This Old Mouse Keeps Track Of Filament Usage”