Turning Broken Toy Into Laser Target Practice

[Mathieu] wrote in with his laser target practice game. It’s not the most amazing hack in the history of hackery, but it’s an excellent example of the type of simple and fun things you can do with just a little bit of microcontrollering.
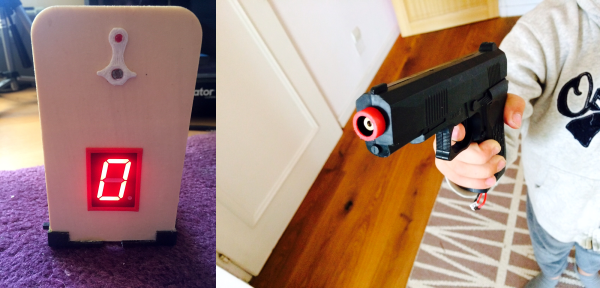
Flasergun8
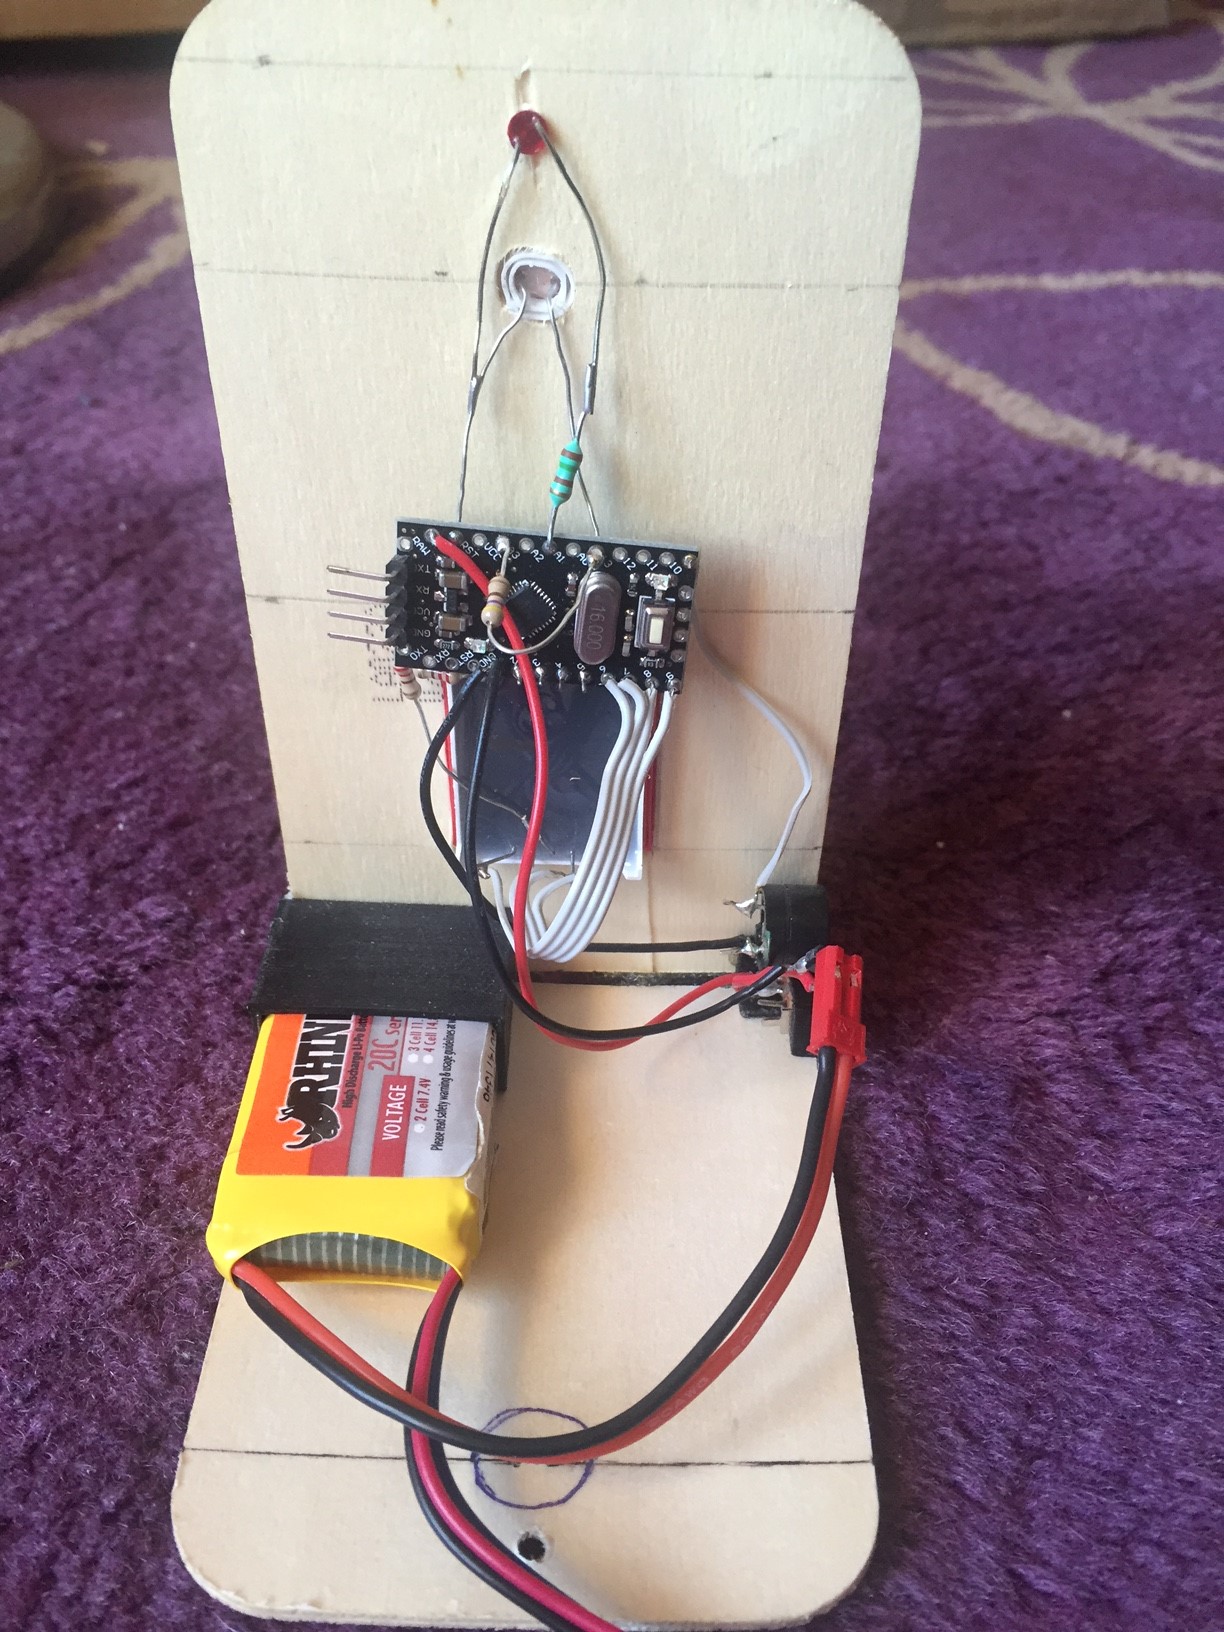
irst off, the gun is a broken toy gun that used to shoot something other than red collimated light beams. The Arduino knockoff inside reacts to a trigger pull and fires the laser for around 200 milliseconds. The gun also has a “gas gauge” that fills up with repeated shots and cools down over time. And therein lies the game — a simple race to ten, where each player only has a fixed number of shots over time.

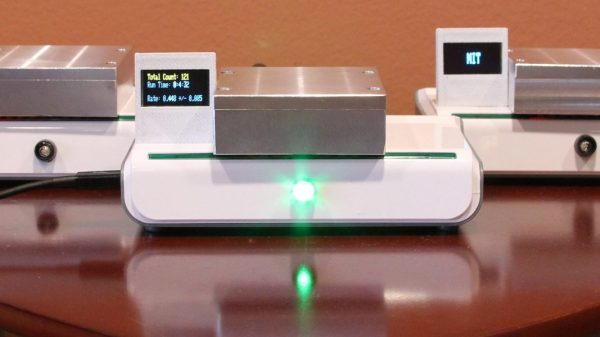
The targets are simply a light sensor, scorekeeping LED display, and a buzzer that builds tension by beeping at you as the countdown timer ticks down. The bodies are made out of 3D-printed corners that connect some of [Mathieu]’s excess wooden goat-cheese lids.

All the code is up on GitHub so you can make your own with stuff that you’ve got lying around the house. The “gun” can be anything that you can embed a laser in that makes it aimable. Good clean fun!

Rotating Frame Will Change Your View Of Vertical Images

[Tim] was tired of compromising his portrait-oriented digital photos by shoehorning them into landscape-only frames. Unable to find a commercial solution, he built his own rotating digital photo frame from a 27″ LCD TV.

It uses a Raspi 3 to find [Tim]’s pictures on a giant SD card. He originally wanted to have the Pi pull pictures from Google Photos and display them randomly, but the API doesn’t work in that direction. Instead, a Python script looks at the pictures on the SD card and determines whether each is landscape or portrait-oriented. If a picture was taken in portrait-mode, the display will rotate 90 degrees. Rotation is handled with an Arduino, a stepper motor, and some 3D-printed herringbone gears. The first version was a bit noisy, so [Tim] re-printed the motor mount and the pinion gear out of flexible filament.

[Tim] designed the mount and frame himself and laser-cut the pieces out of birch plywood. We like that he accounted for the front-heaviness and that he covered the high voltage circuitry with acrylic to mitigate the risk of shock. All the code and design files are available on his project page. Make the jump to see a brief demonstration followed by a walk-through and stay for the six-minute slide show.

Continue reading “Rotating Frame Will Change Your View Of Vertical Images”

It’s A Clock! It’s A Puzzle! It’s The GoonieBox!

[Dr.Duino] recently completed the latest piece of what he calls “Interactive Furniture” – the GoonieBox. It took over 800 hours of design and assembly work and the result is fascinating. Part clock and part puzzle box, it’s loaded with symbols, moving parts, lights, riddles, sounds, switches, and locked compartments. It practically begs visitors to take a closer look.

The concept of Interactive Furniture led [Dr.Duino] to want to create a unique piece of decor that visitors could interact with. That alone wasn’t enough — he wanted something that wouldn’t require any explanation of how it worked; something that intrinsically invited attention, inspection, and exploration. This quest led to creating The GoonieBox, named for its twin inspirations of the 1985 film The Goonies as well as puzzles from the game “The Room“.

Embedded below are two short videos: the first demonstrates the functions of the box, and the second covers the build process. There’s laser-cut wood, plenty of 3D printed parts, and a whole lot of careful planning and testing.

Continue reading “It’s A Clock! It’s A Puzzle! It’s The GoonieBox!”

Homemade E-Drums Hit All The Right Notes

In our eyes, there isn’t a much higher calling for Arduinos than using them to make musical instruments. [victorh88] has elevated them to rock star status with his homemade electronic drum kit.

The kit uses an Arduino Mega because of the number of inputs [victorh88] included. It’s not quite Neil Peart-level, but it does have a kick drum, a pair of rack toms, a floor tom, a snare, a crash, a ride, and a hi-hat. With the exception of the hi-hat, all the pieces in the kit use a piezo element to detect the hit and play the appropriate sample based on [Evan Kale]’s code, which was built to turn a Rock Band controller into a MIDI drum kit. The hi-hat uses an LDR embedded in a flip-flop to properly mimic the range of an actual acoustic hi-hat. This is a good idea that we have seen before.

[victorh88] made all the drums and pads out of MDF with four layers of pet screen sandwiched in between. In theory, this kit should be able to take anything he can throw at it, including YYZ. The crash and ride cymbals are MDF with a layer of EVA foam on top. This serves two purposes: it absorbs the shock from the sticks and mutes the sound of wood against wood. After that, it was just a matter of attaching everything to a standard e-drum frame using the existing interfaces. Watch [victorh88] beat a tattoo after the break.

If you hate Arduinos but are still reading for some reason, here’s a kit made with a Pi.

Continue reading “Homemade E-Drums Hit All The Right Notes”

Dirt Cheap Muon Detector Puts Particle Physics Within DIY Reach

Subatomic physics is pretty neat stuff, but not generally considered within the reach of the home-gamer. With cavernous labs filled with racks of expensive gears and miles-wide accelerators, playing with the subatomic menagerie has been firmly in the hands of the pros for pretty much as long as the field has been in existence. But that could change with this sub-$100 DIY muon detector.

[Spencer Axani] has been fiddling with the idea of a tiny muon detector since his undergrad days. Now as an MIT doctoral candidate, he’s making that dream a reality. Muons are particles that are similar to electrons but more massive and less likely to be affected by electromagnetic fields. Muons rain down on the Earth’s surface at the rate of 10,000 per square meter every minute after being created by cosmic rays interacting with the atmosphere and are capable of penetrating deep into the planet. [Spencer]’s detector is purposely kept as low-budget as possible, using cheap plastic scintillators and solid-state photomultipliers hooked up to an Arduino. The whole project is as much STEM outreach as it is a serious scientific effort; the online paper (PDF link) stresses the mechanical and electronics skills needed to complete the build. At the $100 price point, this build is well within the means of most high school STEM programs and allows for a large, distributed array of muon detectors that has the potential for some exciting science.

We’ve covered quite a few subatomic detection projects before, from the aforementioned large-scale builds to more modest efforts. But we like this project because it has the potential to inspire a lot of citizen scientists.

Thanks for the tip, [deralchemist]

Arcade Cabinet Build Takes Quarters, Dispenses Fun

Building an arcade cabinet seems to be a rite of passage for many hackers and woodworkers. Not that there is anything wrong with that: as this series of posts from [Alessandro] at boxedcnc shows, there is an art to doing it well.

His final build is impressive, with quality buttons, a genuine-looking banner, and even a coin slot so he can charge people to play. His build log covers both the carpentry and electronic aspects of the build, from cutting the panels to his own code for running the coin acceptor that takes your quarter (or, as he is in Italy, Euro coins) and triggers the game to play.

To extract money from his family, he used the Sparkfun COM-1719 coin acceptor, which can be programmed to send different pulses for different coins, connected to an Arduino which is also connected to the joystick and buttons. The Arduino emulates a USB keyboard and is connected to an old PC running MAME with the Attract Mode front end. It’s a quality build, down to the Bubble Bobble banner, and the coin slot means that it might even make some money back eventually.