LEDs Give HP 3457A DDM’s LCD Display The Boot

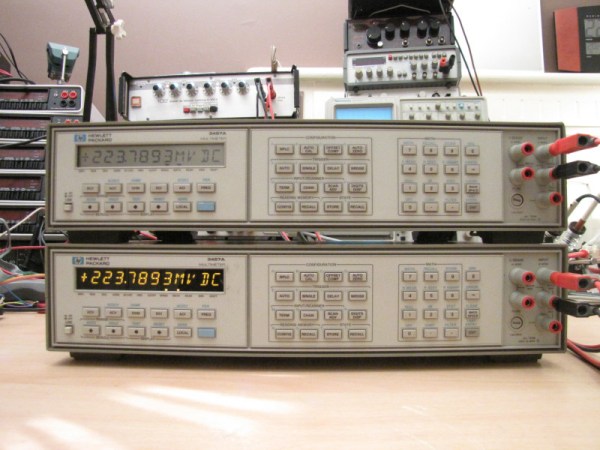
Have you ever been so frustrated with a digital display that you wanted to rip the whole thing out and create a better one? That is exactly what [xi] did. Replacing their constantly used HP 3457A multimeter’s LCD display with a brighter LED one was a necessary project — and a stress reducing one at that.

While this digital multimeter is well-known for its reliability, its standard display is rather lacking. In fact, there are several mods already out there that simply add a backlight. However, as [xi] notes, LCD screens always have a certain angle where they still don’t quite show properly. So this hack reverses the LCD’s protocol and details the process of creating new LED display.

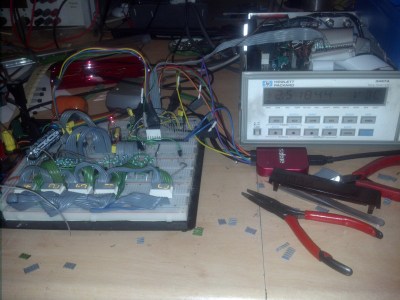
The issue of dim displays that comes with traditional digital multimeters is not a new one. One solution to this that we have seen before is a hack where someone decided to add a backlight onto their cheap multimeter. [Ken Kaarvik] got around the dimness altogether by giving his multimeter a wireless remote display of his choosing. It is interesting to see the different solutions that are made to the same nuisance. The first item on the agenda of [xi]’s hack was to successfully analyze the HP LCD protocol. With the aid of an ATmega32, the digits were decoded throughout the transmission frames.

Continue reading “LEDs Give HP 3457A DDM’s LCD Display The Boot”

Hackaday Prize Entry: Reflowduino, The Open Source Reflow Oven Controller

Face it — you want a reflow oven. Even the steadiest hands and best eyes only yield “meh” results with a manual iron on SMD boards, and forget about being able to scale up to production. But what controller should you use when you build your oven, and what features should it support? Don’t worry — you can have all the features with this open source reflow oven controller.

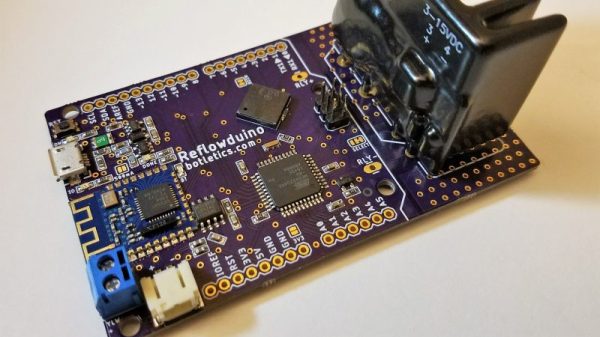
Dubbed the Reflowduino for obvious reasons, [Timothy Woo]’s Hackaday Prize entry has everything you need in a reflow oven controller, and a few things you never knew you needed. Based on an ATMega32, the Reflowduino takes care of the usual tasks of a reflow controller, namely running the PID loop needed to accurately control the oven’s temperature and control the heating profile. We thought the inclusion of a Bluetooth module was a bit strange at first, but [Timothy] explains that it’s a whole lot easier to implement the controller’s UI in software than in hardware, and it saves a bunch of IO on the microcontroller. The support for a LiPo battery is somewhat baffling, as the cases where this would be useful seem limited since the toaster oven or hot plate would still need a mains supply. But the sounder that plays Star Wars tunes when a cycle is over? That’s just for fun.

Hats off to [Timothy] for a first-rate build and excellent documentation, which delves into PID theory as well as giving detailed instructions for every step of the build. Want to try lower-end reflow? Pull out a halogen work light, or perhaps fire up that propane torch.

Reverse Engineering Unobtanium

font

If you listen to [Bil Herd] and the rest of the Commodore crew, you’ll quickly realize the folks behind Commodore were about 20 years ahead of their time, with their own chip foundries and vertical integration that would make the modern-day Apple jealous. One of the cool chips that came out of the MOS foundry was the 6500/1 – used in the keyboard controller of the Amiga and the 1520 printer/plotter. Basically a microcontroller with a 6502 core, the 6500/1 has seen a lot of talk when it comes to dumping the contents of the ROM, and thus all the code on the Amiga’s keyboard controller and the font for the 1520 plotter – there were ideas on how to get the contents of the ROM, but no one tried building a circuit.

[Jim Brain] looked over the discussions and recently gave it a try. He was completely successful, dumping the ROM of a 6500/1, and allowing for the preservation and analysis of the 1520 plotter, analysis of other devices controlled by a 6500/1, and the possibility of the creation of a drop-in replacement for the unobtanium 6500/1.

The datasheet for the 6500/1 has a few lines describing the test mode, where applying +10 VDC to the /RES line forces the machine to make memory fetches from the external pins. The only problem was, no body knew how to make this work. Ideas were thrown around, but it wasn’t until [Jim Brain] pulled an ATMega32 off the top of his parts bin did anyone create a working circuit.

The code for the AVR puts the 6500/1 into it’s test mode, loads a single memory location from ROM, stores the data in PORTA, where the AVR reads it and prints it out over a serial connection to a computer. Repeat for every location in the 6500/1 ROM, and you have a firmware dump. This is probably the first time this code has been seen in 20 years.

Now the race is on to create a drop-in replacement of what is basically a 6502-based microcontroller. That probably won’t be used for much outside of the classic and retro scene, but at least it would be a fun device to play around with.

Fubarino-Contest: 1980’s CD Player With MPD

fubarino-cd-shelf-player

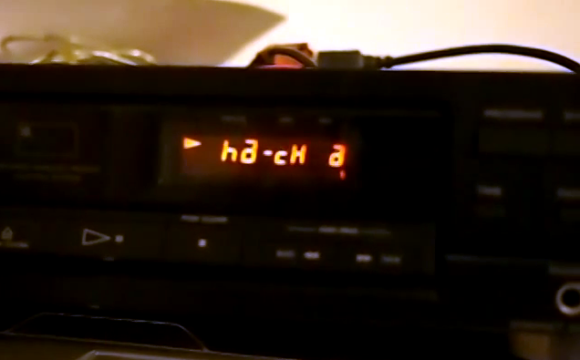
[Ronald] had to scramble to get his submission in, but we’re glad he did. His demo video shows the display of a 1980’s CD player working with Music Player Daemon. It’s really just the original display itself that works, but the project is not yet finished. However, is far enough along to show our URL when a track reaches the 22:00 mark.

The display is driven by an ATmega32 chip which uses a USB connection to receive commands from the computer running MPD. [Ronald] had troubles figuring out how to send int values over USB so he hacked his own protocol that just uses the LSB of each byte coming over the bus. After the break you can see the video, and read the description which he included with his submission. There is also a code package available here.


This is an entry in the Fubarino Contest for a chance at one of the 20 Fubarino SD boards which Microchip has put up as prizes!

Continue reading “Fubarino-Contest: 1980’s CD Player With MPD”

Another Take On The 6502 Computer

another-take-on-the-6502-computer

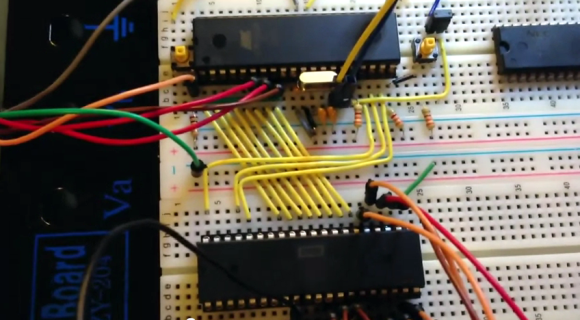
[Mark] is just starting off on his own 6502 computer odyssey. He was inspired by some of the other projects we’ve seen around here, like [Quinn Dunki’s] Veronica Project, but with a spin that leverages modern processors to alleviate some of the messy work. As you can see above, there’s an Atmel chip perched above the 65C02 processor. This chip not only feeds the processor data (through all those slightly diagonal yellow wires) but also provides the clock signal and operates the reset and bus enable lines.

This is more of a hello world post for [Mark]. The chip is simply running NOP commands right now. But it shows that the basic idea works, and the video after the break lets us see another time-saving aspect of the circuit. He’s using a character LCD to display memory location and data values. The plan is to get a blog going, which he’s hesitant to do as it takes valuable hacking time away from the project. We disagree. The write-up (although incredibly fun for us to read) ends up being a reference manual for him once the project starts to get really hairy.

Continue reading “Another Take On The 6502 Computer”

Tricking The BeagleBone Into Outputting Video

[FlorianH] wanted to get video out working with his BeagleBone but he just couldn’t figure out how to make the kernel play ball. Then a bit of inspiration struck. He knew that if you plug in the official DVI cape (that’s the BeagleBone word for what you may know as a shield) the kernel automatically starts pumping out the signals he needs. So he figured out a way to spoof the cape and output video.

At boot time the kernel polls the I2C bus to see what’s connected. The DVI cape has an EEPROM which identifies it. Since the data from the EEPROM is available for download [FlorianH] grabbed the data he needed, then used an ATmega32 to stand in for the memory chip. When he got the chip talking to the BeagleBone he was able to detect the video sync signals on his scope and he knew he was in business.

Look closely at the breadboard on the right. We love that SIL breakout board for the ATmega32. Very prototype friendly!

Playing Video On An 8-bit Microcontroller

The LCD displays for Nokia phones have seen a ton of use as easily interfaced displays for Arduino or other microcontroller projects. Usually, these LCDs are only used for displaying a few lines of text, or if someone is feeling really fancy, a small graph. Shame, then that we don’t see more complicated and computationally difficult tasks like playing video very often. [Vinod] sent us his way of playing video on these small color screens, surprisingly using only an ATMega32 microprocessor.

The build started off by saving uncompressed image data on an SD card using code from a previous project. [Vinod] was able to write a slideshow program to go through the SD card one file at a time and displaying each image. From there, it was simply a matter of using a Python script to convert frames of an .AVI video file to an uncompressed image and display them at 15 frames/second.

Turning these videos into talkies was a bit of a problem, but after taking an uncompressed .WAV file and sending that to a PWM pin on the ATMega, [Vinod] managed to play sound alongside his video.

The result is the ability to play a video with sound at 15 frames a second and a 132 x 65 resolution. You can check out the demo video after the break.

Continue reading “Playing Video On An 8-bit Microcontroller”