Battery technology is the talk of the town right now, as it’s the main bottleneck holding up progress on many facets of renewable energy. There are other technologies available for energy storage, though, and while they might seem like drop-in replacements for batteries they can have some peculiar behaviors. Supercapacitors, for example, have a completely different set of requirements for charging compared to batteries, and behave in peculiar ways compared to batteries.
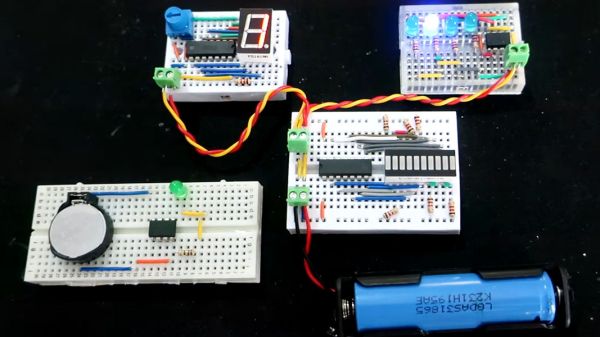
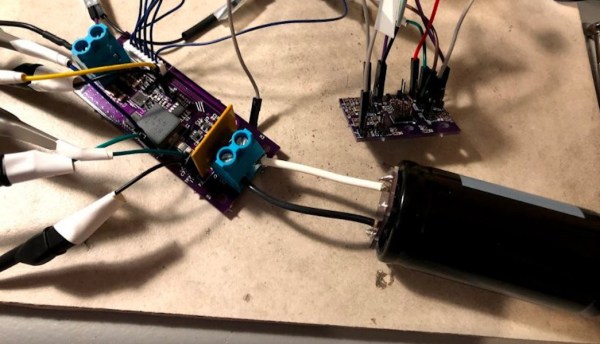
This project from [sciencedude1990] shows off some of the quirks of supercapacitors by showing one method of rapidly charging one. One of the most critical differences between batteries and supercapacitors is that supercapacitors’ charge state can be easily related to voltage, and they will discharge effectively all the way to zero volts without damage. This behavior has to be accounted for in the charging circuit. The charging circuit here uses an ATtiny13A and a MP18021 half-bridge gate driver to charge the capacitor, and also is programmed in a way that allows for three steps for charging the capacitor. This helps mitigate the its peculiar behavior compared to a battery, and also allows the 450 farad capacitor to charge from 0.7V to 2.8V in about three minutes.
If you haven’t used a supercapacitor like this in place of a lithium battery, it’s definitely worth trying out in some situations. Capacitors tolerate temperature extremes better than batteries, and provided you have good DC regulation can often provide power more reliably than batteries in some situations. You can also combine supercapacitors with batteries to get the benefits of both types of energy storage devices.