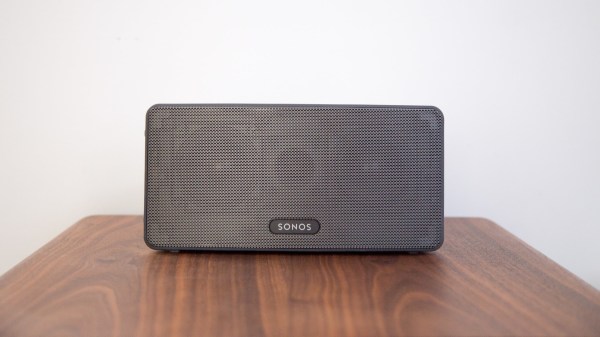
[Maurice-Michel Didelot] owns a Sonos smart speaker, and was lamenting the devices inability (or plain unwillingness) to stream music from online sources without using a subscription service. YouTube Music will work, but being a subscription product there is a monthly fee, which sucks since you can listen to plenty of content on YouTube for free. [Maurice] decided that the way forward was to dig into how the Sonos firmware accesses ‘web radio’ sources, and see if that could be leveraged to stream audio from YouTube via some kind of on-the-fly stream conversion process.
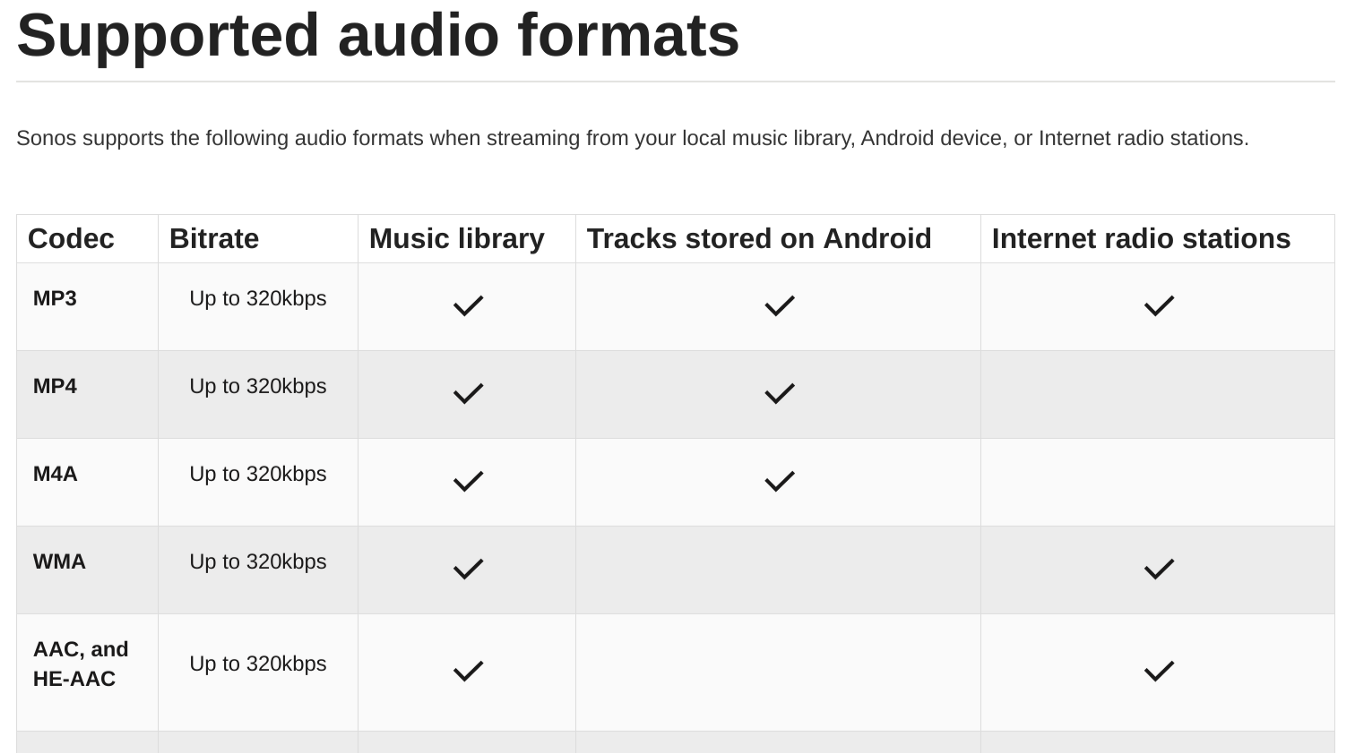
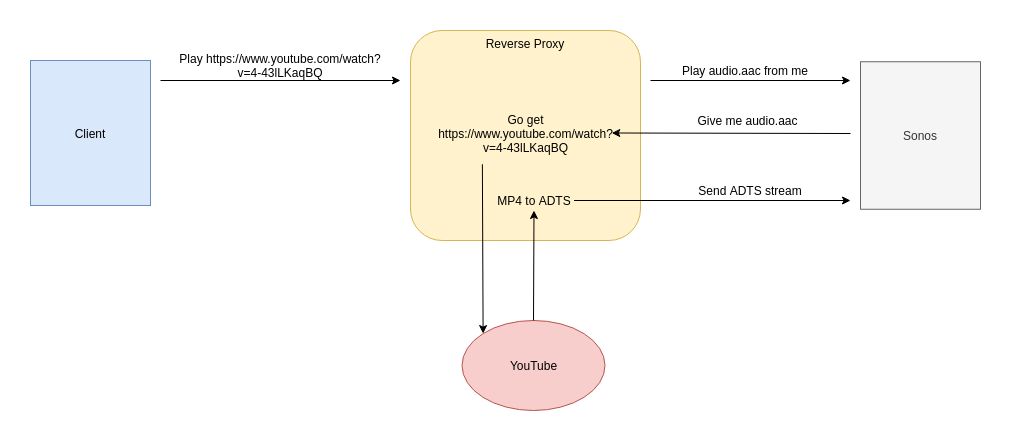
So let’s dig in to how [Maurice] chose to approach this. The smart speaker can be configured to add various streaming audio sources, and allows you add custom sources for those. The Sonos firmware supports a variety of audio codecs, besides MP3, but YouTube uses the MP4 format. Sonos won’t handle that from a web radio source, so what was there to do, but make a custom converter?
After a little digging, it was determined that Sonos supports AAC encoding (which is how MP4 encodes audio) but needs it wrapped in an ADTS (Audio Data Transport Stream) container. By building a reverse web-proxy application, in python using Flask, it was straightforward enough to grab the YouTube video ID from the web radio request, forward a request to YouTube using a modified version of pytube tweaked to not download the video, but stream it. Pytube enabled [Maurice] to extract the AAC audio ‘atoms’ from the MP4 container, and then wrap them up with ADTS and forward them onto the Sonos device, which happily thinks it’s just a plain old MP3 radio stream, even if it isn’t.
Sonos doesn’t have the best reputation, let’s say, but you can’t deny that there’s some pretty slick tech going on inside. Here’s a neat hack we covered last year, adding Sonos support to an old school speaker, and a nice teardown of a IKEA Sonos-compatible unit, which uses some neat design hacks.
Thanks [mip] for the tip!
Featured image by Charles Deluvio on Unsplash.

![The legendary Technics SL1200 direct-drive turntable, as used by countless DJs. Dydric [CC BY-SA 2.5)], via Wikimedia Commons.](https://hackaday.com/wp-content/uploads/2017/02/640px-technics_sl-1200mk2-2.jpg)