Print Wave Metal Casting

Direct 3D printing of metal remains out of reach for the hobbyist at the moment, so casting is often the next best thing, particularly given the limitations of 3D printed metals. [Denny] from Shake the Future shows us how to simplify the process with “print wave metal casting.”

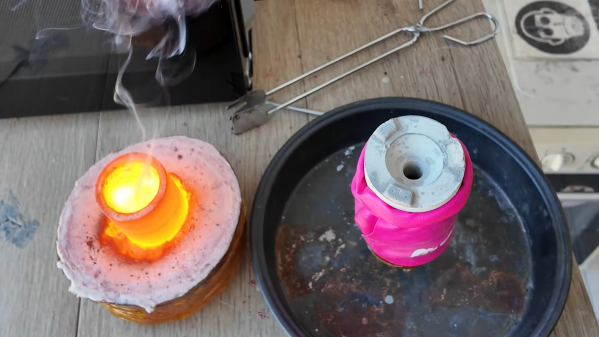
The first step of printing a PLA object will seem familiar to any 3D print to metal process, but the main differentiator here is pouring the investment casting on the printer build plate itself. We like how he used some G-code to shake the build plate to help remove bubbles. Once the plaster solidifies, the plastic and mold are placed in the microwave to soften the plastic for removal.

The plaster is dried in an oven (or air fryer) and then [Denny] bolts the mold together for the casting process. Adding a vacuum helps with the surface finish, but you can always polish the metal with a generous helping of elbow grease.

If [Denny] seems familiar, you might remember his very detailed breakdown of microwave casting. We’ve seen plenty of different approaches to metal casting over the years here. Need a part in another material? How about casting concrete or resin?

Thanks to [marble] on the Hackaday Discord for the tip!

Continue reading “Print Wave Metal Casting”

Old Knobs With A Cast Of Thousands

You have an old radio — in the case of [The Radio Mechanic], a Stromberg Carlson — and it needs new knobs. What do you do? You can’t very well pop down to the local store and find any knobs anymore. Even if you are lucky enough to be around an electronics store, they aren’t going to have knobs to do justice to an antique radio. You could 3D print them, of course, but there are a number of issues with transferring the old knob to a CAD file for printing. So [The Radio Mechanic] decided to cast them instead.

He printed some fixtures to help with the molding using two-part molding silicone. He mounted the knob on a shaft in a jig, filled the jig with silicone, and lowered the knob into the mix. The next day, he had a good-looking mold.

The next step, of course, is to cast with resin. Admittedly 3D printing would have been faster, but would not have as nice a surface finish. The epoxy resin is clear, but he was hopeful that some caramel pigment would match the original knob color. Spoiler alert: it didn’t. The resulting knob looked translucent, like a root beer barrel candy, rather than the brown sugar color of the original knob.

The knob needed a spring insert to hold the shaft, so he repurposed some from a different kind of radio. Overall, this is the kind of thing we always think we are going to do when we need something and then we rarely follow through. Then again, we rarely have the patience to wait as long as these two knobs took to make.

Of course, a casting guerrilla doesn’t have to make just knobs. You can even add metal powders to do cold metal casting.

Continue reading “Old Knobs With A Cast Of Thousands”

Lost Foam Casting In Action

Even though not all of us will do it, many of us are interested in the art of casting metal. It remains a process that’s not out of reach, though, especially for metals such as aluminium whose melting points are reachable with a gas flame. The video below the break takes us through the aluminium casting process by showing us the lost-foam casting of a cylinder head for a BSA Bantam motorcycle.

The foam pattern is CNC milled to shape, and the leftover foam swarf is removed with a hot wire. The pattern is coated with a refractory coating of gypsum slurry, and the whole is set up in a tub packed with sand. We get the impression that the escaping gasses make this a tricky pour without an extra sprue, and indeed, they rate it as not perfect. The cooling fins on the final head are a little ragged, so it won’t be the part that goes on a bike, but we can see with a bit of refining, this process could deliver very good results.

For this pour, they use a gas furnace, but we’ve seen it doneĀ with a microwave oven. Usually, you are losing wax, not foam, but the idea is the same.

Continue reading “Lost Foam Casting In Action”

How To Cast Silicone Bike Bits

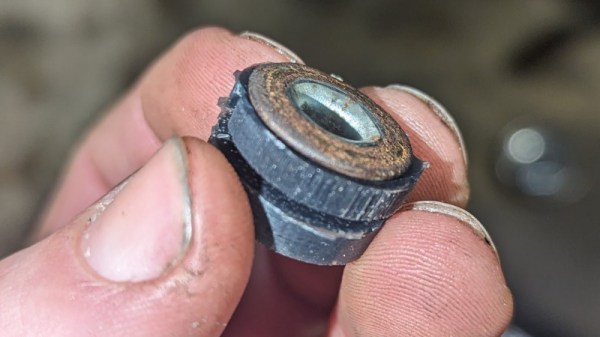
It’s a sad fact of owning older machinery, that no matter how much care is lavished upon your pride and joy, the inexorable march of time takes its toll upon some of the parts. [Jason Scatena] knows this only too well, he’s got a 1976 Honda CJ360 twin, and the rubber bushes that secure its side panels are perished. New ones are hard to come by at a sensible price, so he set about casting his own in silicone.

Naturally this story is of particular interest to owners of old motorcycles, but the techniques should be worth a read to anyone, as we see how he refined his 3D printed mold design and then how he used mica powder to give the clear silicone its black colour. The final buses certainly look the part especially when fitted to the bike frame, and we hope they’ll keep those Honda side panels in place for decades to come. Where this is being written there’s a CB400F in storage, for which we’ll have to remember this project when it’s time to reactivate it.

If fettling old bikes is your thing then we hope you’re in good company here, however we’re unsure that many of you will have restored the parts bin for an entire marque.

More Microwave Metal Casting

If you think you can’t do investment casting because you don’t have a safe place to melt metal, think again. Metal casting in the kitchen is possible, as demonstrated by this over-the-top bathroom hook repair using a microwave forge.

Now, just because it’s possible doesn’t mean it’s advisable. There are a lot better ways to fix something as mundane as a broken bathroom hook, as [Denny] readily admits in the video below. But he’s been at the whole kitchen forging thing since building his microwave oven forge, which uses a special but easily constructed ceramic heat chamber to hold a silicon carbide crucible. So casting a replacement hook from brass seemed like a nice exercise.

The casting process starts with a 3D-printed model of the missing peg, which gets accessories such as a pouring sprue and a thread-forming screw attached to it with cheese wax. This goes into a 3D-printed mold which is filled with a refractory investment mix of plaster and sand. The green mold is put in an air fryer to dry, then wrapped in aluminum foil to protect it while the PLA is baked out in the microwave. Scrap brass gets its turn in the microwave before being poured into the mold, which is sitting in [Denny]’s vacuum casting rig.

The whole thing is over in seconds, and the results are pretty impressive. The vacuum rig ensures metal fills the mold evenly without voids or gaps. The brass even fills in around the screw, leaving a perfect internal thread. A little polishing and the peg is ready for bathroom duty. Overly complicated? Perhaps, but [Denny] clearly benefits from the practice jobs like this offer, and the look is pretty cool too. Still, we’d probably want to do this in the garage rather than the kitchen.
Continue reading “More Microwave Metal Casting”

Retrotechtacular: The Master Hands Of The Early Automotive Industry

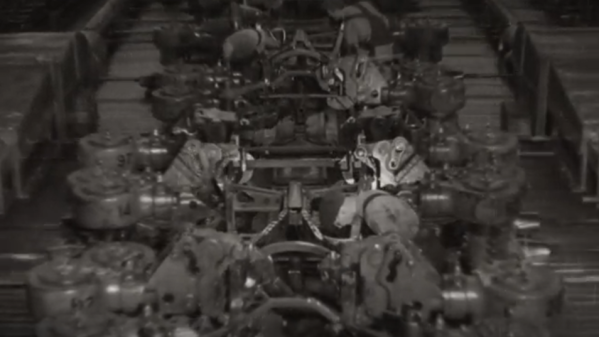
When motion pictures came along as a major medium in the 1920s or so, it didn’t take long for corporations to recognize their power and start producing promotional pieces. A lot of them are of the “march of progress” genre, featuring swarms of workers happy in their labors and creating the future with their bare hands. If we’re being honest, a lot of it is hard to watch, but “Master Hands,” which shows the creation of cars in the 1930s, is somehow more palatable, mostly because it’s mercifully free of the flowery narration that usually accompanies such flicks.

“Master Hands” was produced in 1936 and focuses on the incredibly labor-intensive process of turning out cars, which appear to be the Chevrolet Master Deluxe, likely the 1937 model year thanks to its independent front suspension. The film is set at General Motors’ Flint Assembly plant in Flint, Michigan, and shows the entire manufacturing process from start to finish. And by start, we mean start; the film begins with the meticulous work of master toolmakers creating the dies and molds needed for forging and casting every part of the car. The mold makers and foundrymen come next, lighting their massive furnaces and packing the countless sand molds needed for casting parts. Gigantic presses stamp out everything from wheels to frame rails to body panels, before everything comes together at the end of the line in a delicate ballet of steel and men.

Continue reading “Retrotechtacular: The Master Hands Of The Early Automotive Industry”

Making A Concrete Sign

While paging through the feed a few days ago our attention was caught by something a little away from the ordinary in Hackaday terms, a DIY video about creating cast concrete signage from [Proper DIY] which we’ve placed below the break. A deceptively easy-looking mould-making process has a few tricks thatĀ  will make the difference between a hard-wearing sign that lasts for years, and a lump of concrete.

So, to make a cast concrete sign, you throw together a mould with some letters, and chuck in some concrete? Not so fast, because the key appears to be preparation, and ensuring that there are no 90-degree corners on the mould parts. The letters are carefully shaped and sealed with varnish before being attached to the mould with silicone adhesive, and all the corners are beveled. Finally a light oil is used as a release agent, and hefty vibration takes care of any air bubbles.

The result is a set of signs, but we can see these techniques finding uses outside signage. For example, how about casting using a 3D printed mould?

Continue reading “Making A Concrete Sign”