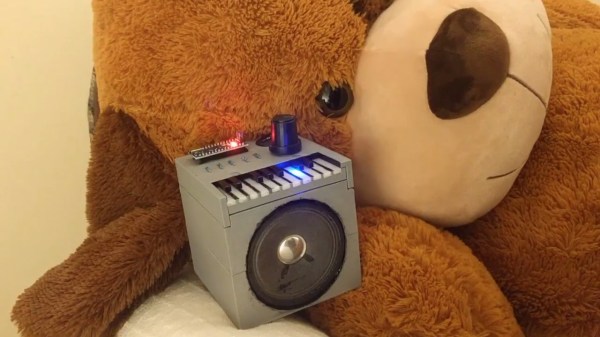
Childlike imagination is a wonderful thing. The ability to give life to inanimate objects and to pretend how they’re living their own life is precious, and not for nothing a successful story line in many movies. With the harsh facts or adulthood and reality coming for all of us eventually, it’s nice to see when some people never fully lose that as they get older. Even better when two find each other in life, like [er13k] and his girlfriend, who enjoy to joke about all the mischief their giant dog-shaped plush toy [Tobias] might secretly get into in their absence. The good thing about growing up on the other hand is the advanced technical opportunities at one’s disposal, which gave the imagined personality an actual face, and have it live inside an old CRT screen.
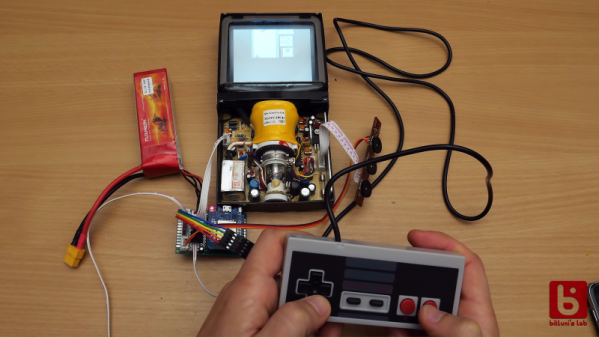
The initial idea was to just build a little music box as a gift, which beeps out [er13k]’s girlfriend’s favorite song with an Arduino on a speaker he salvaged from an old radio. But as things tend to go when you’re on a roll, he decided to make the gift even more personal. The result is still that music box, built in a 3D-printed case with a little piano that lights up the notes it plays, but in addition the Arduino now also displays a cartoon version of [Tobias] through composite video on an old TV. You can see for yourself in the video after the break how he goes through the day gifting flowers and drawings, and ponders about work and alternative career plans — adult problems are clearly universal.
Sure, the music box sound is a bit one-dimensional, but it’s nevertheless a highly thoughtful gift idea that triumphs with a peak personalization factor. If [er13k] ever wants to change the sound though, maybe there’s some inspiration in this drum machine we’ve seen just a few weeks ago, or this pocket sampler.
Continue reading “Arduino Music Box Turns Stuffed Animal Into TV Personality”


 The real treat here is [uli]’s