Likely Everything You Need To Know Before Adopting A Drill Press

Oh sure, the thought of owning a happy whirring drill press of your very own is exciting, but have you really thought about it? It’s a big responsibility to welcome any tool into the home, even seemingly simple ones like a drill press. Lubricants, spindle runout, chuck mounts, tramming, and more [Quinn Dunki], of no small fame, helps us understand what it needs for happy intergration into its new workshop.

[Quin] covers her own drill press adventure from the first moments it was borne into her garage from the back of a truck to its final installation. She chose one of the affordable models from Grizzly, a Washington based company that does minimal cursory quality control on import machinery before passing on the cost to the consumer.

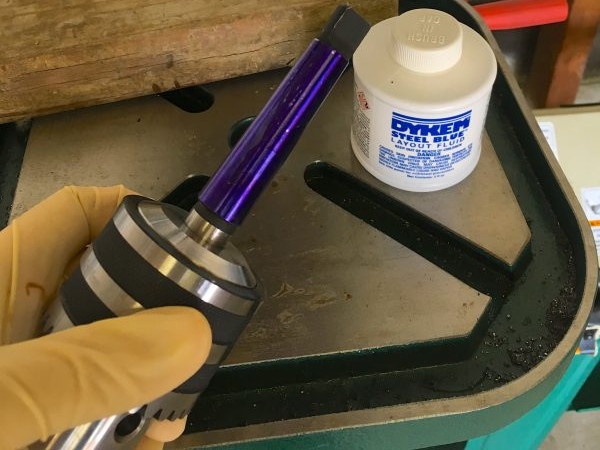
The first step after inspection and unpacking was to remove all the mysterious lubricants and protectants from the mill and replace them with quality alternatives. After the press is set-up she covers some problems that may be experience and their workarounds. For example, the Morse taper on the chuck had a few rough spots resulting in an incomplete fit. The chuck would work itself loose during heavier drilling operations. She works through the discovery and repair of this defect.

Full of useful tips like tramming the drill press and recommended maintenance, this is one of the best guides on this workshop staple that we’ve read.


[CNLohr]’s Glass PCB Fabrication Process

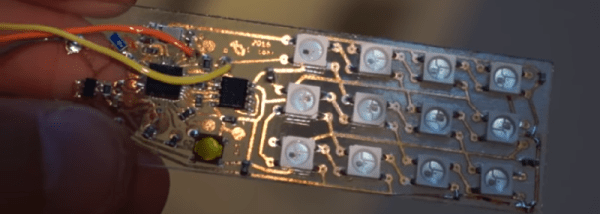
One of [CNLohr]’s bigger claims to fame is his process for making glass PCBs. They’re pretty much identical to regular, fiberglass-based PCBs, but [CNLohr] is building circuits on microscope slides. We’ve seen him build a glass PCB LED clock and a Linux Minecraft Ethernet thing, but until now, [CNLohr]’s process of building these glass PCBs hasn’t been covered in the depth required to duplicate these projects.

This last weekend, [CNLohr] put together a series of videos on how he turns tiny pieces of glass into functional circuits.

At the highest level of understanding, [CNLohr]’s glass PCBs really aren’t any different from traditional homebrew PCBs made on copper clad board. There’s a substrate, and a film of copper that is etched away to produce traces and circuits. The devil is in the details, and there are a lot of details for this build. Let’s dig deeper.

Continue reading “[CNLohr]’s Glass PCB Fabrication Process”

The Unity Of Dance And Architecture

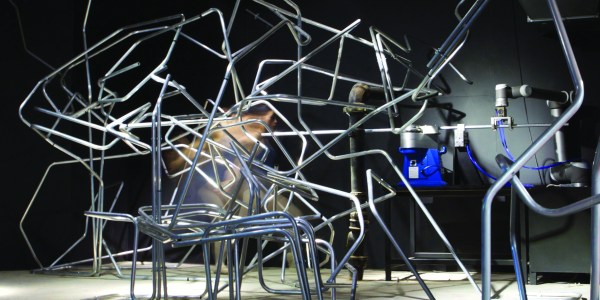
In an ambitious and ingenious blend of mechanical construction and the art of dance, [Syuko Kato] and [Vincent Huyghe] from The Bartlett School of Architecture’s Interactive Architecture Lab have designed a robotic system that creates structures from a dancer’s movements that they have christened Fabricating Performance.

A camera records the dancer’s movements, which are then analyzed and used to direct an industrial robot arm and an industrial CNC pipe bending machine to construct spatial artifacts. This creates a feedback loop — dance movements create architecture that becomes part of the performance which in turn interacts with the dancer. [Huyghe] suggests an ideal wherein an array of metal manipulating robots would be able to keep up with the movements of the performer and create a unique, fluid, and dynamic experience. This opens up some seriously cool concepts for performance art.

Continue reading “The Unity Of Dance And Architecture”

Simple Headphone Bracket Shows Off Carbon Fiber Basics

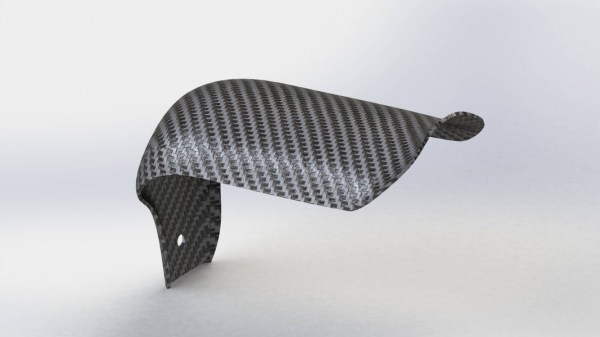
The carbon fiber look is a pretty hot design element for things these days. Even things that have no need for the strength and flexibility of carbon fiber, from phone cases to motorcycle fenders, are sporting that beautiful glossy black texture. Some of it only looks like the real stuff, though, so it’s refreshing to see actual carbon fiber used in a project, like this custom headphone rack.

True, this is one of those uses of carbon fiber that doesn’t really need it – it just looks cool. But more importantly, [quada03]’s build log takes us through the whole process, from design to mold construction to laying up the fiber mats and finishing, and shows us how specialized equipment is not needed to achieve a great result. A homemade CNC router carves the two-piece mold out of Styrofoam, which is then glued up and smoothed over with automotive body filler. The epoxy-soaked carbon fiber mats are layered into the mold with careful attention paid to the orientation of the fibers, and the mold goes into one of those clothes-packing vacuum bags for 24 hours of curing. A little trimming and sanding later and the finished bracket looks pretty snazzy.

We’ve discussed the basics of carbon fiber fabrication before, but what we like about [quada03]’s build is that it shows how approachable carbon fiber builds can be. Once you hone your skills, maybe you’ll be ready to tackle a carbon fiber violin.

[via r/DIY]

Most Beautiful Mini-Galaga-Pi Ever!

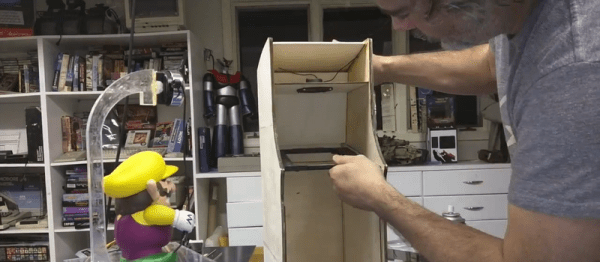
The problem with click-bait titles, besides the fact that they make the reader feel cheated and maybe a little bit dirty for reading the article, is that they leave us with nothing to say when something is truly outstanding. But the video of [Tiburcio de la Carcova] building up a mini-Galaga cabinet (complete with actual tiny CRT screen from an old portable 5″ TV) is actually the best we’ve ever seen.

Plywood is laser-cut. Custom 3D printed parts are manufactured and assembled, including the joysticks and coin door. Aluminum panels are cut on a bandsaw and bent with a hand brake. Parts are super-glued. In short, it’s a complete, sped-up video of the cutting-edge of modern DIY fab. If that’s not enough reason to spend four minutes of your time, we don’t know what is.

[Tiburcio] has also made a mini Space Invaders, and is thinking of completing the top-20 of his youth. Pacman, Asteroids, and Missile Command are next. We can’t wait.

There are (ahem) a couple of Raspberry-Pi-powered video game emulators on Hackaday, so it’s a little awkward to pick one or two to link in. We’ll leave you with this build that also uses a small CRT monitor to good effect albeit in less-fancy clothing.

Continue reading “Most Beautiful Mini-Galaga-Pi Ever!”

3D Objects From A Laser Cutter

Actors want to be singers and singers want to be actors. The hacker equivalent to this might be that 3D printers want to be laser cutters or CNC machines and laser cutters want to be 3D printers. When [Kurt] and [Lawrence] discovered their tech shop acquired a 120 Watt Epilog Fusion laser cutter, they started thinking if they could coax it into cutting out 3D shapes. That question led them to several experiments that were ultimately successful.

The idea was to cut away material, rotate the work piece, and cut some more in a similar way to how some laser cutters handle engraving cylindrical objects. Unlike 3D printing which is additive, this process is subtractive like a traditional machining process. The developers used wood as the base material. They wanted to use acrylic, but found that the cut away pieces tended to stick, so they continued using wood. However, the wood tends to char as it is cut.

In the end, they not only had to build special jigs and electronics, they also had to port some third party control software to solve some issues with the Epilog Fusion cutter’s built in software. The final refinement was to use the laser’s raster mode to draw surface detail on the part.

The results were better than you’d expect, and fairly distinctive looking. We’ve covered a similar process that made small chess pieces out of acrylic using two passes. This seems like a natural extension of the same idea. Of course, there are very complicated industrial machines that laser cut in three dimensions (see the video below), but they are not in the same category as the typical desktop cutter.

Continue reading “3D Objects From A Laser Cutter”

Valentine Heart

Animated LED Valentine Heart

With only a week left until Valentine’s day, [Henry] needed to think on his feet. He wanted to build something for his girlfriend but with limited time, he needed to work with what he had available. After scrounging up some parts and a bit of CAD work, he ended up with a nice animated LED Valentine heart.

[Henry] had a bunch of WS2812 LEDs left over from an older project. These surface mount LED’s are very cool. They come in a small form factor and include red, green, and blue LEDs all in a single package. On top of that, they have a built-in control circuit which makes each LED individually addressable. It’s similar to the LED strips we’ve seen in the past, only now the control circuit is built right into the LED.

Starting with the LEDs, [Henry] decided to build a large animated heart. Being a stickler for details, he worked out the perfect LED placement by beginning his design with three concentric heart shapes. The hearts were plotted in Excel and were then scaled until he ended up with something he liked. This final design showed where to place each LED.

The next step was to design the PCB in Altium Designer. [Henry’s] design is two-sided with large copper planes on either side. He opted to make good use of the extra copper surface by etching a custom design into the back with his girlfriend’s name. He included a space for the ATMega48 chip which would be running the animations. Finally, he sent the design off to a fab house and managed to get it back 48 hours later.

After soldering all of the components in place, [Henry] programmed up a few animations for the LEDs. He also built a custom frame to house the PCB. The frame includes a white screen that diffuses and softens the light from the LEDs. The final product looks great and is sure to win any geek’s heart. Continue reading “Animated LED Valentine Heart”