Escher: Etch-a-Sketch As A Service

For better or for worse, the tech world has fully committed to pushing as many of their products into “The Cloud” as possible. Of course, readers of Hackaday see right through the corporate buzzwords. It’s all just a fancy way of saying you have to poke some server over the Internet every time you want to use the service. In a way, [Matt Welsh] has perfectly demonstrated this concept with Escher. It’s a normal Etch-a-Sketch, but since somebody else owns it and you’ve got to have an active Internet connection to use it, that makes it an honorary citizen of the Cloud.

Escher takes the form of a 3D printed mount and replacement knobs for the classic drawing toy that allow two NEMA 17 steppers to stand in for human hands. Thanks to the clever design, [Matt] can easily pull the Etch-a-Sketch out and use it the old fashioned way, though admittedly the ergonomics of holding onto the geared knobs might take a little getting used to. But who wants to use their hands, anyway?
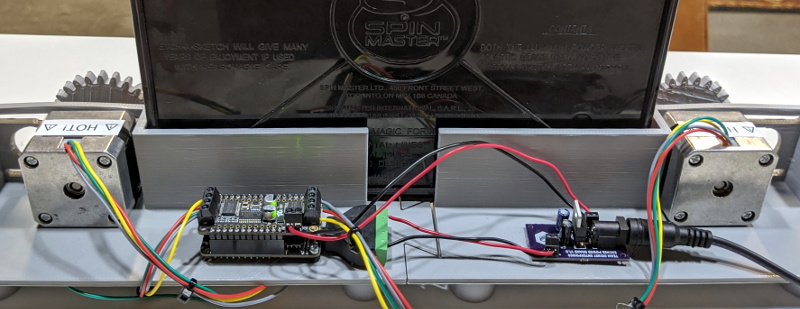
In terms of the electronics, the star of the show is the the Adafruit Feather HUZZAH32 development board, paired with a motor controller that can provide 12 V to the steppers. [Matt] even went through the trouble of making a custom voltage regulator PCB that steps down the stepper’s voltage to 5 V for the Feather. Totally unnecessary, just how we like it.

For the software folks in the audience, [Matt] goes into considerable detail about how he got his hardware talking to the web with Google Firebase. Even if the Internet of Sketches doesn’t quite tickle your fancy, we imagine his deep-dive on pushing G-Code files from the browser into the Feather will surely be of interest.

It probably will come as little surprise to hear this isn’t the first automatic Etch-a-Sketch that’s graced these pages over the years, but this might be the most fully realized version we’ve seen yet.

A STM32F4 Based Arduino In The Feather Form Factor

[minh7a6] loves the Adafruit Feather, but sees some room for improvement.

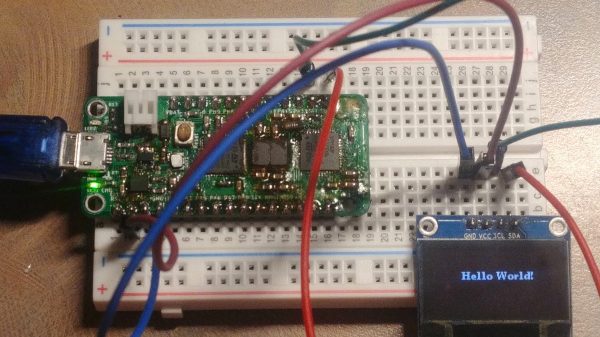
First is the matter of 5V tolerance. While just about everything is available in a 3.3v range these days, sometimes it’s just nice not to have to care. The main controller on the Feather is plenty powerful, but its intolerant pins just wouldn’t do so it was swapped for a chip from the ever popular STM32F4 line.

Then he wanted better energy efficiency when running from battery. In order to achieve this he switched from a linear regulator to a buck-boost converter. He also felt that the need for a separate SWD adapter for debugging seemed unnecessary, so he built a Black Magic Probe right in.

He’s just now finishing up the Arduino IDE support for the board, which is pretty cool. There’s no intention to produce this souped up Feather, but all the files are available for anyone interested.

If You Need A Measurement Tool Just Build A Measurement Tool

[Darlan Johnson] was working on a wearable project and needed a way to measure the change in voltage and current over time. 

Most measurement tools are designed to take snapshots of a system’s state in a very small window of time, but there are few common ones designed to observe and log longer periods. It’s an interesting point, for example, many power supply related failures such as resets occur sporadically. Longer timescale measuring devices could pick these up.

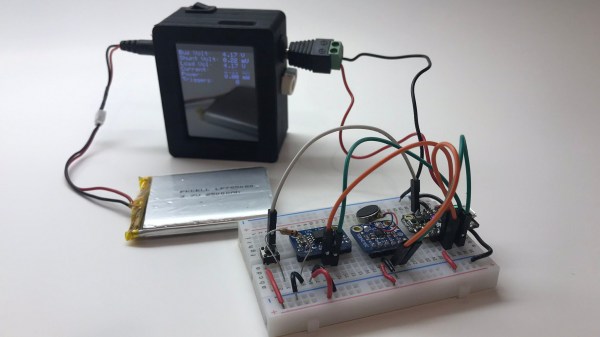
[Darlan] had a ton of Feathers and shields lying around, and combined them into the needed instrument. An INA219 current sensor records the measurements. They are then displayed on a TFT and logged to an SD card. Everything is bundled into a neat 3D printed case along with a battery for wireless operation. A set of barrel connectors provide the breakout to split the wires for the current measurement.

It’s a neatly done hack and we can see it as a nice addition to any hacker’s measurement drawer.

Accessibility Apps Get Help From Bluetooth Buttons

Ever hear of Microsoft Soundscape? We hadn’t, either. But apparently it and similar apps like Blindsquare provide people with vision problems context about their surroundings. The app is made to run in the background of the user’s mobile device and respond to media controls, but if you are navigating around with a cane, getting to media controls on a phone or even a headset might not be very convenient. [Jazzang] set out to build buttons that could control apps like this that could be integrated with a cane or otherwise located in a convenient location.

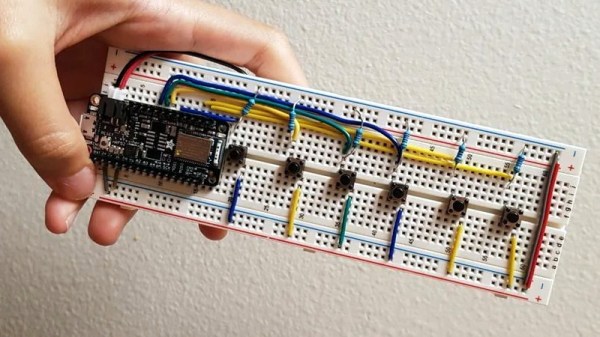
There are four buttons of interest. Play/pause, Next, Back, and Home. There’s also a mute button and an additional button you can use with the phone’s accessibility settings. Each button has a special function for Soundscape. For example, Next will describe the point of interest in front of you. Soundscape runs on an iPhone so Bluetooth is the obvious choice for creating the buttons.

To simplify things, the project uses an Adafruit Feather nRF52 Bluefruit board. Given that it’s Arduino compatible and provides a Bluetooth Human Interface Device (HID) out of the box, there’s almost nothing else to do for the hardware but wire up the switches and some pull up resistors. That would make the circuit easy to stick almost anywhere.

Software-wise, things aren’t too hard either. The library provides all the Bluetooth HID device trappings you need, and once that’s set up, it is pretty simple to send keys to the phone. This is a great example of how simple so many tasks have become due to the availability of abstractions that handle all of the details. Since a Bluetooth HID device is just a keyboard, you can probably think of many other uses for this setup with just small changes in the software.

We covered the Bluefruit back when it first appeared. We don’t know about mounting this to a cane, but we do remember something similar attached to a sword.

Continue reading “Accessibility Apps Get Help From Bluetooth Buttons”

Announcing The “Take Flight With Feather” Contest

The Adafruit Feather is the latest platform for microcontroller development, and companies like Particle, Sparkfun, Seeed Studios, and of course Adafruit are producing Feather-compatible devices for development and prototyping. Now it’s your turn! The Take Flight With Feather contest challenges you to design a board to fit in the Feather ecosystem, with the grand prize of having your boards manufactured for you and listed for sale on Digi-Key.

To get started, take a look at the current Feather ecosystem and get acquainted with this list of examples. From there, get to work designing a cool, useful, insane, or practical Feather. But keep in mind that we’re looking for manufacturability. Electron savant Lady Ada will be judging each board on the basis of manufacturability.

What’s a good design? We’re looking for submissions in the following categories:

  • The Weirdest Feather — What’s the most ridiculous expansion board you can come up with?
  • You’ll Cut Yourself On That Edge — We’re surrounded with bleeding-edge tech, what’s the coolest use of new technology?
  • Retro Feather — Old tech lives on, but can you design a Feather to interact with it? Is it even possible to build a vampire Ethernet tap or an old acoustically-coupled modem?
  • Assistive Tech — Build a Feather to help others. Use technology to improve lives.
  • Wireless Feather — Add a new wireless technology to the Feather ecosystem

In addition to the grand prize winner, five other entries (one in each of the 5 categories above) will receive $100 Tindie gift certificates. The contest begins now and runs through December 31st. To get started, start a project on Hackaday.io and use the “Submit Project To” dropdown box on the left sidebar of your project page to enter it in the contest.

Rifle-Mounted Sensor Shows What Happens During Shot

People unfamiliar with shooting sports sometimes fail to realize the physicality of getting a bullet to go where you want it to. In the brief but finite amount of time that the bullet is accelerating down the barrel, the tiniest movement of the gun can produce enormous changes in its trajectory, and the farther away your target is, the bigger the potential error introduced by anticipating recoil or jerking the trigger.

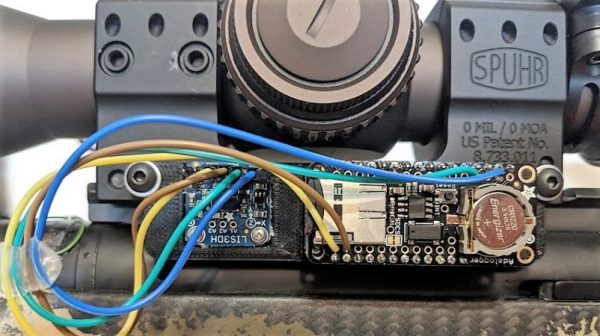
Like many problems this one is much easier to fix with what you can quantify, which is where this DIY rifle accelerometer can come in handy. There are commercial units designed to do the same thing that [Eric Higgins]’ device does but most are priced pretty dearly, so with 3-axis accelerometer boards going for $3, rolling his own was a good investment. Version 1, using an Arduino Uno and an accelerometer board for data capture with a Raspberry Pi for analysis, proved too unwieldy to be practical. The next version had a much-reduced footprint, with a Feather and the sensor mounted in a 3D-printed tray for mounting solidly on the rifle. The sensor captures data at about 140 Hz, which is enough to visualize any unintended movements imparted on the rifle while taking a shot. [Eric] was able to use the data to find at least one instance where he appeared to flinch.

We like real-world data logging applications like this, whether it’s grabbing ODB-II data from an autocross car or logging what happens to a football. We’ll be watching [Eric]’s planned improvements to this build, which should make it even more useful.

Shooting For The First Time With Help From A Raspberry Pi

Like many people, [Mike] has a list of things he wants to do in life. One of them is “fire a gun with a switch,” and with a little help from some hacker friends, he knocked this item off last weekend.

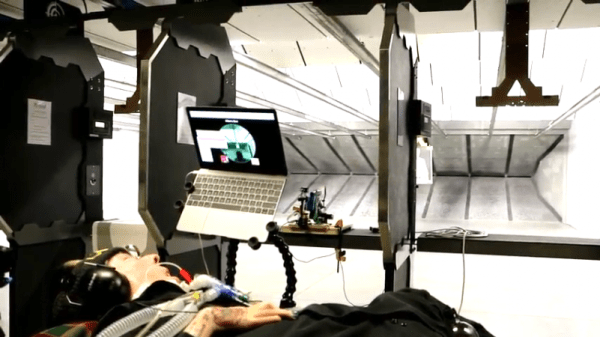
For those wondering why the specificity of the item, the backstory will help explain. [Mike] has spinal muscular atrophy, a disease that was supposed to end his life shortly after it began. Thirty-seven years later, [Mike] is still ticking items off his list, but since he only has voluntary control of his right eyebrow, he faces challenges getting some of them done. Enter [Bill] and the crew at ATMakers. The “AT” stands for “assistive technologies,” and [Bill] took on the task of building a rig to safely fire a Glock 17 upon [Mike]’s command.

Before even beginning the project, [Bill] did his due diligence, going so far as to consult the Bureau of Alcohol, Tobacco, and Firearms (ATF) and arranging for private time at a local indoor gun range. The business end of the rig is a commercially available bench rest designed to control recoil from the pistol, which is fired by a servo connected to the trigger. The interface with [Mike]’s system is via a Raspberry Pi and a Crikit linked together by a custom PCB. A PiCam allowed [Mike] to look down the sights and fire the gun with his eyebrow. The videos below show the development process and the day at the range; to say that [Mike] was pleased is an understatement.

We’re not sure what else is on [Mike]’s list, but we see a lot of assistive tech projects around here — we even had a whole category of the 2017 Hackaday Prize devoted to them. Maybe there’s something else the Hackaday community can help him check off.

Continue reading “Shooting For The First Time With Help From A Raspberry Pi”