Video Baby Monitor Repair Uncovers Private Data

As the name of the channel implies, [BuyItFixIt] likes to pick up cheap gadgets that are listed as broken and try to repair them. It’s a pastime we imagine many Hackaday readers can appreciate, because even if you can’t get a particular device working, you’re sure to at least learn something useful along the way.

But after recently tackling a VTech video baby monitor from eBay, [BuyItFixIt] manages to do both. He starts by opening up the device and going through some general electronics troubleshooting steps. The basics are very much worth following along with if you’ve ever wondered how to approach a repair when you don’t know what the problem is. He checks voltages, makes sure various components are in spec, determines if the chips are talking to each other with the oscilloscope, and even pulls out the thermal camera to see if anything is heating up. But nothing seems out of the ordinary.
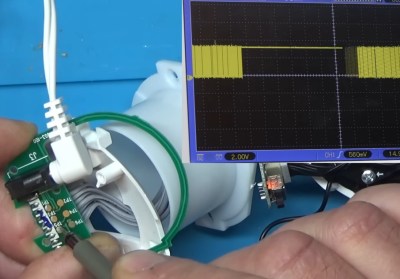
The scope uncovers some serial data.

While poking around with the oscilloscope, however, he did notice what looked like the output of a serial debug port. Sure enough, when connected to a USB serial adapter, the camera’s embedded Linux operating system started dumping status messages into the terminal. But before it got too far along in the boot process, it crashed with a file I/O error — which explains why the hardware all seemed to check out fine.

Now that [BuyItFixIt] knew it was a software issue, he started using the tools built into the camera’s bootloader to explore the contents of the device’s flash chip. He uncovered the usual embedded Linux directories, but when he peeked into one of the partitions labeled Vtech_data2, he got a bit of a shock: the device seemed to be holding dozens of videos. This is particularly surprising considering the camera is designed to stream video to the parent unit, and the fact that it could record video internally was never mentioned in the documentation.

Continue reading “Video Baby Monitor Repair Uncovers Private Data”

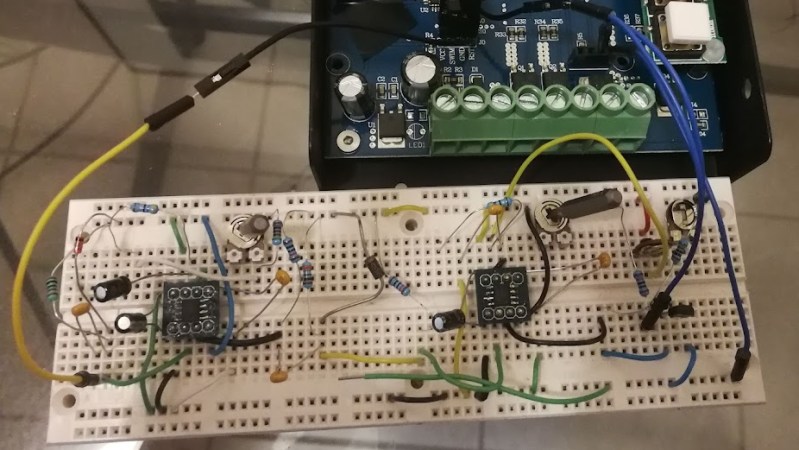
555 timer circuit for the contest

Doing The Right Thing The Wrong Way: Dumping STM8 Firmware With 555 Timers

When [Jarrett] decided to enter the 555 Contest that’s just wrapped up, he leaned up on an idea that’s been rattling around in his noggin for a few years: Using 555 timers to trigger a firmware dump on a microcontroller. It’s definitely the wrong tool for the job, but [Jarrett] got it working and documented it nicely at Hackaday.io.

The premise is that by interrupting the power supply to the STM8 microcontroller at just the right time and for just the right duration, it would skip the instruction telling it not to allow its firmware to be read. Time and duration… things the 555 is well known for being capable of. There was a problem, however.

The first problem is that the duration was to be measured in nanoseconds. A garden variety 555 has can only pulse down to about 10 microseconds. The solution? Well, you’ll have to read the excellent project page to find out, but don’t worry- it’s a 555. The second problem? He was using 555’s!

Was [Jarrett] successful? After much fiddling and twiddling, he absolutely was! The old firmware was dumped from the STM8 processor and the new firmware could be flashed with impunity.

This 555 contest has seen some truly epic entries, including but not limited to this 555 based accordion like instrument that this particular author just can’t get enough of!


An Exercise In Firmware Dumping With The GreatFET

Looking to hone his hardware hacking skills, [James Chambers] recently set out to reverse engineer a common cheap wireless keyboard: the Logitech K360. The chipset it uses has already been fairly well explored (and exploited) by security researchers, but the goal here was more about gaining some practical hands-on experience than it was breaking any new ground.

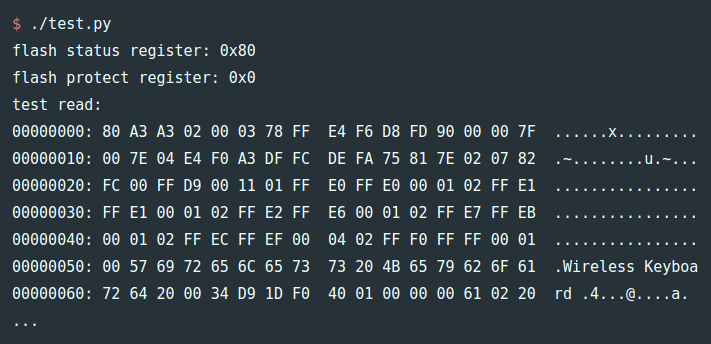
The first post in what we’re sure will be a fascinating series deals with dumping the board’s firmware using the GreatFET. We actually haven’t seen too many projects that showcase the capabilities of this highly capable open hardware multi-tool, so the post serves as a nice demonstration of how one goes about writing the necessary Python scripts to put it to work in a practical scenario.

Some promising bytes.

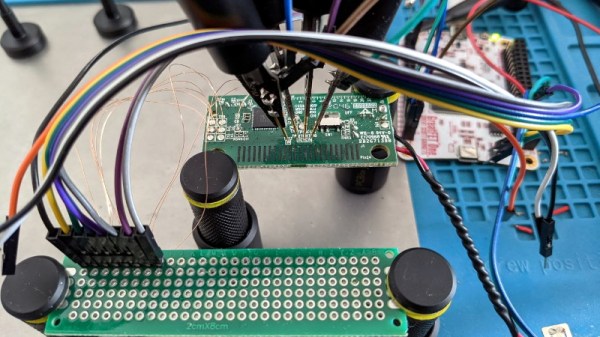
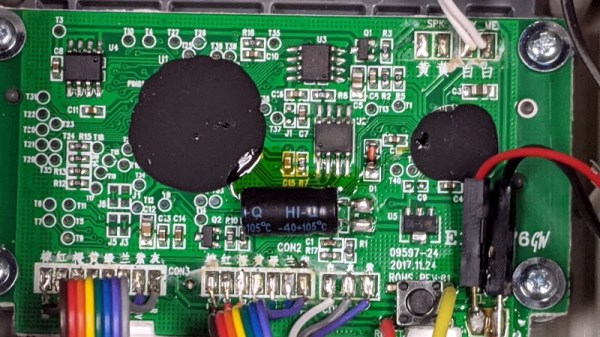
Of course, even with the best of tools, there’s always a few stumbling blocks. After identifying what was clearly some kind of programming header on the K360’s diminutive PCB, it took a few failed attempts at reading the firmware before [James] realized he needed to tap into more pins on the keyboard’s nRF24LE1 microcontroller. Once everything was physically wired up, he wrote some code for the GreatFET that would perform the proper incantations on the chip’s PROG and RESET pins to enable its programming interface.

[James] goes on to explain how you can pull some extended chip information out of the hardware and verify the contents of the firmware dump with Gihdra, but any more advanced analysis will have to wait until the next post in the series. In the meantime, if you like reading about hardware hacking from this “over the shoulder” viewpoint, you should check out some of the fantastic work that [wrongbaud] has sent in over the last year or so.

Hacking A Netgear Router

Have you ever wanted to watch someone reverse engineer a piece of hardware and pick up some tips? You can’t be there while [Jeremy] tears open a Netgear N300 router, but you can see his process step by step in some presentation charts, and you’ll get a few ideas for the next time you want to do something like this.

The first part of the presentation might be a little basic for most Hackaday readers, but presumably, the intended audience might not know much about soldering or multimeters. But we enjoyed the methodology used to work out the UART pins on the board. We would have read the baud rate with the scope, which [Jeremy] does, but he also mentions a script to work it out and create a minicom profile that looked interesting.

Continue reading “Hacking A Netgear Router”

Poking Around Inside A Pair Of Classic Gaming Gifts

Retro gaming is huge right now, and like probably millions of other people, [wrongbaud] found himself taking possession of a couple faux-classic gaming gadgets over the holidays. But unlike most people, who are now using said devices to replay games from their youth, he decided to tear into his new toys to see how they work.

The first to get pulled apart is a handheld The Oregon Trail game, which Hackaday readers may recall from a teardown we did back when it was first released. His work continues right where our teardown left off, by pulling the game’s two EEPROM chips out and dumping their contents. As expected, [wrongbaud] found that the I2C connected chip contained the game save information, and the SPI flash chip stored the actual game files.

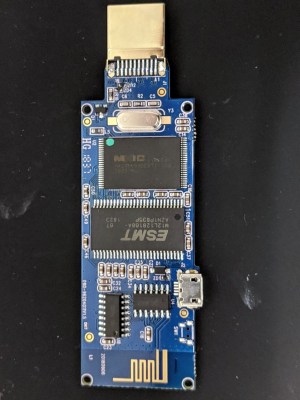
Next up was an HDMI “stick” from Bandai Namco that allows the user to play a selection of NES games. Here again [wrongbaud] liberates the flash chip and dumps it for examination, this time using an ESP32 tool of his own creation. Inside the firmware image he’s able to identify several elements with the help of binwalk, such as splash screen graphics and text strings.

But perhaps most interestingly, he found that binwalk was able to automatically extract the NES ROMs themselves. After verifying they were standard ROMs with an NES emulator, he theorizes that repacking the firmware with different ROMs should be possible should anyone feel so inclined.

Both of these hacks are fantastic examples of how you can reverse engineer a device’s firmware with low cost hardware, open source tools, and a healthy dose of patience. Even if you aren’t interested in fiddling with The Oregon Trail or swapping out the Mappy ROM for Contra, this write-up is an invaluable resource for anyone looking to do their own firmware analysis.

This isn’t the first time [wrongbaud] has hacked around inside these extremely popular retro games, either. Just last month we covered some of his previous exploits with the re-released versions of Rampage and Mortal Kombat.

Injecting Code Into Mouse Firmware Should Be Your Next Hack

Here’s a DEF CON talk that uses tools you likely have and it should be your next hacking adventure. In their Saturday morning talk [Mark Williams] and [Rob Stanely] walked through the process of adding their own custom code to a gaming mouse. The process is a crash course in altering a stock firmware binary while still retaining the original functionality.

The jumping off point for their work is the esports industry. The scope of esporting events has blown up in recent years. The International 2016 tournament drew 17,000 attendees with 5 million watching online. The prize pool of $20 million ($19 million of that crowdfunded through in-game purchases) is a big incentive to gain a competitive edge to win. Contestants are allowed to bring their own peripherals which begs the questions: can you alter a stock gaming mouse to do interesting things?

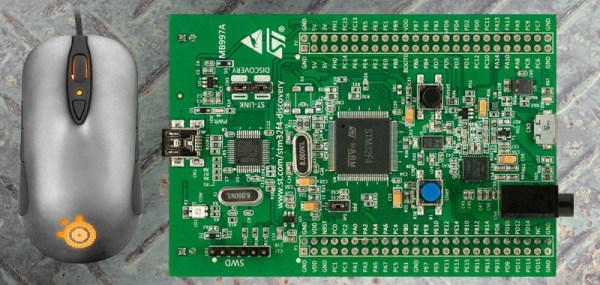
The steelseries Sensei mouse was selected for the hack because it has an overpowered mircocontroller: the STM32F103CB. With 128 KB of flash the researchers guessed there would be enough extra room for them to add code. STM32 chips are programmed over ST-Link, which is available very inexpensively through the ST Discovery boards. They chose the STM32F4DISCOVERY which runs around  $20.

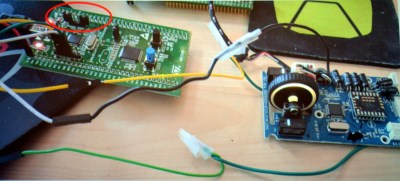
Perhaps the biggest leap in this project is that the firmware wasn’t read-protected. Once the data, clock, and ground pads on the underside of the board were connected to the Discovery board the firmware was easy to dump and the real fun began.

They first looked through the binary for a large block of zero values signifying unused space in flash. The injected firmware is designed to enumerate as a USB keyboard, open Notepad, then type out, save, and execute a PowerShell script before throwing back to the stock firmware (ensuring the mouse would still function as a mouse). Basically, this builds a USB Rubber Ducky into stock mouse firmware.

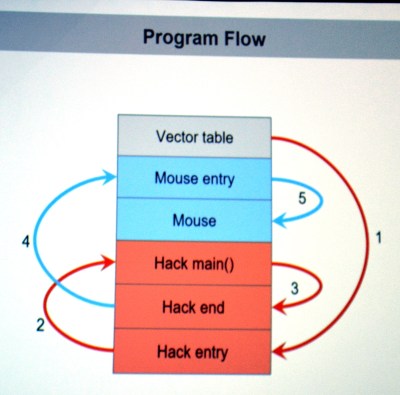
There are a few useful skills that make taking on this project a worthwhile learning experience. To compile your custom code correctly you need to choose the correct offset address for where it will end up once pasted into the firmware binary. The vector table of the original code must be rewritten to jump to the injected code first, and it will need to jump back to the mouse execution once it has run. The program flow on the left shows this. Both of these jumps require the program counter and registers to be saved and restored. The ARM stack is subtractive and the address will need to be updated to work with the added code.

The talk ended with a live demo that worked like a charm. You can check out the code in the MDHomeBrew repo. In this case the PowerShell script adds keyboard shortcuts for DOOM cheats. But like we said before, the experience of getting under the hood with the firmware binary is where the value will be for most people. With this success under your belt you can take on more difficult challenges like [Sprite_TM’s] gaming keyboard hack where the firmware couldn’t easily be dumped and an update binary was quite obsfucated.