Do you like change for the sake of change? Are you incapable of leaving something in a known and working state, and would rather fiddle endlessly with it? Are you unconcerned about introducing arbitrary compatibility issues into your seemingly straight-forward product line? If you answered “Yes” to any of those questions, have we got the job for you! You can become a product engineer, and spend your days confounding customers who labor under the unrealistic expectation that a product they purchased in the past would still work with seemingly identical accessories offered by the same company a few years down the line. If interested please report to the recruitment office, located in the darkest depths of Hell.
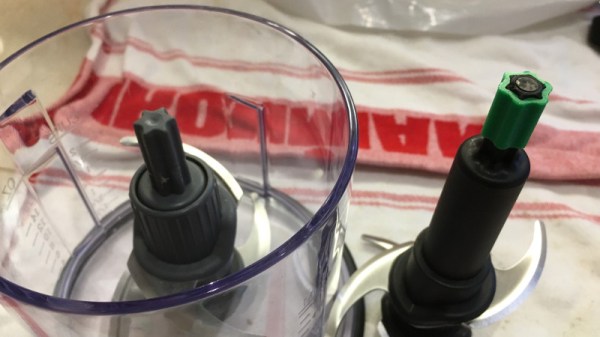
Until the world is rid of arbitrary limitations in consumer hardware, we’ll keep chronicling the exploits of brave warriors like [Alex Whittemore], who take such matters into their own hands. When he realized that the blades for his newer model Ninja food processor didn’t work on the older motor simply because the spline was a different size, he set out to design and print an adapter to re-unify the Ninja product line.
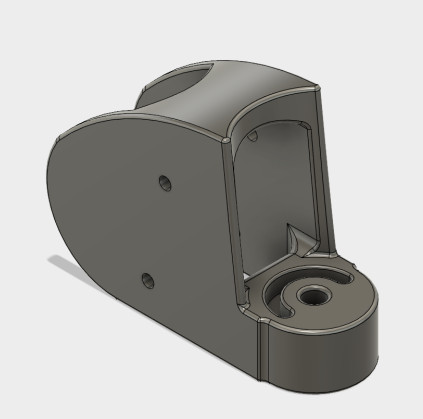
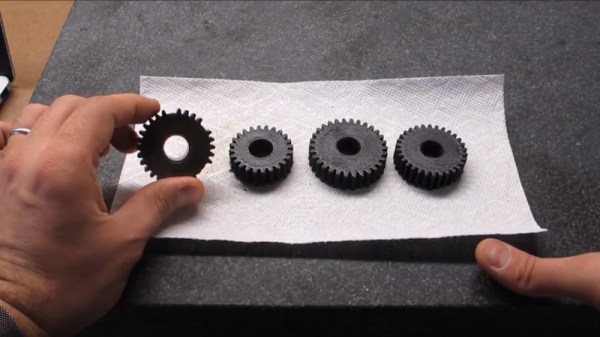
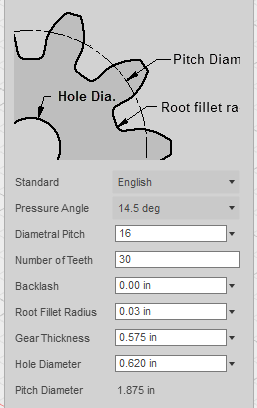
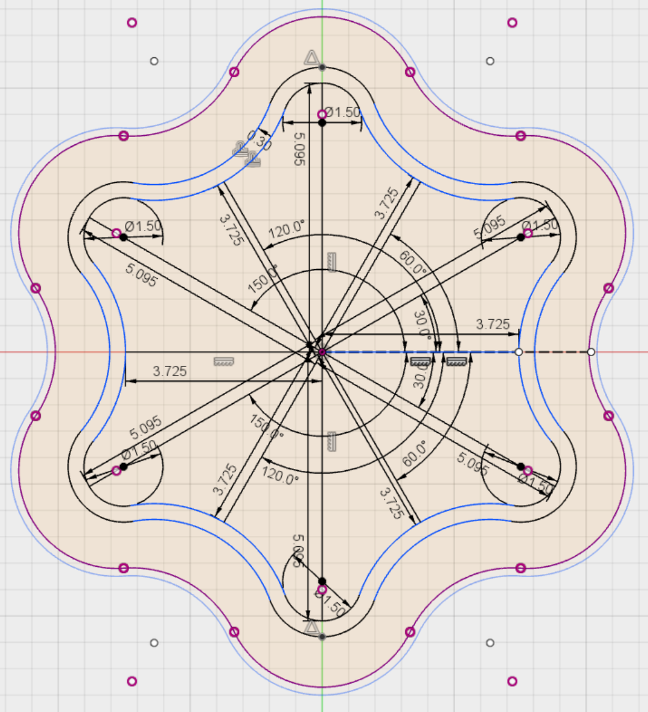
[Alex] tried taking a picture of the spline and importing that into Fusion 360, but in the end found it was more trouble than it was worth. As is the case with many printed part success stories, he ended up spending some intimate time with a pair of calipers to get the design where he wanted it. Once broken down into its core geometric components (a group of cylinders interconnected with arches), it didn’t take as long as he feared. In the end the adapter may come out a bit tighter than necessary depending on the printer, but that’s nothing a few swift whacks with a rubber mallet can’t fix.
This project is a perfect example of a hack that would be much harder (but not impossible) without having access to a 3D printer. While you could create this spline adapter by other means, we certainly wouldn’t want to. Especially if you’re trying to make more than one of them. Small runs of highly-specialized objects is where 3D printing really shines.
 This is an entry in Hackaday’s
Repairs You Can Print contest
The twenty best projects will receive $100 in Tindie credit, and for the best projects by a Student or Organization, we’ve got two brand-new Prusa i3 MK3 printers. With a printer like that, you’ll be breaking stuff around the house just to have an excuse to make replacement parts.