Super Low Tech Mario

Browsing around the depths of the Internet we came across a super low tech version of Super Mario from [Sata Productions]. The video presents a complete tutorial on how to make a playable, cardboard version of the famous Super Mario game. If you are a fan, you probably going to like this.

You basically need cardboard, a hot glue gun, a ball bearing, a couple of DC motors, some iron BBs, some magnets, batteries, some wires… it sounds just like shopping list for a MacGuyver episode. But it works and it’s playable. It has a wired remote control, you control Mario to move and make him jump up and down in a kind of turning dashboard game. It even has a game over screen when Mario dies. Yes, Mario can die in this cardboard version. If you want to make a custom version you can always print a bigger level and resize the cardboard box.

Super Mario has had its shares of hacks, like this interface hack using a Kinect to control Mario or this super tricky jailbreak hack that allows players to run their own game mods, but this one is just on another level: a low tech approach. It seems like it could be a fun weekend project, especially if you have kids. If you’re not into Super Mario, it’s possible to just print a different game, the supporting platform is pretty generic and could support several simplified platform games.

Check out the video:

Continue reading “Super Low Tech Mario”

Mercy Me, Thanks For The Heals

Sometimes, you have to call in the experts. [CorSec Props], builders of fine props, costumes and more, were commissioned to replicate Mercy’s healing staff from the game Overwatch. Sounds simple, but the customer — right as they always are — requested that it spin and light up just like the original.

To get a look at the electronics, the rotating head slides off after removing a screw. Inside, the rechargeable 18650 lithium-ion 3.7V battery — via a DC to DC converter — is bumped up to 5.5V in order to run a 12V, 120rpm motor. At full voltage the staff’s head rotates too fast, and so it’s deliberately under-powered for a more replica-appropriate speed.

A ring of RGB LEDs as well as a pair pointed at the tip of the staff toggle between yellow and blue hues. To switch between these different lighting modes, a double-pole, triple throw switch was modified to function like a more-suited-to-the-task-than-what-we-had-in-the-shop three position, double-pole, double-throw switch.

On the motor shaft, pair of studs slot into a piece of acrylic at the tip of the staff. This stops it from slipping, but also allows the LED glow to diffuse out the top as well as the portholes on the side of the staff. Check out the build after the break!

Continue reading “Mercy Me, Thanks For The Heals”

This Mask Will Make You A Psycho

Videos games are a cornucopia of project ideas well-suited to the talents of makers and hackers, and Halloween is as good a time as any to show them off! Reddit user [Tavarin], a huge fan of the Boderlands video games, whipped up a plaster mask — replete with glowing eyes — of one of the game’s signature enemies: the Psycho.

[Tavarin]’s secret to forming comfortable plaster masks is to open his jaw while the wrap is setting  — that way he’ll be able to talk without breaking the mask off his face. Hot gluing in and modifying a 60mm PC fan and a pair of lenses meant that the only thing standing between him and a lot of sanding to shape the mask’s details was a few layers of thick plaster mix.

Continue reading “This Mask Will Make You A Psycho”

Why Only Use One Controller When You Can Use ALL Of Them?

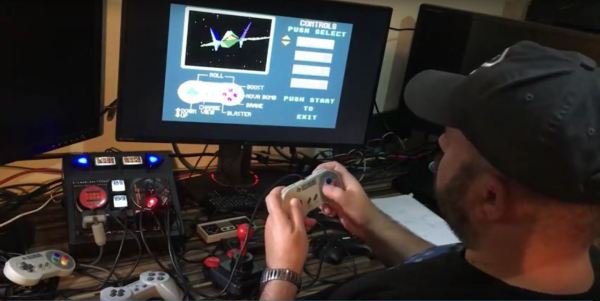
After booting up his RetroPie system, [jfrmilner] had the distinct feeling that something was off. Realizing that the modern Xbox 360 controller didn’t fit right when reliving the games of his youth, he rounded up all his old controllers to make sure he always had the right gamepad for the game.

Wanting to keep the controllers unmodified — so they could still be used on the original systems — he had to do a bit of reverse-engineering and source some controller sockets before building his controller hub. Using shift-in registers, shift-out registers, and some multiplexers, he designed a large circuit selector — which acts as a shield for an Arduino Micro — so all the controllers remain connected. A potentiometer allows him to select the desired controller and a few arcade buttons which access RetroPie shortcuts really round out the hub. Check out the demo after the break!

Continue reading “Why Only Use One Controller When You Can Use ALL Of Them?”

Pac Man On The Colour Computer 3

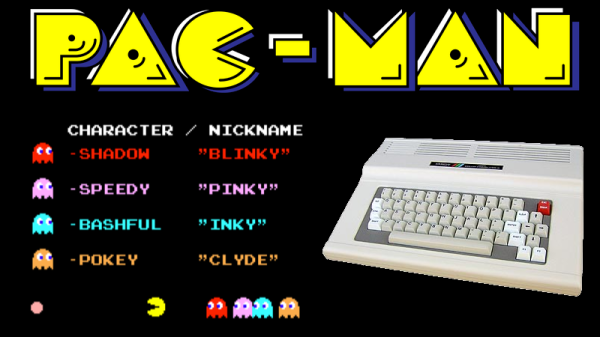
The 1980s were the heyday of the venerable Z80, a processor that found its way into innumerable home computers, industrial systems, and yes — arcade machines. However, not everyone had a Z80 based machine at home, and so sometimes porting is required. [Glen] is tackling this with a port of Pac Man to the Radio Shack Colour Computer 3.

The key to any good arcade port is authenticity – the game should feel as identical to the real thing as possible. The Atari 2600 port got this famously wrong. Porting to the Colour Computer 3 is easier in theory – with more RAM, a Motorola 6809 CPU running at a higher clock rate, and a more powerful graphics subsystem, fewer compromises need to be made to get the game to run at a playable speed.

The way [Glen] tackled the port is quite handy. [Glen] built a utility that would scrape a disassembled version of the original Pac Man Z80 code, look up the equivalent 6809 CPU instruction, and replace it, while placing the original Z80 code to the side as a comment. Having the original code sitting next to the ported instructions makes debugging much easier.

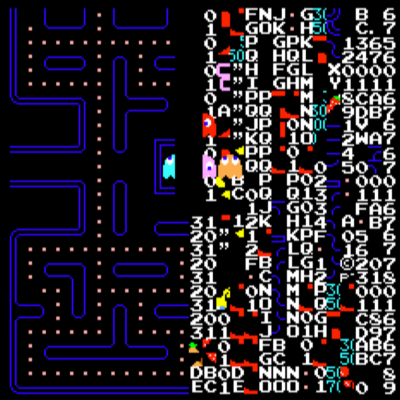
Level 256 as seen in [Glen]’s port.
There was plenty of hand tweaking to be done, and special effort was made to make sure all the data the original code was looking for was accessible at the same addresses as before. There was also a lot of work involved in creating a sprite engine that would reliably display the game video at a playable frame rate.

Overall, the port is highly faithful to the original, with the game code being identical at the CPU level. [Glen] reports that the same patterns used on the arcade machine can be used to complete the mazes on the Colour Computer 3 version, and it faithfully recreates the Level 256 bug as well. It’s an impressive piece of work to create such an authentic port on a home computer from 1986.

For another classic port, but with the temporal vectors flipped, check out Portal 2 on the Apple II.


Hack Together A Whack-A-Mole In A Box!

Here’s a project that you can throw together in an afternoon, provided you have the parts on hand, and is certain to entertain. Hackaday.io user [SunFounder] walks us through the process of transforming a humble cardboard box into a whack-a-mole game might be just the ticket to pound out some stress or captivate any children in the vicinity.

A multi-control board and nine arcade buttons are the critical pieces of hardware here, with wires and a USB cable rounding out  the rest of the electronics. Separate the button core from the upper shell, mounting the shell in the box, and connect the button core’s LED cathode to the button’s ON terminal. Repeat eight times. Solder the buttons in parallel and add some more wire to the buttons’ ON terminals to extend their reach. Repeat eight more times.

Place the finished LED+cores into the buttons and connect their ON terminals to their respective buttons on the multi control board. Now for the hard step: use a mini-USB to USB cable to connect the controller to a computer you want to use to run the game’s code in the Arduino IDE. Modify the key-mappings and away you go! Check out the build video after the break.

Continue reading “Hack Together A Whack-A-Mole In A Box!”

Improved Game Tokens With Laser Cutting And Clever Design

[Martin Raynsford] is a prolific project maker, especially when it comes to using a laser cutter. These laser-cut token counters for the board game Tigris & Euphrates demonstrate some clever design, and show that some simple touches can make a big difference.

In the digital version of the game, the tokens conveniently display a number representing their total power value. [Martin] liked this feature, and set out to design a replacement token for the tabletop version that could display a number while still keeping the aesthetic of the originals. The tokens were designed as a dial with a small cutout window to show a number, but the surface of the token showing color and icon is still mostly unchanged.

Magnets hold the top and bottom together, and because of the small size of the assembly, no detents are needed. Friction is enough to keep things from moving unintentionally. The second noteworthy design feature is the material for the top layer of the token. This layer is made from 0.8 mm birch plywood; a nice and thin top layer means a wider viewing angle because the number is nearer to the surface. If the top layer were thicker, the number would be recessed and harder to see.

[Martin] made the design file available should anyone wish to try it out. No stranger to games, he even once game-ified the laser itself, turning it into a physical version of Space Invaders. Be sure to check it out!