Crawling A Dungeon, 64 Pixels At A Time

The trend in video games is toward not being able to differentiate them from live-action theatrical releases, and games studios are getting hard to tell from movie studios. But quality graphics don’t always translate into quality gameplay, and a lot can be accomplished with minimalist graphics. Turn the clock back a few decades and think about the quarters sucked up by classics like Pac-Man, Space Invaders, and even Pong if you have any doubts about that.

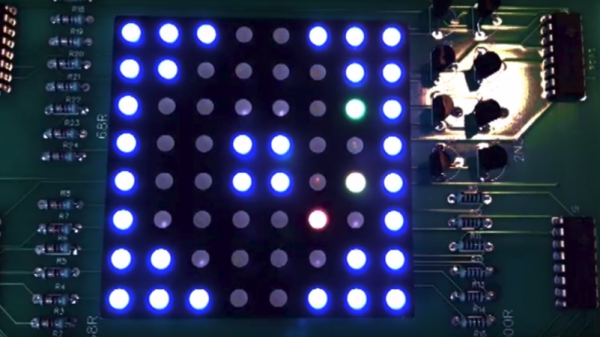
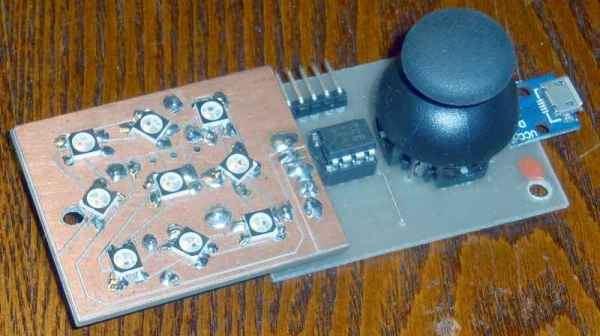
But even Pong had more than 64 pixels to work with, which is why this dungeon-crawler game on an 8×8 RGB matrix is so intriguing. You might think [Stolistic]’s game would be as simple as possible but think again. The video below shows it in action, and while new users will need a little help figuring out what the various colors mean, the game is remarkably engaging. The structure of the dungeon is random with multiple levels to unlock via the contents of power-up chests, and there are mobs to battle in a zoomed-in display. The game runs on an Arduino Uno and the matrix is driven by a bunch of 74HC595 shift registers.

It’s fun to see what can be accomplished with as little as possible. Looking for more low-res goodness? Check out this minimalist animated display, or a Geiger counter with a matrix display.

Continue reading “Crawling A Dungeon, 64 Pixels At A Time”

Play Chess Against A Ghost

While chess had long been a domain where humans were superior to computers, the balance has shifted quite substantially in the computers’ favor. But the one thing that humans still have control over is the pieces themselves. That is, until now. A group has built a robot that both uses a challenging chess engine, and can move its own pieces.

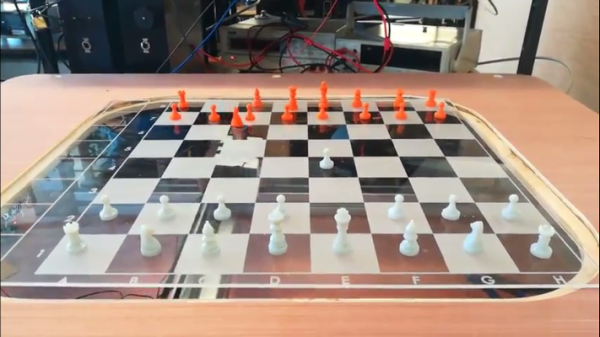
The robot, from creators [Tim], [Alex S], and [Alex A], is able to manipulate pieces on a game board using a robotic arm under the table with an electromagnet. It is controlled with a Raspberry Pi, which also runs an instance of the Stockfish chess engine to play the game of chess itself. One of the obvious hurdles was how to keep the robot from crashing pieces into one another, which was solved by using small pieces on a large board, and always moving the pieces on the edges of the squares.

This is a pretty interesting project, especially considering it was built using a shoestring budget. And, if you aren’t familiar with Stockfish, it is one of the most powerful chess engines and also happens to be free and open-source. We’ve seen it used in some other chess boards before, although those couldn’t move their own pieces.

Continue reading “Play Chess Against A Ghost”

Stecchino Game Is All About Balancing A Big Toothpick

Stecchino demo by the creator

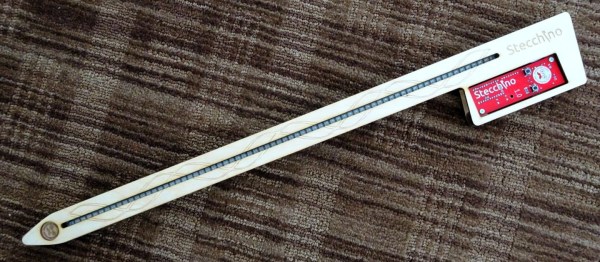
Self-described “Inventor Dad” [pepelepoisson]’s project is called Stecchino (English translation link here) and it’s an Arduino-based physical balancing game that aims to be intuitive to use and play for all ages. Using the Stecchino (‘toothpick’ in Italian) consists of balancing the device on your hand and trying to keep it upright for as long as possible. The LED strip fills up as time passes, and it keeps records of high scores. It was specifically designed to be instantly understood and simple to use by people of all ages, and we think it has succeeded in this brilliantly.

To sense orientation and movement, Stecchino uses an MPU-6050 gyro and accelerometer board. An RGB LED strip gives feedback, and it includes a small li-po cell and charger board for easy recharging via USB. The enclosure is made from a few layers of laser-cut and laser-engraved material that also holds the components in place. The WS2828B WS2812B LED strip used is technically a 5 V unit, but [pepelepoisson] found that feeding them direct from the 3.7 V cell works just fine; it’s not until the cell drops to about three volts that things start to glitch out. All source code and design files are on GitHub.

Games are great, and the wonderful options available to people today allow for all kinds of interesting experimentation like a blind version of tag, or putting new twists on old classics like testing speed instead of strength.

Hijacking A Sony Watchman For Pong

The era of the vintage television was a great one, and one of the transitional by-products was the Sony Watchman. It was a portable TV which Sony started selling in 1982, and the amazing thing about it was that it had an actual 4-inch cathode ray tube or CRT. [Sideburn] just posted a video in which he hijacks the internals of a Watchman to make it into a portable game of Pong.

The hack begins with removing the TV tuner module inside to make some room for the new residents. Next comes the M51364P which is VIF video decoder chip, and for which surprisingly there is not a lot of info on the web. They were able to find a part of the schematic, which though it was in Russian may still be useful for enthusiasts. Removing the VIF revealed the audio and video pins that needed the appropriate signals for the hack to be successful. In an age of multilayer boards it is amazing how a two-layer PCB makes life so easier for the tinkerer.

For the new brains an Arduino Nano clone was selected, and instead of adding modern buttons the existing volume and band select switches were convinced to be the paddle control and play/pause button. Getting everything to fit was easy with the absence of the tuner module, and voila! New(ish) hardware. For the firmware, [Sideburn] turns to Hackvision firmware which has a host of games such as Space Invaders, Asteroids, and even Tetris.

We covered Hackvision a few years ago as a hardware/firmware bundle, and if you are more into CRTs then check out the Arduino driven 6845 CRT controller.

Continue reading “Hijacking A Sony Watchman For Pong”

Discrete Pong Project Goes Big, Adds A Player

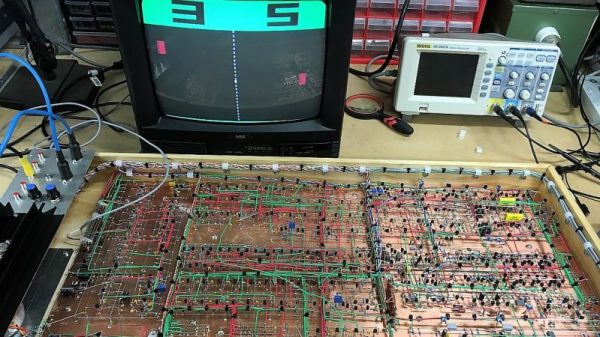
Some projects just take on a life of their own. What started as a pleasant diversion or a simple challenge becomes an obsession, and the next thing you know you’ve built a two-player color Pong game with audio completely from discrete components.

If this one seems familiar, it’s because we were dazzled by its first incarnation last year. As impressive as version 1.0 was, all the more so since it was built using the Manhattan method and seemingly over the course of a weekend, it did have its limitations. [GK] has been refining his design ever since and keeping accurate track of the process, to the tune of 22 pages on the EEVblog forum. We haven’t pored through it all yet, but the state of the project now is certainly worth a look. The original X-Y output to an oscilloscope was swapped out to composite video for a monitor, in both mono and color. This version also allows two people to play head-to-head instead of just battling the machine. It looks like [GK] had to add a couple of blocks worth of real estate to his Manhattan board to accommodate the changes, and he tidied the wiring significantly while he was at it.

It’s a project that keeps on giving, so feast your eyes and learn. We suspect [GK] doesn’t have any plans to finish this soon, but if he does, we can’t wait to see what’s next.

Thanks to [David Gustafik] for reminding us to check back on this one.

A Game That Does More With Less

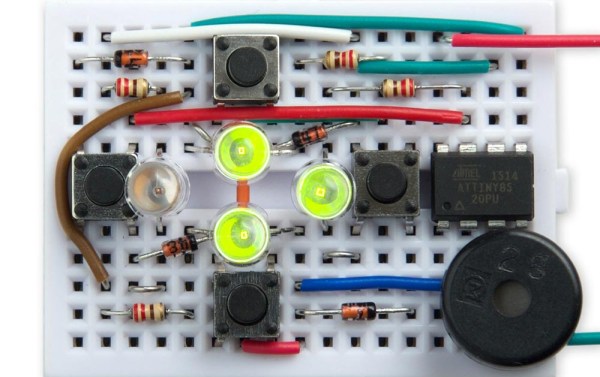
[David Johnson-Davies] created a minimal Secret Maze Game using a single ATTiny85 and a few common components. This simple game uses four buttons, four LEDs, and a small speaker. The player moves in the four cardinal directions using buttons, and the LEDs show walls and corridors. If an LED is lit, it means the path in that direction is blocked by a wall, and attempting to move in that direction will make a beep. When the player reaches the exit, a short victory tune chirps from the speaker.

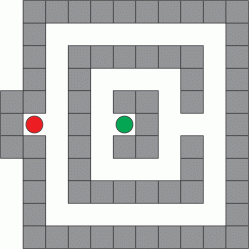
Sample maze. A 16×16 matrix is allocated for maze designs.

Since the ATTiny85 has only five I/O lines, [David] had to get a bit clever to read four buttons, display output on four LEDs, and drive a little speaker. The solution was to dedicate one pin to the speaker and the other four to charlieplexing, which is a method of driving more LEDs than you have pins. It takes advantage of the fact that most microcontroller pins can easily switch state between output high, output low, or low-impedance high-impedance input.

As for the buttons, [David] charlieplexed them as well. Instead of putting an LED in a charlieplexed “cell”, the cell contains a diode and an SPST switch in series with the diode. To read the state of the switch, one I/O line is first driven low and the other I/O line is made an input with a pullup. A closed switch reads low on the input, and an open switch reads high. With charlieplexing, four pins is sufficient for up to twelve LEDs (or buttons) in any combination, which is more than enough for the Secret Maze.

Charlieplexing is also what’s behind this 110 LED micro-marquee display, or this elegant 7-segment display concept that takes advantage of modern PCB manufacturing options.

HandHolo: A Homebrew ARG

Taking a dive into VR or augmented reality — once, dreamed-of science fiction — is not only possible for the average consumer, but crafting those experiences is as well! Hackaday.io user [kvtoet]’s HandHolo is a homebrew method to cut your teeth on peeking into a virtual world.

This project requires a smartphone running Android Oreo as its backbone, a Bluetooth mouse, a piece of cardboard and a small mirror or highly reflective surface. The phone is slotted into the cardboard housing — prototype with what you have! — above the mouse, and the mirror angled opposite the screen reflects the image back to the user as they explore the virtual scene.

Within Unity, [kvtoet]’s used a few scripts that access phone functions — namely the gyroscope, which is synchronised to the mouse’s movements. That movement is translated into exploration of the virtual space built in Unity and projected onto the portal-like mirror. Check it out!

Continue reading “HandHolo: A Homebrew ARG”