People generate lots of waste heat. It makes sense that there is a desire to convert that heat into usable energy. The problem is one of efficiency. Researchers from MIT and the National Renewable Energy Lab have announced a new heat converter that they claim has 40% efficiency. Of course, there’s a catch. The temperature range for the devices starts at 1,900 °C .
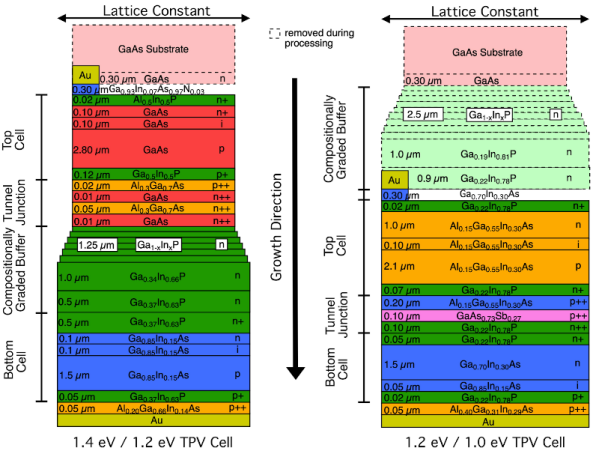
The thermophotovoltaic cells are tandem devices with two cells mated on one substrate. Each cell is multiple layers of very thin and somewhat exotic materials. So this probably isn’t something you will cobble up in your basement anytime soon unless you’re already manufacturing ICs down there. It appears that the secret is in the multiple layers including a reflective one that sends any missed photons back through the stack.
The paper is pretty dense, but there’s a Sunday-supplement summary over on the MIT site. Using heat storage leads to the ability to make heat batteries, more or less, and harness what would otherwise be waste energy.
We’ve noticed a lot of interest in drawing power from hot pipes lately. All of them techniques we’ve seen rely on some kind of exotic materials.