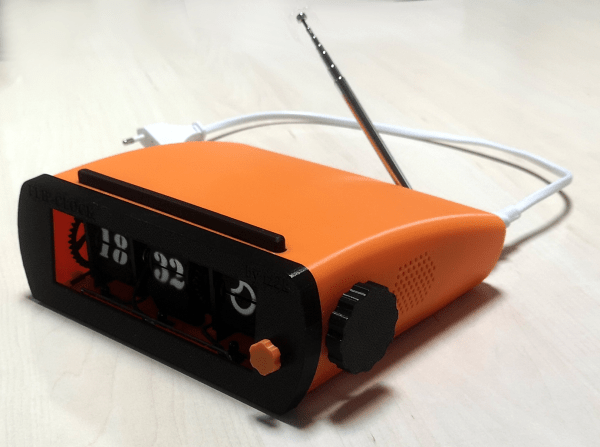
3D Printed Flip Clock Is Worth A Second Look

Flip clocks: they were cool long before Bill Murray was slapping one repeatedly in Groundhog Day, they were cool in 1993, and they’re still cool now. If you can’t find one on the secondhand market, you’re in luck, because [iz2k] has laid out an extensive blueprint for building a gorgeous retro-looking clock with some modern touches.

There’s a Raspberry Pi to fetch the time, the weather, and the Spotify. Old flip clocks invariably tuned in FM radio, so [iz2k] used an RTL-SDR dongle and a software decoder for the deed. This clock even has a big snooze bar, which functions like a night light when there is no alarm actively going off. The three groups of painstakingly-printed flaps are controlled with stepper motors and an IR transmitter/receiver pair to do the counting.

For the interface, [iz2k] kept things nice and simple. The big-knobbed rotary encoder handles volume up/down/mute, and the little one on the front switches between FM radio, Spotify, and silence. Moving either knob generates feedback by flashing LEDs that sit underneath the display. Take a few seconds to flip past the break and check out the short demo.

If you do find a nice flip clock out in the wild, maybe you can retrofit it.

Continue reading “3D Printed Flip Clock Is Worth A Second Look”

See In The Dark, The Simple Way

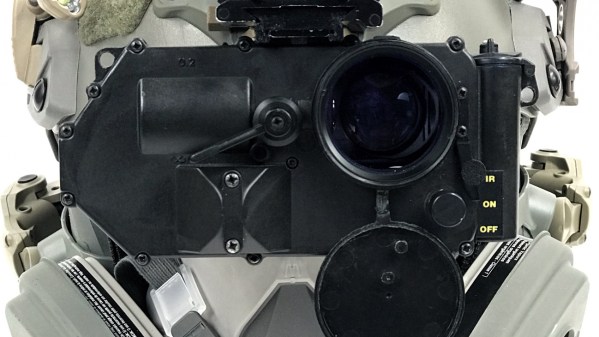
Night vision googles used to be the exclusive preserve of the military, and then of the well-heeled. Image intensifier tubes were very expensive, and needed high-voltage power supplies to keep them going. Now that we have solid-state infra-red cameras the task of seeing in the dark had become much simpler, and [Alex Zidros] is here to show us just how easy that can be. His night vision goggles take a selection of off-the-shelf parts and a little bit of 3D printing to produce a complete set-up for a fraction of the cost of those night-vision goggles of old.

At its heart is a little NTSC/PAL LCD display in a 3D printed bracket. These used to be a small display of choice, but we see them rarely now because standalone displays and the microcontrollers to drive them have become so much more useful. Driving the display is a video camera with its IR filter removed, and providing illumination is an IR flashlight. In effect it’s a classic analogue CCTV system in miniature, but the most important thing is that it works.

We might have expected a Raspberry Pi Zero and NoIR camera, but it’s difficult to argue with a functioning night vision system. If you want to look at a project with an image intensifier tube though, we’ve covered one of those in the past.

The Fun Is On The Christmas Tree With This Playable Duck Hunt Decoration

‘Tis the season for leftovers, be they food, regifted presents, or the decorations left behind in the wake of the festivities. Not to mention the late tips we get for holiday-themed builds, like this Duck Hunt ornament that’s completely playable.

Details are sparse in [wermy]’s video below, but there’s enough there to get the gist. The game is based on the Nintendo classic, where animated ducks fly across the screen and act as targets for a light pistol. Translating that to something suitable for decorating a Christmas tree meant adding an Arduino and an IR LED to the original NES light pistol, and building a base station with a Feather and a small LCD screen into a case that looks like [The Simpsons] TV. An LED on each 3d-printed duck target lights in turn, prompting you to blast it with the gun. An IR sensor on each duck registers hits, while the familiar sound effects are generated by the base, which also displays the score. Given a background of festive blinkenlights, it’s harder than it sounds – see it in action briefly below.

[wermy] has done some interesting builds before, like a RetroPie in an Altoids tin and a spooky string of eyes for Halloween. We hope he’ll come through with a more detailed build video for this project at some point – we’re particularly interested in those beautiful multi-color 3D-prints.

Continue reading “The Fun Is On The Christmas Tree With This Playable Duck Hunt Decoration”

Dice Reader Brings Tech To Your Craps Game… Or, Ya Know, D&D

There are truisms about dice that you’ve probably already heard: if you have just one of them it’s called a “die”, opposite faces of each die always add up to seven, and those dots that you’re adding together are known as “pips”. But what about the infrared properties of those pips? It turns out they reflect less IR than the white body of the die and that trait can be used to build an automatic die reader.

Great projects have a way of bubbling to the surface. The proof of concept comes from way back in 2009, and while the source blog is now defunct, it’s thankfully been preserved by the Internet Archive. In recreating the project based on that barebones description, [Calvin] reached for a set of five IR transmitter/receiver pairs. Take a close look and you’ll see each transmitter is hidden under its partnered receiver. The light shines up through the receiver and the presence of the pip is detected by measuring how much of it bounces back.

This board is only the sensor portion of the design. A 595 shift register provides the ability to control which IR pair is powered, plus five more signals heading out to the analog pins of an Arduino Uno to monitor how much light is being detected by the receivers. Hey, that’s another interesting fact about dice, you only need to read five different pips to establish the value shown!

We wish there were a demo video showing this in action, but alas we couldn’t find one. We were amused to hear [Calvin] mentioned this was a sorting assignment at University and the team didn’t want to build yet another candy sorter. Look, we love an epic M&M sorter just as much as the next electronic geek, but it’s pretty hard to one-up this dice-based random number generator which rolls 1.3 million times each day.

E-Book Reader Gets Page Turn Buttons, Is None The Wiser

Most e-book readers don’t have physical page turn buttons. Why? They just don’t. Virtual page turns are accomplished with a tap at a screen edge. Determined to reduce the awkwardness of one-handed use, [Sagar Vaze] modified a Kobo e-reader with two physical page turn buttons as a weekend project.

[Sagar] points out that since the underlying OS of the Kobo device is Linux, it is possible to fake touches to the screen (and therefore trigger page turns) by recording then replaying the appropriate input event. However, there was a more direct solution available to those willing to tamper slightly with the hardware. Touch sensing on the screen is done via an infrared break-beam system. Along two edges of the screen are IR emitters, and opposite the emitters are receivers. Broadly speaking, when a fingertip touches the display a minimum of two IR beams are broken, and the physical location of the fingertip can therefore be determined by analyzing exactly how the IR pattern has been changed.

To spoof page turns, [Sagar] briefly shorts two IR emitters: one on each axis. The sudden winking out of the IR is interpreted by the device as a crisp tap, and the device obediently turns the page. The only hitch is that both IR emitters must be shorted at the same time. If one is shorted before the other, the device ignores it. Double-pole switches would probably do the trick, but with the part bin coming up empty in that respect, [Sagar] instead used a few transistors to accomplish the same thing. A 3D printed enclosure rounds out the whole mod, and a brief video is embedded below.

Continue reading “E-Book Reader Gets Page Turn Buttons, Is None The Wiser”

Super Simple Sensor Makes DSLR Camera Motion Sensitive

Do you have a need to photographically document the doings of warm-blooded animals? If so, a game camera from the nearest hunting supplier is probably your best bet. But if you don’t need the value-added features such as a weather-resistant housing that can be chained to a tree, this DIY motion trigger for a DSLR is a quick and easy build, and probably loads more fun.

The BOM on [Jeremy S Cook]’s build is extremely short – just a PIR sensor and an optoisolator, with a battery, a plug for the camera’s remote jack, and a 3D-printed bracket. The PIR sensor is housed in a shroud to limit its wide field of view; [Jeremy] added a second shroud when an even narrower field is needed. No microcontroller is needed because all it does is trigger the camera when motion is sensed, but one could be added to support more complicated use cases, like an intervalometer or constraining the motion sensing to certain times of the day. The video below shows the build and some quick tests.

Speaking of intervalometers, we’ve seen quite a few of those over the years. From the tiny to the tinier to the electromechanical, people seem to have a thing for taking snapshots at regular intervals.

Continue reading “Super Simple Sensor Makes DSLR Camera Motion Sensitive”

PLA Foils Homemade Tachometer

[Integza] built a Tesla turbine and wanted to know how fast it was spinning. However, he didn’t have a tachometer, and didn’t want to buy one. After a false start of trying to analyze the audio to measure the speed, he decided to use a tried-and-true method. Let the wheel break an infrared (IR) optointerruptor and count the spokes of the wheel as they go by. If you know the spacing between the spokes, you can compute the speed. There was only one problem: it didn’t work.

Turns out, PLA is at least somewhat transparent to IR. Knowing that it was a simple matter to fix some tape to the wheel that would block IR and that made things work much better. If you missed the video where he built the turbine, you might want to watch it first.

Continue reading “PLA Foils Homemade Tachometer”