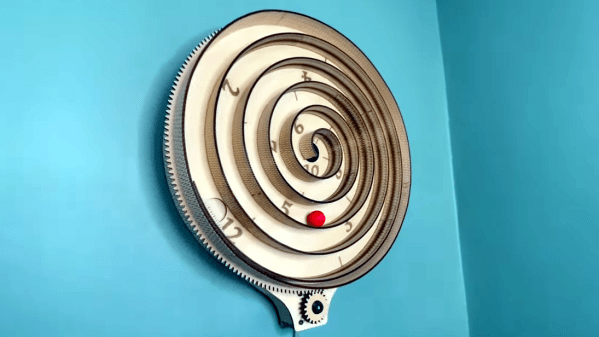
[Build Some Stuff] created an unusual spiral clock that’s almost entirely made from laser-cut wood, even the curved and bendy parts.
The living hinge is one thing, but getting the spacing, gearing, and numbers right also takes work.
The clock works by using a stepper motor and gear to rotate the clock’s face, which consists of a large dial with a spiral structure. Upon this spiral ramp rolls a ball, whose position relative to the printed numbers indicates the time. Each number is an hour, so if the ball is halfway between six and seven, it’s 6:30. At the center of the spiral is a hole, which drops the ball back down to the twelve at the beginning of the spiral so the cycle can repeat.
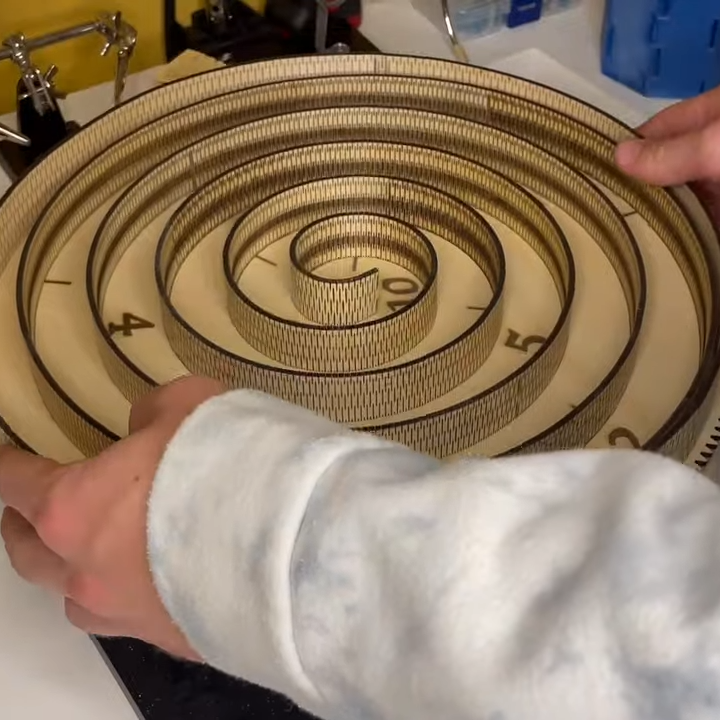
The video (embedded below) demonstrates the design elements and construction of the clock in greater detail, and of particular interest is how the curved wall of the spiral structure consists of a big living hinge, a way to allow mostly rigid materials to flex far beyond what they are used to. Laser cutting is well-suited to creating living hinges, but it’s a technique applicable to 3D printing, as well.
Ikea have been known for years as a purveyor of inexpensive yet stylish homewares, but it’s fair to say that sometimes their affordability is reflected in their insubstantial construction. Such is the case with the Sjöpenna lamp, whose construction relies on rubber bands. On [Tony]’s lamp these bands degraded with age, causing it to fall apart. The solution? A set of cleverly-designed laser-cut clips to replace them.
The challenge to replacing a stretchy material with a rigid one is that it must have enough ability to bend without snapping as it is put in place. For this he selected PETG, with 0.04″ (about 1 mm thick) hitting the sweet spot. His photos demonstrate with some green tape added for visibility, how the clip bends backwards just far enough to fit over where the rubber band once located, and then flips back neatly to hold it all in place.
If you have a collapsing Ikea lamp then this will be just what you need, but this hack goes further than that. A frequent requirement for repairs is some kind of clip, because clips are always the first to break, This technique for laser cutting them is a handy one to remember, next time your design needs a springy bit of plastic.
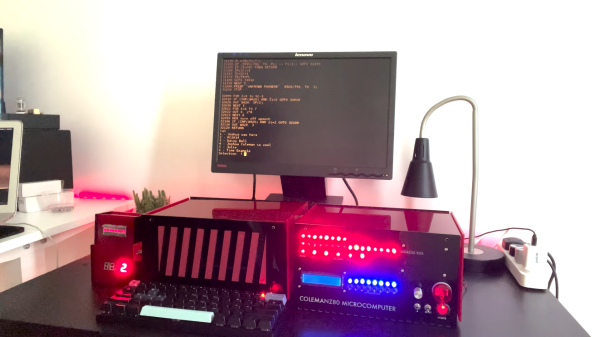
[Joshua Coleman] likes to design his own computers. Sometimes, that means drawing up bus architectures, memory maps and I/O port pinouts. Other times, he can focus his efforts more on the general aesthetics, as well as on building a great set of peripherals, as he shows in his latest ColemanZ80 project. Thanks to the RC2014 architecture defining most of the essential features of a classic Z80 computing platform, [Joshua] was able to design a modern retrocomputer that’s not only genuinely useful, but also looks as if it came off a production line yesterday.
The external design is a sight to behold: bright red laser-cut acrylic pieces form a neat, semi-transparent case with ventilation slots on the sides and lots of blinkenlights on the front. Inspired by 1970s classics like the Altair 8800, the front panel gives the user a direct view of the machine’s internal state and allows simple command inputs through a series of tumbler switches. The CPU, RAM and other basic devices are housed in one case, with all the expansion modules in a second one, linked to the mainboard through a 40-wire flatcable.
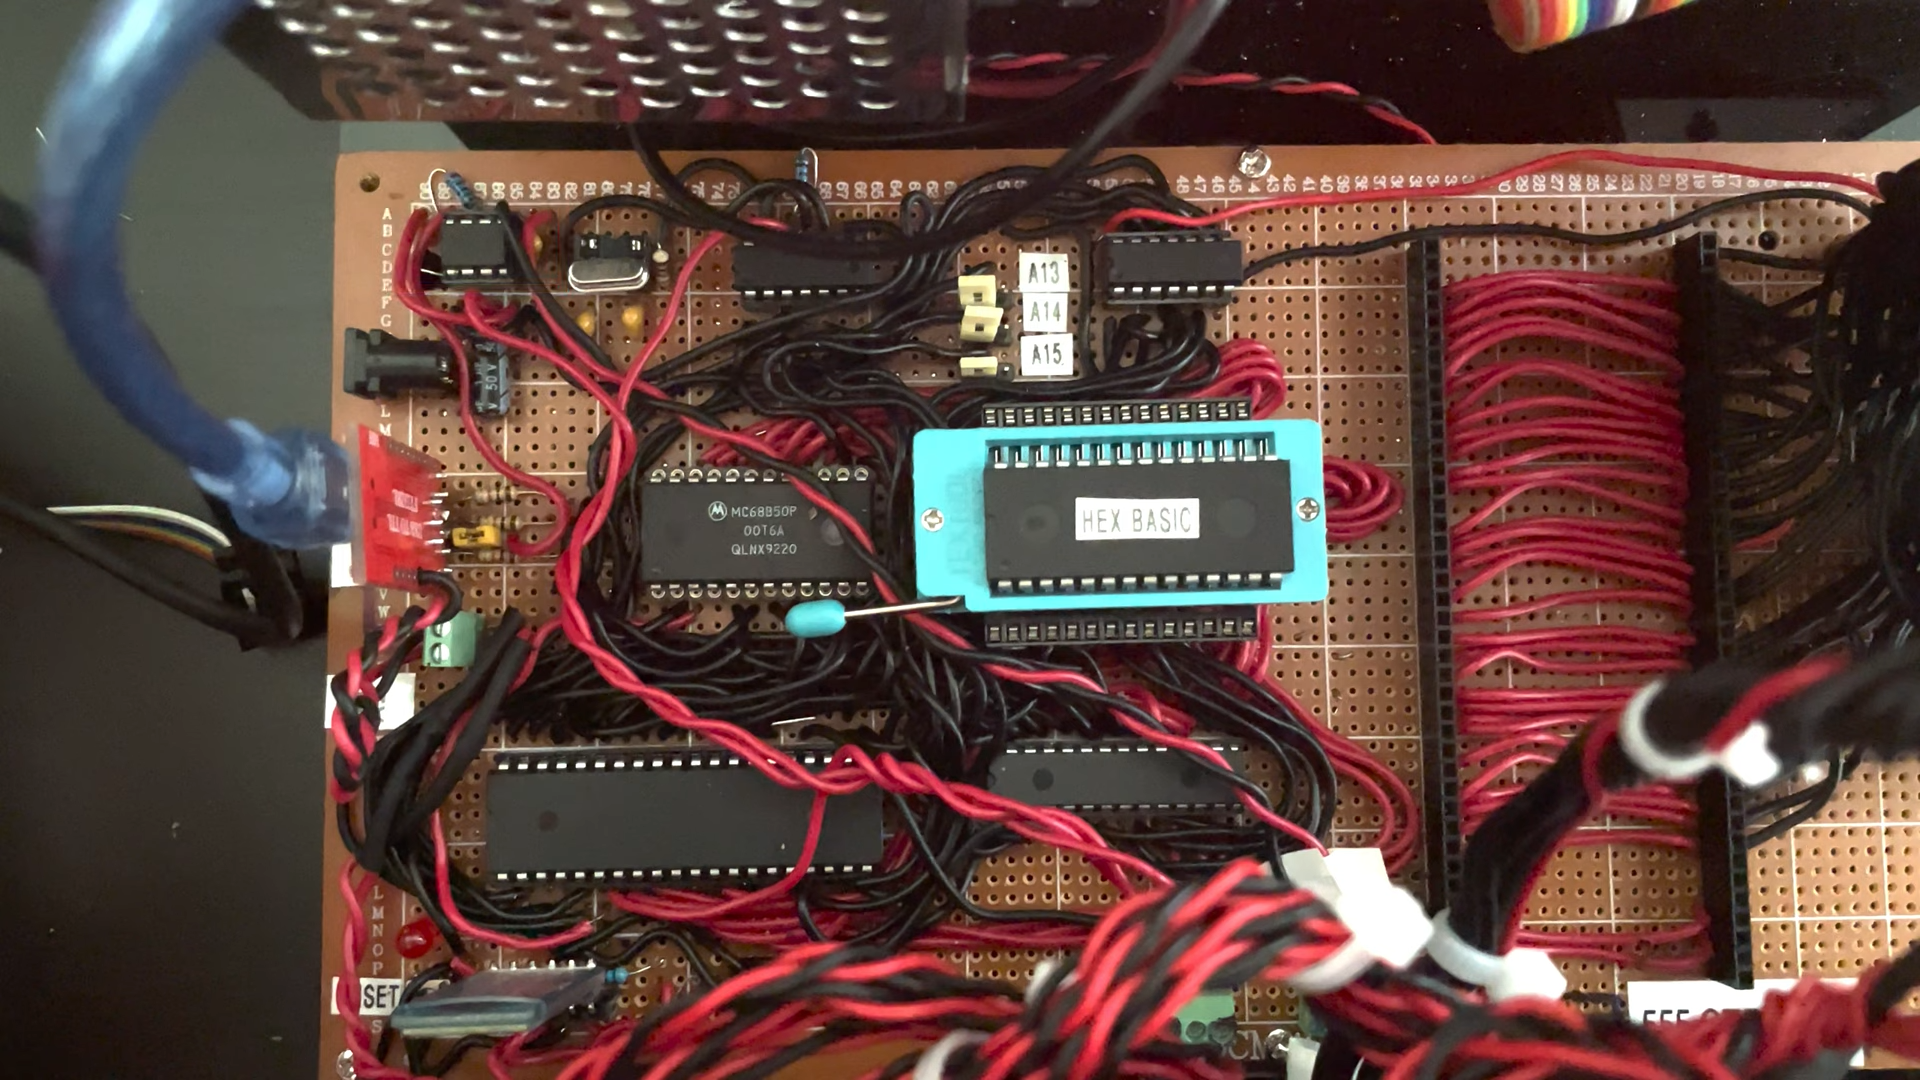
Lots of classic chips, but also loads of hand-routed wires grace the ColemanZ80’s mainboard.
Although the mainboard closely follows the RC2014 design, [Joshua] went through a lot of effort to tune the system to his specific needs. The expansion boards he built include an NS16550 UART to replace the default 68B50, a battery-backed real-time clock, a YM2149-based sound card and even a speech synthesizer module built around the classic SP0256 chip, of Speak & Spell fame. An even more unusual feature is the presence of an AM9511, one of the earliest math coprocessors ever made, to speed up floating-point calculations. All of these modules were built entirely by hand on prototype boards: we can barely imagine how much time this must have taken.
Output devices include a VGA adapter courtesy of a Raspberry Pi Pico as well as a regular 4-digit 7-segment LED display and a set of classic HP “bubble” LEDs. [Joshua] runs several demos in his video (embedded below), ranging from computing the Mandelbrot set to playing chiptunes on the YM2149. There’s plenty of scope for further expansion, too: [Joshua] plans to build more peripherals including a floppy drive interface and a module to operate a robotic car.
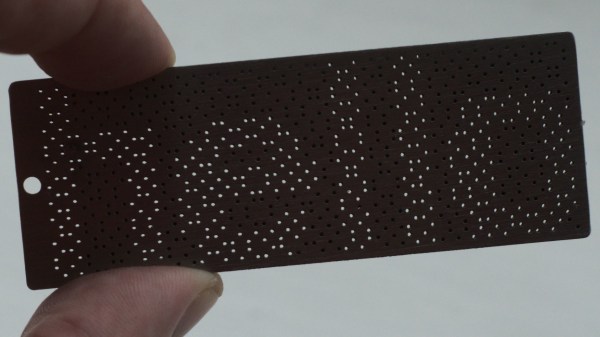
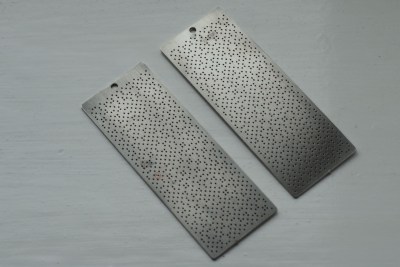
Visual cryptography is one of those unusual cases that kind of looks like a good idea, but it turns out is fraught with problems. The idea is straightforward enough — an image to encrypt is sampled and a series of sub-pixel patterns are produced which are distributed to multiple separate images. When individual images are printed to transparent film, and all films in the set are brought into alignment, an image appears out of the randomness. Without at least a minimum number of such images, the original image cannot be resolved. Well, sort of. [anfractuosity] wanted to play with the concept of visual cryptography in a slightly different medium, that of a set of metal plates, shaped as a set of keyrings.
Two image ‘share pairs’ needed as a minimum to form an image when combined
Metal blanks were laser cut, with the image being formed by transmitted light through coincident holes in both plate pairs, when correctly aligned. What, we hear you ask, is the problem with this cryptography technique? Well, one issue is that of faking messages. It is possible for a malicious third party, given either one of the keys in a pair, to construct a matching key composing an entirely different message, and then substitute this for the second key, duping both original parties. Obviously this would need both parties to be physically compromised, but neither would necessarily notice the substitution, if neither party knew the originally encrypted message. For those interested in digging in a little deeper, do checkout this classic paper by Naor and Shamir [pdf] of the Wiezmann Institute. Still, despite the issues, for a visual hack it’s still a pretty fun technique!
Want to learn a little more about crypto techniques you can do at home? Here’s our guide. Encryption too hard to break, but need a way to eavesdrop? Just punt out a flawed system, and you’re good to go.
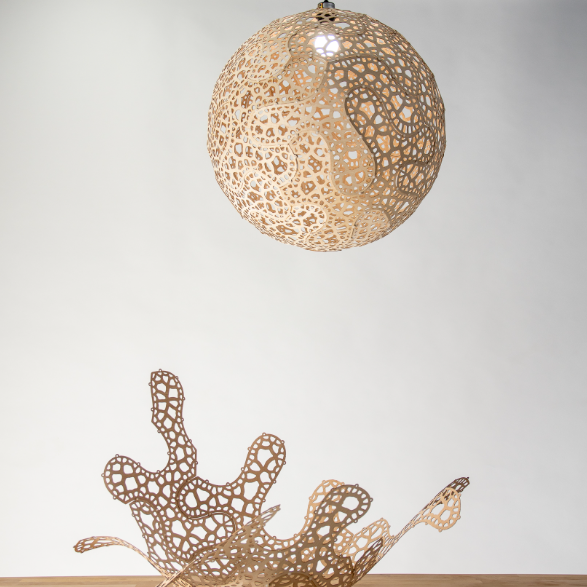
[Nervous System] sells a variety of unique products, and we really appreciate the effort they put into sharing elements of their design and manufacturing processes. This time, it’s details of the work that went into designing a luxury lamp shade that caught our eye.
Top: Finished lamp. Bottom: Partially-assembled.
The finished lamp shade is spherical, but is made entirely from flat-packed pieces of laser-cut wood that have been specifically designed to minimize distortion when assembled into a curved shape. The pieces themselves are reminiscent of puzzle cells; complex, interlocking cellular shapes found in many plants.
As usual, [Nervous System] applied a hefty dose of math and computational design to arrive at a solution. Each unique panel of the lamp is the result of a process that in part implements a technique called variation surface cutting for the shape of the pieces. They also provide a couple of nifty animations that illustrate generating both the piece boundaries as well as the hole patterns in each of the 18 unique pieces that make up each lamp.
As for making the pieces themselves, they are laser-cut from wood veneer, and assembly by the end user takes an hour or two. Watch a video overview, embedded just below under the page break.
We’re glad [Nervous System] takes the time to share details like this, just like the time they figured out the very best type of wood for laser-cutting their unique puzzles and didn’t keep it to themselves.
Who are you? No, who are you really? You’re an amalgamation of influences from your family, your friends, the media, and the parasocial relationships you have with fictional characters. It’s okay; we all are. It can’t be helped that there’s a lot of it about.
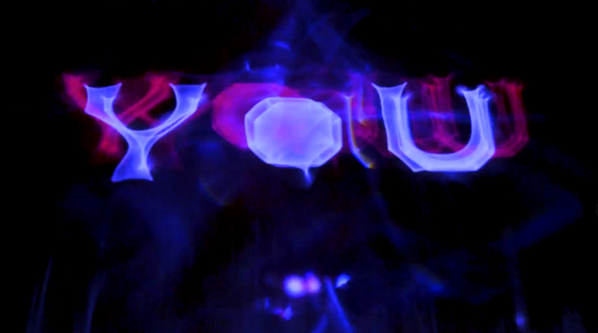
[Kim Pimmel]’s YOU examines this question of identity in the form of projected typography. YOU are solidly laser-cut at birth, but then come the influences — the water of everyday life that surrounds you, the lights that mask your dread or lay you bare, and the prisms of circumstance that twist the light into brilliant patterns that burn memories into your brain.
In this case, the light comes from a hacked camping headlamp that was past its prime. [Kim] laser-cut the letters from acrylic and submerged them in water, which can be manipulated to enhance the effect and mimic the turmoil of life. For added effect, [Kim] held prisms in the light’s path to refract it and cause the patterns to dance. Be sure to check it out after the break, and don’t forget to turn on the sound so you can hear [Kim]’s original composition.
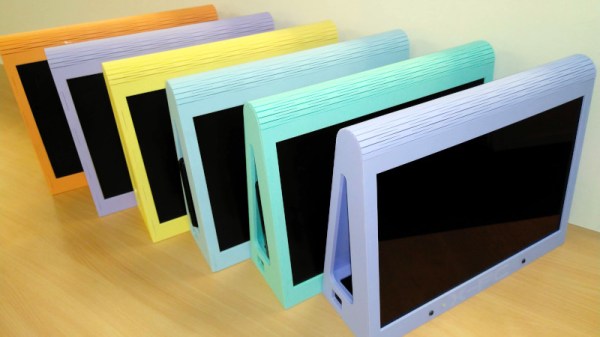
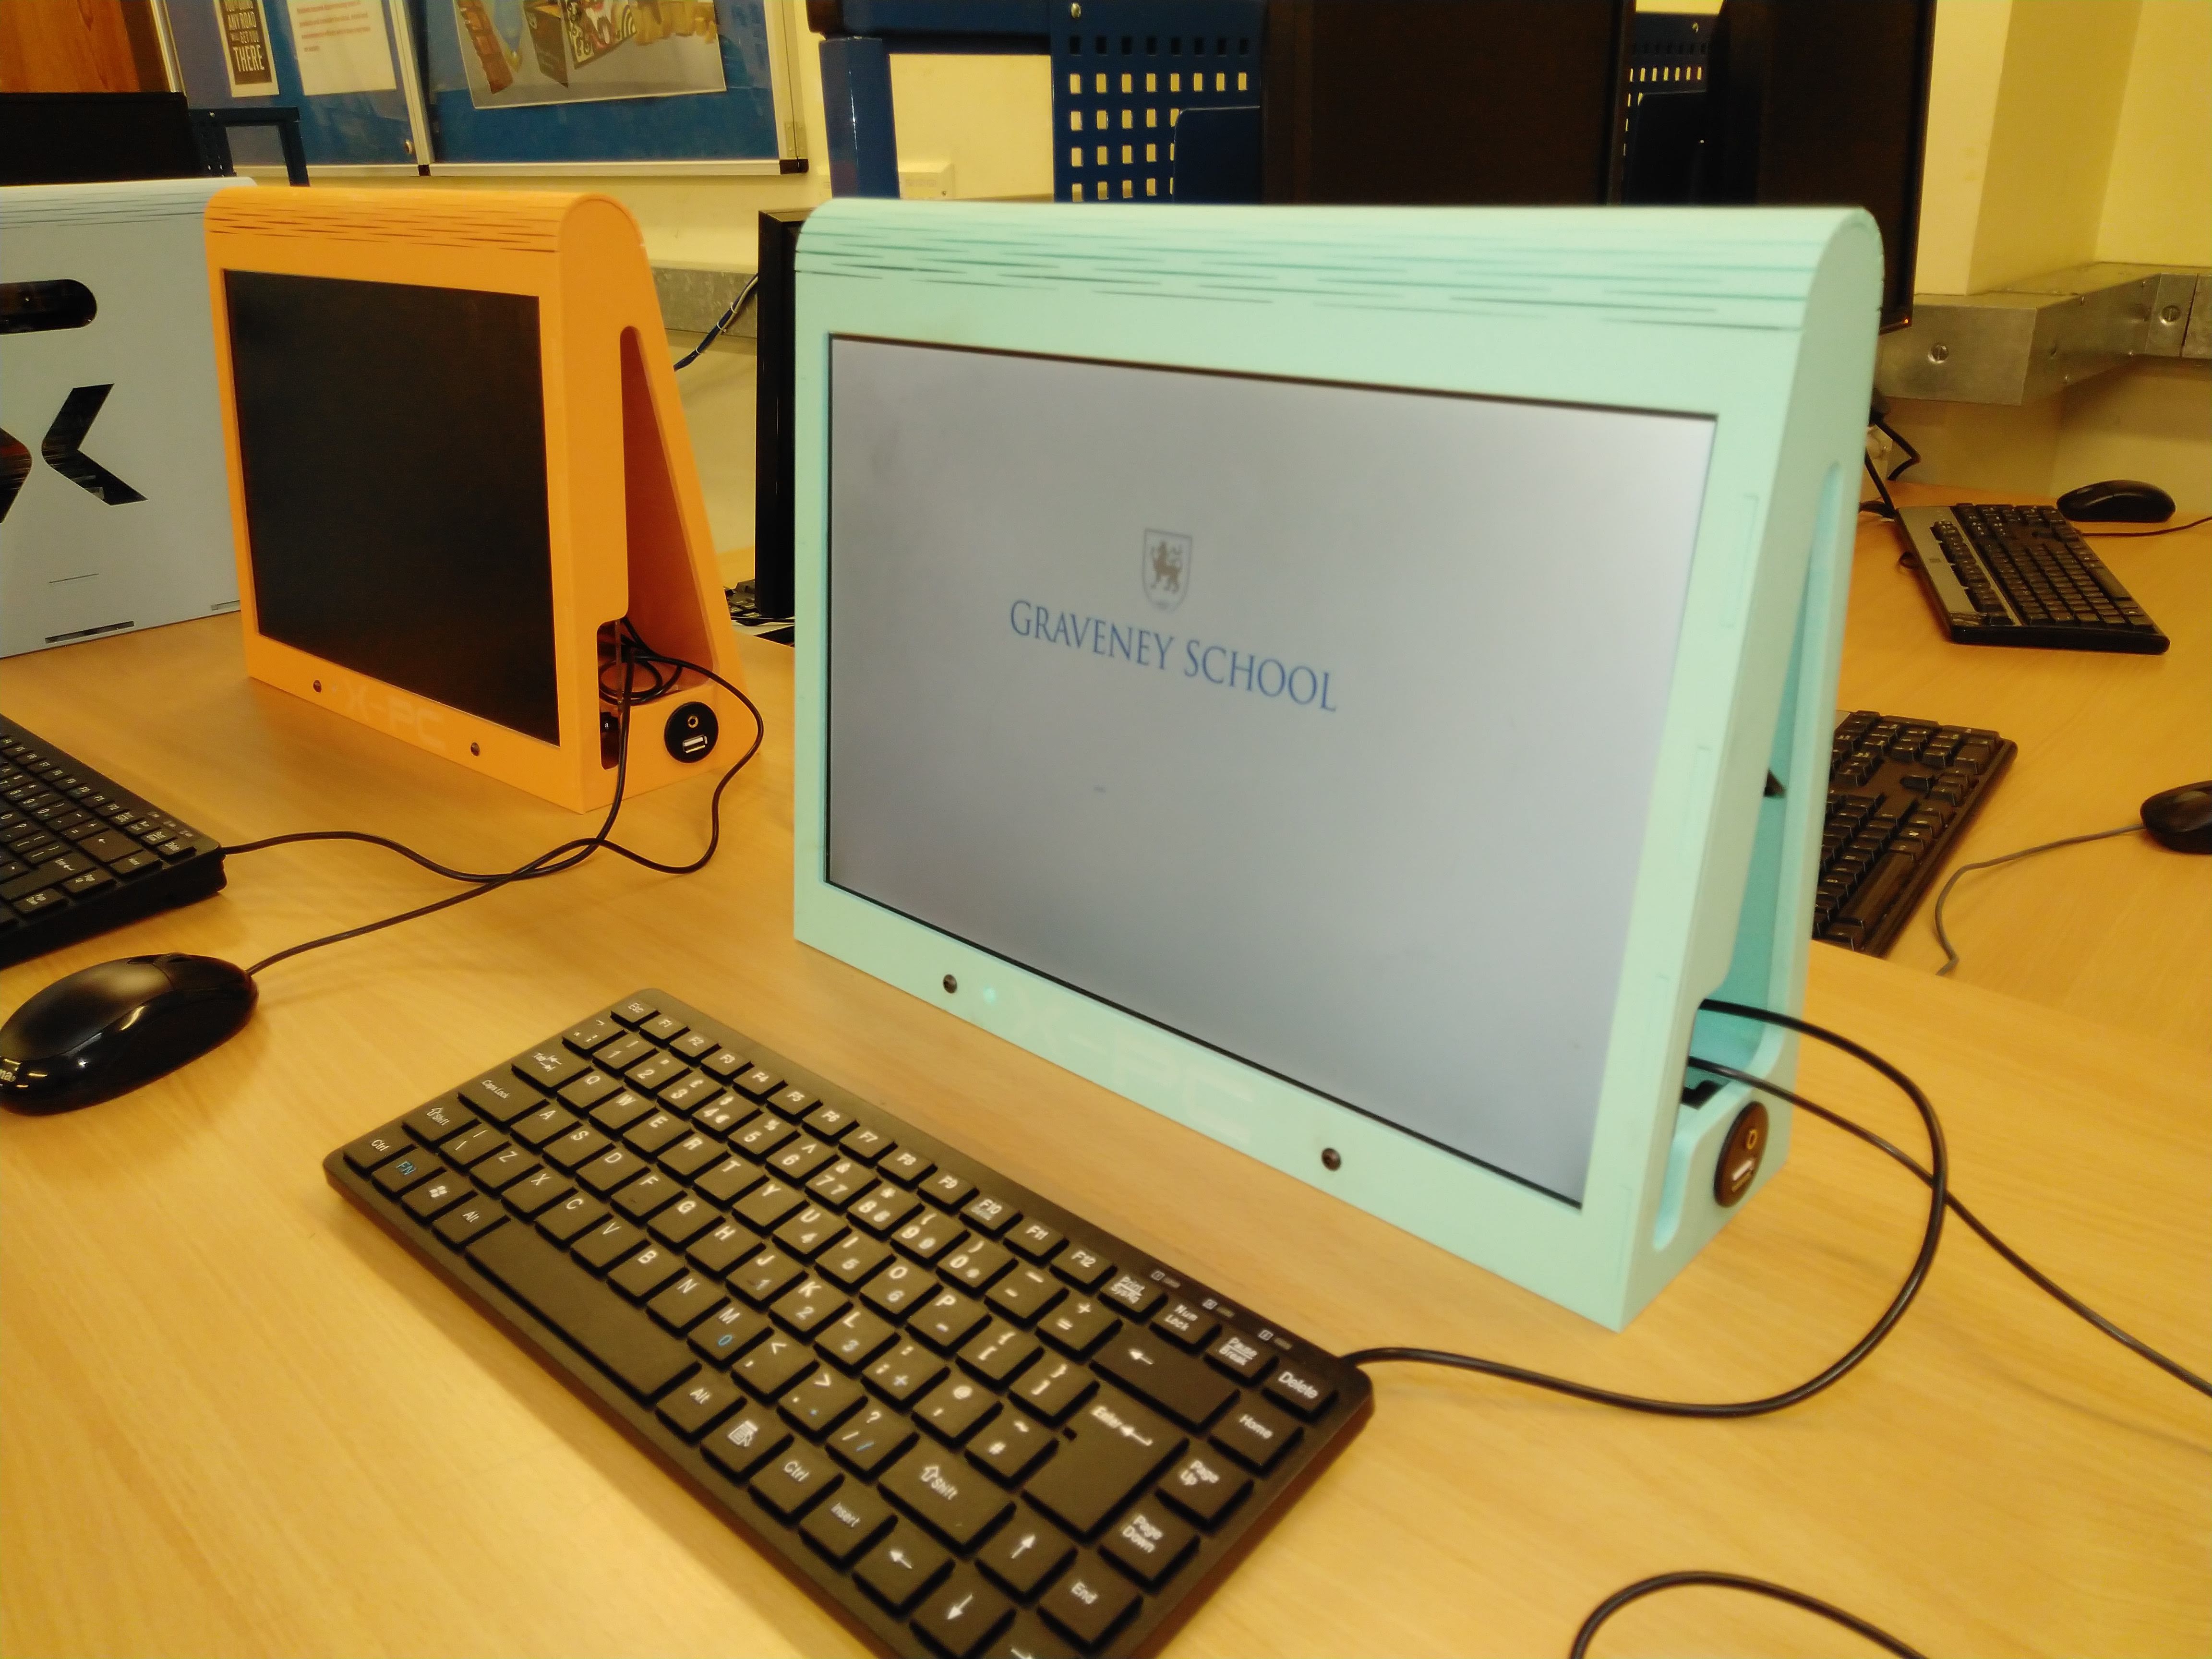
There’s one certainty wherever schoolchildren come into contact with computers: the hardware will inevitably emerge worse for the encounter. The school laptops managed by [Neil Lambert] certainly suffered, losing keys and power supplies aplenty. Faced with a pile of broken machines, he came up with the X-PC, a stylish all-in-one desktop computer built around the innards of a laptop.
Inside a modern laptop there is surprisingly little in the way of parts, now that removable media drives are largely a thing of the past and once the battery has been removed from the equation. When the keyboard and trackpad are subtracted and replaced with USB equivalents the inner workings are reduced to a relatively compact motherboard and hard drive alongside the screen.
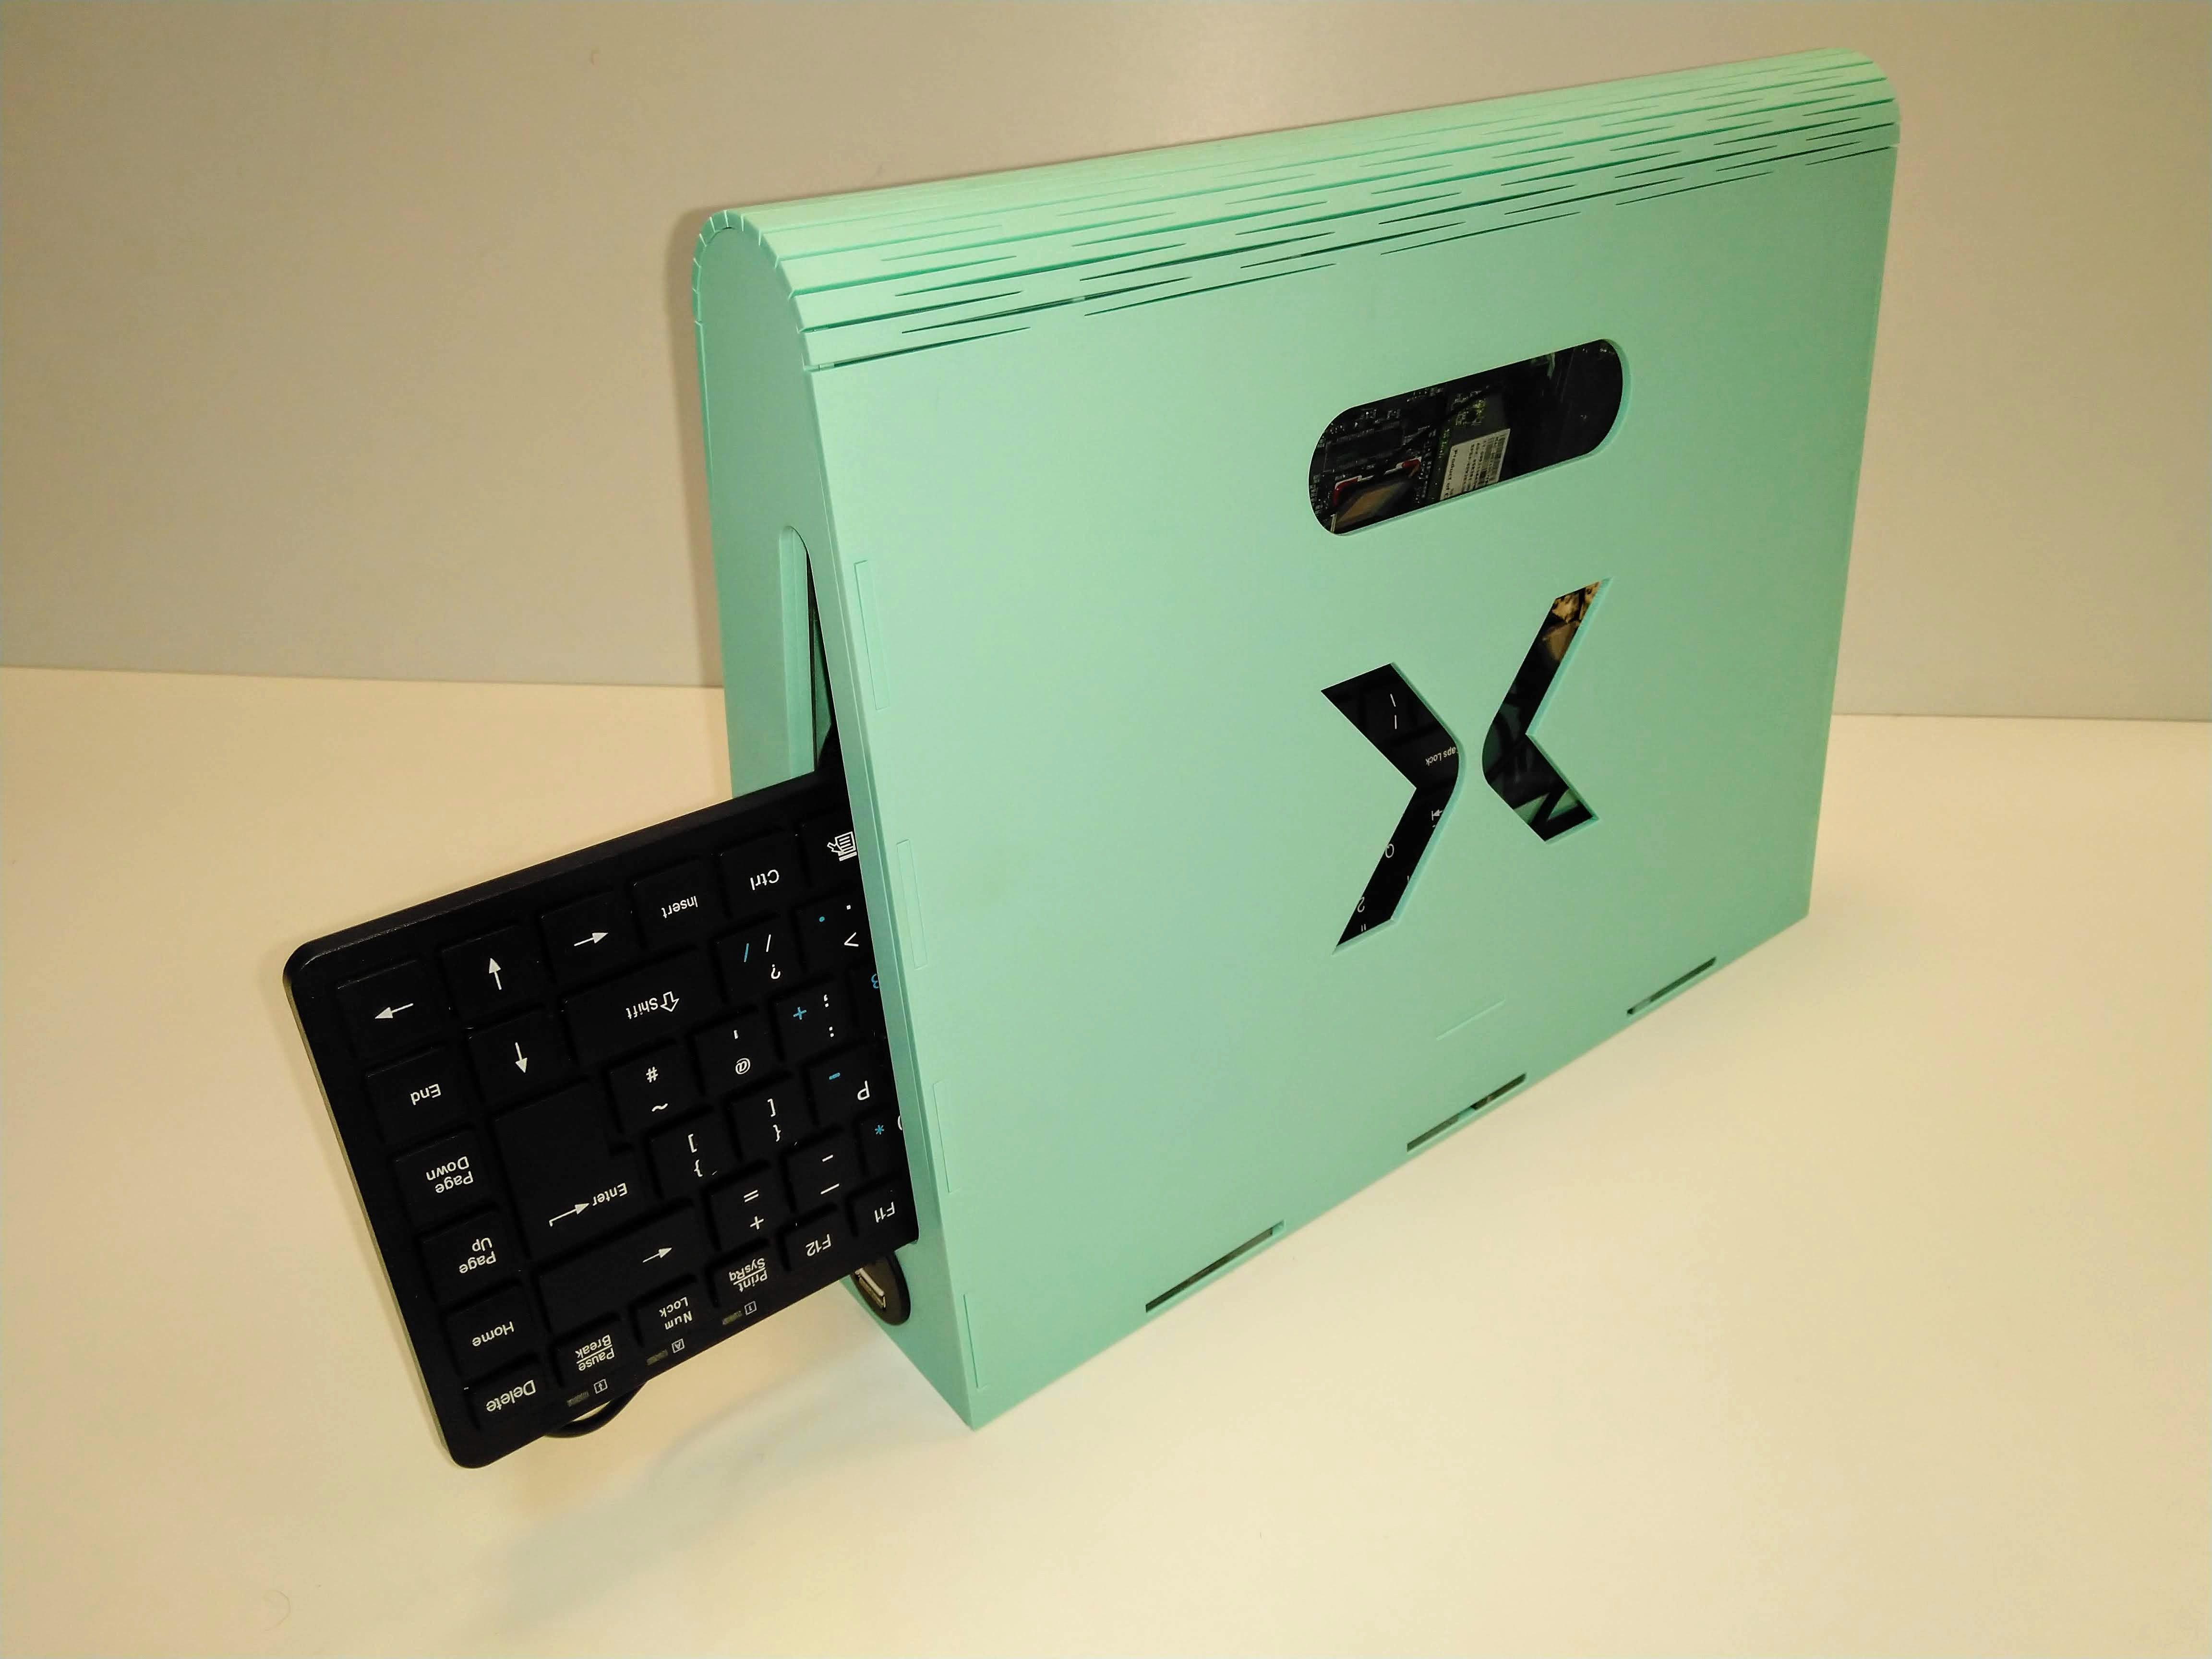
The screen is encased in a lasercut frame that also mounts the motherboard. It includes a lasercut cover that folds over the top in a living hinge to create an A-frame case that also holds the power supply. As an extra bonus the centre of the A provides handy storage for a keyboard.