Fluid Simulation Pendant Teaches Lessons In Miniaturization

Some projects seem to take on a life of their own. You get an idea, design and prototype it, finally build the thing and — it’s good, but it’s not quite right. Back to the drawing board, version 2, still not perfect, lather, rinse, repeat. Pretty soon you look around to discover that you’ve built ten of them. Oops.

That seems to be the arc followed by [mitxela] with this very cool fluid simulation pendant. The idea is simple enough; create a piece of jewelry with a matrix of tiny LEDs that act like the pendant is full of liquid, sloshing about with the slightest movement. In practice, though, this project was filled with challenges. Surprisingly, [mitxela] doesn’t seem to number getting a fluid dynamics simulation running on a microcontroller among those problems, at least not to a great degree. Rather, the LED matrix seemed to cause the most problems, both in terms of laying it out on the 25-mm diameter PCB and how to address the LEDs with relatively limited GPIO on the STM32 microcontroller. The solution to both was diagonal charlieplexing, which reduces the number of vias needed for the 216-LED matrix and allows the 0402 to be densely packed, along with providing some tolerance for solder bridging.

And then there’s the metalworking heroics, which no [mitxela] project would be complete without. This seems to be where a lot of the revisions come from, as the gold-plated brass case kept not quite living up to expectations. The final version is a brass cup containing the LiR2450 rechargeable battery, a magnetic charging connector, and the main PCB, all sealed by a watch crystal. The fluid simulation is quite realistic and very responsive to the pendant’s position. The video below shows it in action along with a summary of the build.

If you want to catch up on [mitxela]’s back catalog of miniaturized builds, start with his amazing industrial ear adornments or these tiny matrix earrings. We’re also fond of his incredible shrinking MIDI builds. Continue reading “Fluid Simulation Pendant Teaches Lessons In Miniaturization”

Brass Propeller Gets Impressive Hand Trimming

Whether you’re a landlubber or an old salt, you’ve got to appreciate the effort that [The Aussie boat guy] puts into cutting an old brass propeller down into a far smaller and sleeker specimen. Especially since he does the entire thing with hand tools, a couple different calipers, and that most valuable of natural resources: experience.

The whole process was made somewhat easier by the fact that [The Aussie boat guy] had a model to work from — his friend had a small propeller that was already known to perform well, it was just a matter of cutting the larger prop down to match its dimensions. Using what appears to be pieces of leather (presumably for its flexibility), a template was made to accurately map out the front face of the blade.

As Bob Ross would say — “Here comes your bravery test”

By measuring out from the hub of the prop with his calipers, [The Aussie boat guy] was able to make sure the template was properly positioned before scribing its shape into the larger prop. An angle grinder was used to cut the shape out of each blade, followed by a smoothing off with a flap wheel.

But there was still a problem — the blades were the right shape, but they were far too thick. So he took the angle grinder to the back of each one to start removing material, using another set of calipers to occasionally spot-check them to make sure they were thinning out at roughly the same rate.

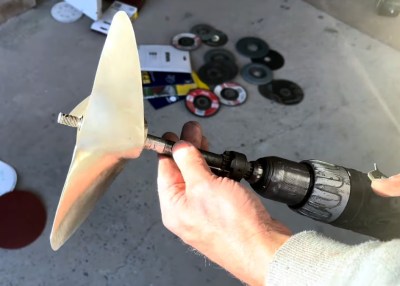
This thinning out process continued until the prop was brought into balance. How do you check that, you might be wondering? Well, if you’re a madman like [The Aussie boat guy], you chuck the thing into a power drill and spin er’ up to see how badly it shakes. But this only gives you a rough idea, so he has to move over to a somewhat more scientific apparatus that uses a set of parallel bars to help determine which blade is heavier than its peers.

Continue reading “Brass Propeller Gets Impressive Hand Trimming”

Making Things Square In Three Dimensions

Measure twice, cut once is excellent advice when building anything, from carpentry to metalworking. While this adage will certainly save a lot of headache, mistakes, and wasted material, it will only get you part of the way to constructing something that is true and square, whether that’s building a shelf, a piece of furniture, or an entire house. [PliskinAJ] demonstrates a few techniques to making things like this as square as possible, in all three dimensions.

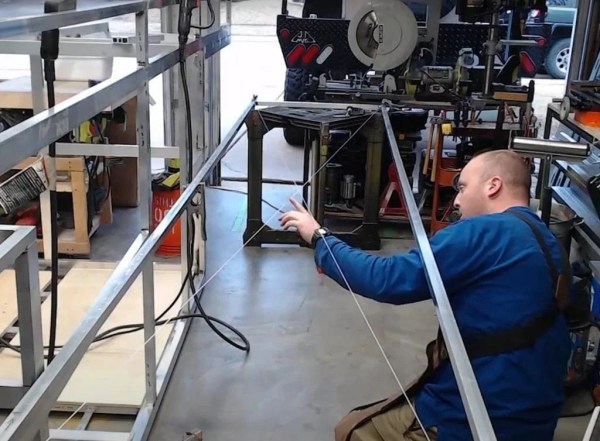
The first method for squaring a workpiece is one most of us are familiar with, which is measuring the diagonals. This can be done with measuring tape or string and ensures that if the diagonals are equal lengths, the workpiece is square. That only gets it situated in two dimensions, though. To ensure it’s not saddle-shaped or twisted, a little more effort is required. [PliskinAJ] is focused more on welding so his solutions involve making sure the welding tables are perfectly flat and level. For larger workpieces it’s also not good enough to assume the floor is flat, either, and the solution here is to minimize the amount of contact it has with the surface by using something like jack stands or other adjustable supports.

There are a few other tips in this guide, including the use of strategic tack welds to act as pivot points and, of course, selecting good stock to build from in the first place, whether that’s lumber or metal. Good design is a factor as well. We’ve also featured a few other articles on accuracy and precision,

No Need To Buy A Woodchipper – Build One!

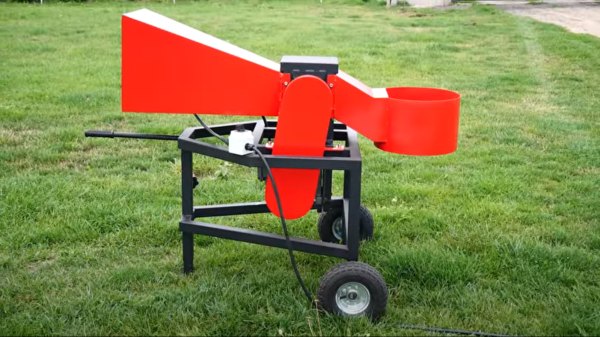
Polish YouTuber WorkshopFromScratch finally got fed up with tripping over piles of garden detritus and decided to have a go at building a woodchipper (Video, embedded below). Since they had a ‘small’ 1.5kW gearmotor just lying idle (as you do) it was an obvious fit for a machine that needs torque rather than supersonic speed. The video is a fabulous 20-minute journey through the workshop showing just about every conceivable metalworking tool being used at some point.

Checkout out the thickness of my blades!

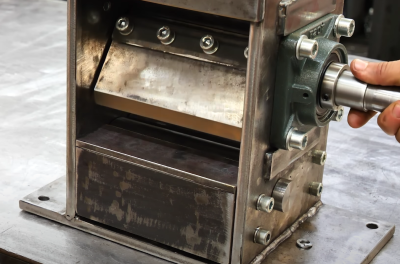
One interesting point is the bottom roller, which sits between a pair of removable guides, which should help the thing self-feed without jamming. Whether that was necessary is not for us to judge, but it can’t hurt. The frame looks like it was constructed from at least 1/4″ thick steel, which is expensive if you don’t happen to have a supply to hand. There’s lots to see, everything from thin sheet metalworking, which was plasma cut, constructing the feed and exhaust guides, to box sections being skilfully welded at some interesting angles to make a cart to move the thing. They tell us the blades were constructed from some seriously thick slabs of C45 grade steel, but currently are not hardened. This is planned for the future, but we suspect not something that is easily achieved in the home workshop!

If this channel is familiar, then you might remember the earlier stump grinder they built. If you are drowning in sawdust, but have a log burner, then you’ll appreciate this sawdust briquette machine.

Continue reading “No Need To Buy A Woodchipper – Build One!”

Hackaday Prize 2023: Machining Metals With Sparks

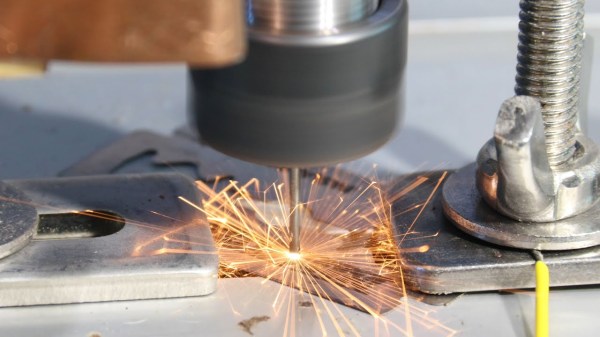
Working with metals can present a lot of unique challenges even for those with a fairly well-equipped shop. Metals like aluminum and some types of steel can be cut readily with grinders and saws, but for thick materials or some hardened steels, or when more complex cuts need to be made, mechanical cutting needs to be reconsidered in favor of something electric like electrical discharge machining (EDM) or a plasma cutter. [Norbert] has been on the path of building his own EDM machine and walks us through the process of generating a spark and its effects on some test materials.

Armed with a microscope, a homemade high-voltage generator, drill bit, and a razor blade to act as the workpiece, [Norbert] begins by experimenting with electrical discharges by bringing the energized drill bit close to the razor to determine the distance needed for effective electrical machining. Eventually the voltage is turned up a bit to dive into the effects of higher voltage discharges on the workpiece. He also develops a flushing system using de-ionized water, and then finally a system to automate the discharges and the movement of the tool.

While not a complete system yet, the videos [Norbert] has created so far show a thorough investigation of this metalworking method as well as some of the tricks for getting a setup like this working. EDM can be a challenging method for cutting metal as we’ve seen before with this similar machine which uses wire as the cutting tool, but some other builds we’ve seen with more robust electrodes have shown some more promise.

Continue reading “Hackaday Prize 2023: Machining Metals With Sparks”

Rocket Stove Efficiently Heats Water

Rocket stoves are an interesting, if often overlooked, method for cooking or for generating heat. Designed to use biomass that might otherwise be wasted, such as wood, twigs, or other agricultural byproducts, they are remarkably efficient and perform relatively complete combustion due to their design, meaning that there are fewer air quality issues caused when using these stoves than other methods. When integrated with a little bit of plumbing, they can also be used to provide a large amount of hot water to something like an off-grid home as well.

[Little Aussie Rockets] starts off the build by fabricating the feed point for the fuel out of steel, and attaching it to a chimney section. This is the fundamental part of a rocket stove, which sucks air in past the fuel, burns it, and exhausts it up the chimney. A few sections of pipe are welded into the chimney section to heat the water as it passes through, and then an enclosure is made for the stove to provide insulation and improve its efficiency. The rocket stove was able to effortlessly heat 80 liters of water to 70°C in a little over an hour using a few scraps of wood.

The metalworking skills of [Little Aussie Rockets] are also on full display here, which makes the video well worth watching on its own. Rocket stoves themselves can be remarkably simple for how well they work, and can even be built in miniature to take on camping trips as a lightweight alternative to needing to carry gas canisters, since they can use small twigs for fuel very easily. We’ve also seen much larger, more complex versions designed for cooking huge amounts of food.

Continue reading “Rocket Stove Efficiently Heats Water”

Learn How Impossibly Close-fitting Parts Are Actually Made

Most of us have seen those demonstrations of metal parts that mate together so finely that, once together, they have no visible seam at all. But how, exactly, is this done? [Steve Mould] has a video that shows and explains all, and we’ve never seen the process explained quite like he does.

The secret ingredient is wire EDM, or Electrical Discharge Machining, but that’s only one part of the whole. Wire EDM works a bit like a hot-wire cutter slicing through foam, but all by itself that’s not enough to produce those impossibly close-fitting parts we love to see.

EDM is capable of astounding precision in part because — unlike a cutting tool — nothing physically contacts the material. Also, there isn’t a lot of friction and heat causing small distortions of the material during the machining process. EDM is as a result capable of fantastically-precise cuts, but not invisible ones.

It’s pretty neat to see a water jet used to thread the fine wire through the workpiece.

In all good manufacturing, the capabilities (and limitations) of the tool are taken into account, and this is also true for making those close-fitting pieces. The hole and plug are actually made in two separate stages.

The hole is cut separately from the plug, and because EDM is capable of such finesse, the cuts can be made in such a way that they complement one another with near-perfection. After that, grinding and polishing takes care of the surface finish. The result is the fantastically-smooth and apparently seamless fitment we like so much.

The video is embedded below, and there are some great details about EDM and how it actually works in there. For example, we see how a wire EDM machine can use a jet of water to help thread the wire through a hole in the part to start a job, and we learn that the wire is constantly moving during the process.

As cool as wire EDM is, it is not magic and we’ve seen some pretty remarkable efforts at bringing the technology into the home workshop.
Continue reading “Learn How Impossibly Close-fitting Parts Are Actually Made”