Magic 8 Ball Provides Tech Support

ChatGPT might be making the news these days for being able to answer basically any question it’s asked, those of us who are a little older remember a much simpler technology that did about the same thing. The humble “Magic 8 Ball” could take nearly the same inputs, provided they were parsed in simple yes/no form, and provide marginal help similar to the AI tools of today. For a toy with no battery or screen, this was quite an accomplishment. But the small toy couldn’t give specific technical support help, so [kodi] made one that can.

The new 8 Ball foregoes the central fluid-filled chamber for an STM32 Blue Pill board with a few lithium batteries to power it. The original plastic shell was split in two with a hacksaw and fitted with a 3D printed ring which allows the two halves to be reconnected and separated again when it needs to charge. It uses a circular OLED to display the various messages of tech support, which are displayed when an accelerometer detects that the toy has been shaken.

Granted, most of the messages are about as helpful to solving a tech support issue as the original magic 8 Ball’s would have been, but we appreciate the ingenuity and carefree nature of a project like this. It also did an excellent job at operating in a low-power state as well, to avoid needing to charge it often. There have been a few other digital conversions of these analog fortune tellers as well, like this one which adds GIFs to each of the original answers.

New Part Day: TI Jumps In To The Cheap MCU Market

One of the interesting areas in the world of new parts recently has been at the lower end of the microcontroller market. Not because the devices there have new capabilities or are especially fast, but because they are cheap. There are now quite a few parts from China under 10 cents apiece, but have the Western manufacturers been able to follow suit? Not quite, but Texas Instruments has a new line of ARM Cortex M0+ parts that get under 40 cents in volume in their cheapest form.

That bottom-of-the-range chip is the MSPM0L1105, a single-core 32 MHz part with 32k of Flash and 4k of RAM. It’s got all the usual peripherals you’d expect on a small microcontroller, but the one which made our heads turn was the on-board 1.45-Msps ADC. On a cheap chip, that’s much faster than expected.

So there’s another microcontroller, and it’s not as cheap as some of its competition, so what? Aside from that ADC there are several reasons to be interested, it has TI’s developer support if you’re in that ecosystem, and inevitably it will find its way on to the dev boards and SBCs we use in our community. It remains to be seen how it will fare in terms of the chip shortage though.

Meanwhile, here’s a reminder of that cheaper competition.

Thanks to the several friends who delivered this tip.

Low-Power Wi-Fi Includes E-Paper Display

Designing devices that can operate in remote environments on battery power is often challenging, especially if the devices need to last a long time between charges or battery swaps. Thankfully there are some things available that make these tasks a little easier, such as e-ink or e-paper displays which only use power when making changes to the display. That doesn’t solve all of the challenges of low-power devices, but [Albertas] shows us a few other tricks with this development board.

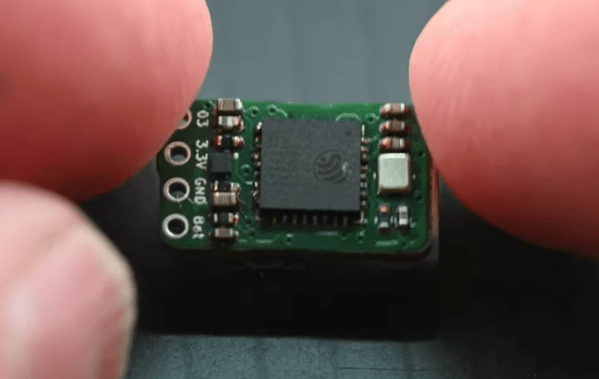
The platform is designed around an e-paper display and is meant to be used in places where something like sensor data needs to not only be collected, but also displayed. It also uses the ESP32C3 microcontroller as a platform which is well-known for its low power capabilities, and additionally has an on-board temperature and humidity sensor. With Bluetooth included as well, the tiny device can connect to plenty of wireless networks while consuming a remarkably low 34 µA in standby.

With a platform like this that can use extremely low power when not taking measurements, a battery charge can last a surprisingly long time. And, since it is based on common components, adding even a slightly larger battery would not be too difficult and could greatly extend this capability as well. But, we have seen similar builds running on nothing more than a coin cell, so doing so might only be necessary in the most extreme of situations.

A CH32V003 Toolchain — If You Can Get One To Try It On

We’re in an exciting time for cheap microcontrollers, as with both the rise of RISC-V and the split between ARM and its Chinese subsidiary, a heap of super-cheap and very capable parts are coming to market. Sometimes these cheap chips come with the catch of being difficult to program though, but for one of them the ever-dependable [CNLohr] has brought together his own open-source toolchain. The part in question is the WCH CH32V003, which is a ten-cent RISC-V part that has an impressive array of capabilities. As always though, there’s a snag, in that we’re also told that while supplies are improving this part can be hard to find. The repository is ready for when you can get them again though, and currently also contains some demo work including addressable LED driver code.

As an alternative there’s a comparable and slightly cheaper ARM-based part, the Puya PY32. It’s reckoned to be the cheapest of the flash-based microcontrollers, and like the WCH part is bearing down on the crop of one-time-programmable chips such as the famous and considerably less powerful 3-cent Padauk. This end of the market is certainly heating up a little, and from our point of view this can only mean some exciting projects ahead.

Wi-Fi Sensor For Rapid Prototyping

There might seem like a wide gulf between the rapid prototyping of a project and learning a completely new electronics platform, but with the right set of tools, these two tasks can go hand-in-hand. That was at least the goal with this particular build, which seeks to use a no-soldering method of assembling electronics projects and keeping code to a minimum, while still maintaining a platform that is useful for a wide variety of projects.

As a demonstration, this specific project is a simple Wi-Fi connected temperature monitoring station. Based around an ESP32 and using a DS18B20 digital temperature sensor, the components all attach to a back plate installed in a waterproof enclosure and are wired together with screw-type terminal breakout boards to avoid the need for soldering. The software suite is similarly easy to set up, revolving around the use of Tasmota and ESPHome, which means no direct programming — although there will need to be some configuration of these tools.

With the included small display, this build makes a very capable, simple, and quick temperature monitor. But this isn’t so much a build about monitoring temperature but about building and prototyping quickly without the need for specialized tools and programming. There is something to be said for having access to a suite of rapid prototyping tools for projects as well, though.

Audio Playback Toy For DSP Adventures

The declining costs of single-board computers has made serious computing power available for even the most trivial of tasks. It’s easy enough to slap a Raspberry Pi onto almost anything for nearly the same cost as a powerful 32-bit microcontroller platform, but this takes some of the fun out of projects for a few of us. Looking to get into the weeds can be a challenge as well, as [Michal Zalewski] demonstrates in this audio playback device he built from a simple 8-bit microcontroller.

The small toy takes audio input from a microphone through an op-amp and feeds this signal to an ADC within the AVR128DA28 microcontroller. The data is then stored on a separate memory chip ready to be played back through another op-amp paired with a speaker. This is where being familiar with the inner workings of the microcontroller comes in handy. By manipulating the interrupt routines in specific ways, the audio stored in memory can be played back at various speeds.

[Michal] intended this build to be a toy for one of his younger relatives, and for the price of a few ICs and buttons it does a pretty good job of turning a regular voice into a chipmunk voice like some commercial children’s toys some of us might remember. If the design aesthetics of this gadget look familiar, you may be thinking of his minimalist gaming device which we recently featured.

A wooden box sits on a darker wooden table. The box has a red, glowing number 8 on it.

Ambient Display Tells You If Borealis Is Coming To Town

For those times when you’d rather not get sucked down another internet rabbit hole when you really just wanted the weather, an ambient display can be great. [AlexanderK106] built a simple ambient display to know the probability the Northern Lights would visit his town.

Starting with a NodeMCU featuring the ESP8266, [AlexanderK106] walks us through a beginner-friendly tutorial on how to do everything from configure the Arduino IDE, the basics of using a breadboard. finding a data source and parsing it, and finally sticking everything into an enclosure.

The 7-segment display is taped and set into the back of the 1/4″ pine with enough brightness to shine through the additional layer of veneer on top. The display is set to show one digit and then the next before a three second repeat. A second display would probably make this easier to use day-to-day, but we appreciate him keeping it simple for this tutorial.

Looking for more ambient displays? Checkout the Tempescope or this clock that lets you feel the temperature outside!