Game Boy Becomes Super Game Boy With A Pair Of Pis

For the Nintendo aficionados of the 90s, the Super Game Boy was a must-have cartridge for the Super Nintendo which allowed gamers to play Game Boy games on your TV. Not only did it allow four-color dot-matrix gaming on the big screen, but it let you play those favorite Game Boy titles without spending a fortune on AA batteries. While later handhelds like the PSP or even Nintendo Switch are able to output video directly to TVs without issue, the original Game Boy needed processing help from an SNES or, as [Andy West] shows us, it can also get that help from a modern microcontroller.

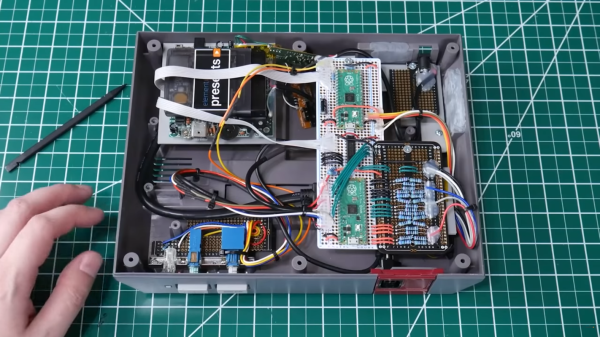
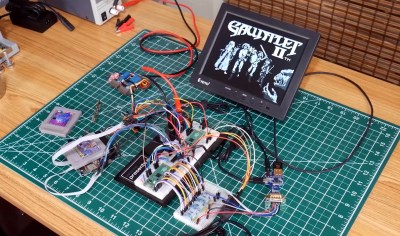
Testing the design before installing it in the NES case.

The extra processing power in this case comes from a Raspberry Pi Pico which is small enough to easily fit inside of a donor NES case and also powerful enough to handle the VGA directly. For video data input, the Pico is connected to the video pins on the Game Boy’s main board through a level shifter. The main board is also connected to a second Pico which handles the controller input from an NES controller. Some fancy conversion needed to be done at this point because although the controller layouts are very similar, they are handles by the respective consoles completely differently.

With all of the technical work largely out of the way, [Andy] was able to put the finishing touches on the build. These included making sure the power buttons, status LEDs, and reset button all functioned, and restoring the NES case complete with some custom “Game Guy” graphics to match the original design of the Game Boy. We commend the use of original Game Boy hardware in this build as well, which even made it possible for [Andy] and his wife to play a head-to-head game of Dr. Mario through a link cable with another Game Boy. If you’re looking for a simpler way of playing on original hardware without burning a hole in your wallet buying AA batteries, take a look at this Game Boy restoration which uses a Lithium battery instead.

Continue reading “Game Boy Becomes Super Game Boy With A Pair Of Pis”

Pico Does PID

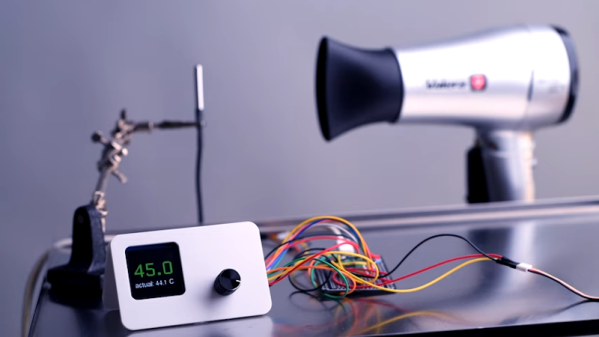
If you wanted to, say, control a temperature you might think you could just turn on a heater until you reach the desired temperature and then turn the heater off. That sort of works, but it is suboptimal — you’ll tend to overshoot the goal and then as the system cools down, you’ll have to catch up and the result is often a system that oscillates around the desired value but never really settles on the correct temperature. To solve that, you can use a PID — proportional integral derivative — loop and that’s what [veebch] has done with a Rasberry Pi PICO and Micropython.

The idea is to control an output signal based on the amount of difference between the actual temperature and the desired temperature (the proportional error). In addition, the amount is adjusted based on the long term error (integral) and any short term change (the derivative). You can also see a video about using the control loop to make a better sous vide burger, below. Continue reading “Pico Does PID”

Digital Rain Animation Crammed Into Pi Pico

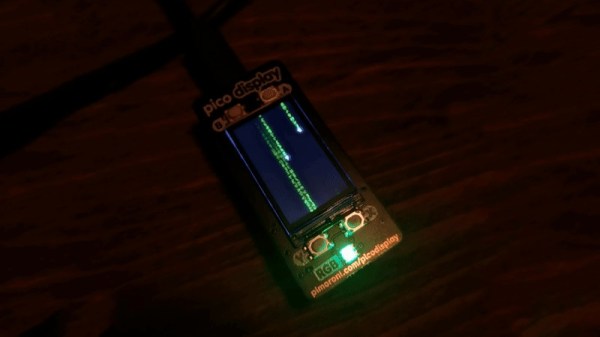
With a new Matrix movie now in cinemas, we’ve all been reminded of those screensavers that were just the coolest thing ever when the original film dropped in 1999. [en0b] decided to recreate the classic “digital rain” effect on the Raspberry Pi Pico, using up all the little microcontroller’s storage in the process.

Rather than rely on existing graphics libraries, [en0b] set about using a high-quality GIF for the animation. The original file was 8 MB, which was far too big to fit on the Pico. After some finagling in an image editor and with the help of a custom Python script, however, [en0b] managed to fit the 127-frame animation at 240 x 135 resolution into the 2 MB Flash onboard the chip. With the microcontroller hooked up to the 1.14″ IPS “Pico Display” from Pimoroni, the final looks great and faithfully recreates the aesthetic seen in the film.

[en0b]’s technique could reliably be used for displaying any GIF that you can cut down to 14 to 16 colors without losing too much quality. It’s not the world’s highest-end graphics format, but it does the job for little animations like these.

We’ve seen similar builds before too, using more heavy-duty hardware to build a magic 8-ball in much the same way. Meanwhile, if you’ve got your own neat little GIF hacks or Pico projects, don’t hesitate to send them in!

Automatic guitar tuning robot

Handheld Bot Takes The Tedium Out Of Guitar Tuning

Even with fancy smartphone apps and custom-built tuners, tuning a guitar can be a tedious process, especially for the beginner. Pluck a string, figure out if the note is sharp or flat, tighten or loosen accordingly, repeat. Then do the same thing for all six strings. It’s no wonder some people never get very far with the guitar.

Luckily, technology can come to the rescue in the form of this handy open-source automatic guitar tuner by [Guyrandy Jean-Gilles]. The tuner has a Raspberry Pi Pico inside, with a microphone attached to the ADC. The program running on the Pico listens for the sound of a plucked string and determines whether the note is sharp or flat. The Pico then drives a small DC gear motor in the appropriate direction, which turns the peg the right way to bring the string into tune. The tuner makes ample use of 3D-printed parts, STLs for which are included in the project repo. [Guyrandy] has also made some updates to the project to make the tuner a little easier to use.

While there’s an affordable commercial version of this — upon which [Guyrandy] based his design — we really like the fact that he rolled his own here, and made the design freely accessible to everyone. We also like the idea that guitarists who can’t use tuners requiring visual feedback can use this, too — just like this one.

[via r/raspberry_pi]

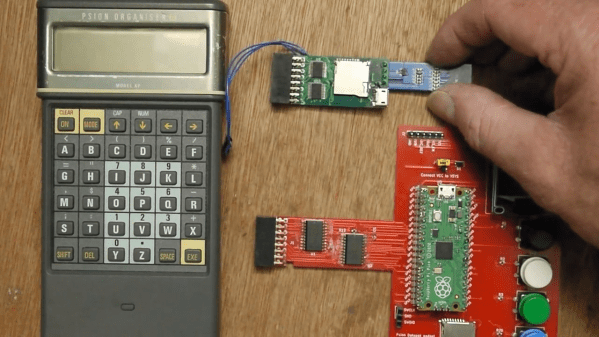
Psion Organiser with a Pico memory pack.

Proto-PDA Regains Its Memory With The Help Of A Raspberry Pi Pico

Remember the Psion Organiser? If you do, chances are you were an early adopter, as the 8-bit pocket computer had its heyday in the mid-1980s. Things have come a long way since then, of course, but just how far is illustrated nicely by the fact that a Raspberry Pi Pico can stand in for the Psion’s original memory packs.

Like many of the early attempts at putting a computer in your pocket, the Psion II had removable modules, which were dubbed “Datapaks”. The earliest versions of the Datapaks were little more than an EPROM chip on a small PCB, and the technical limitations of the day plus the quirky way of addressing the memory made it possible for [Amen] to mimic a Datapak using a modern microcontroller.

The first version was a breakout board that extended out of the Datapak slot significantly, with a Pico, OLED display, SD card slot, and a bunch of pushbuttons. That prototype proved that the Pico was indeed fast enough to fool the Psion into thinking a legit Datapak was plugged in. [Amen] later refined the design by making a board that stuffs everything into the Datapak slot, with the exception of the OLED which still dangles out where it can be seen. He puts the faux memory to the test in the video below.

It’s great to see groundbreaking tech of yesteryear like the Psion being taken care of and returned to use. We’ve seen others try before; here’s a hack that uses a Pi to connect a Psion Organiser to the internet through its RS-232 serial port.

Continue reading “Proto-PDA Regains Its Memory With The Help Of A Raspberry Pi Pico”

Play Your Favorite Nokia Game On The Raspberry Pi Pico

In many people’s memories, Snake lived and breathed on Nokia handsets from the late 90s and early 2000s. However, the game has been around for much longer than that, and will continue to live on in the future. That’s at least in part thanks to people like [Hari Wiguna] keeping it alive by implementing it on new platforms.

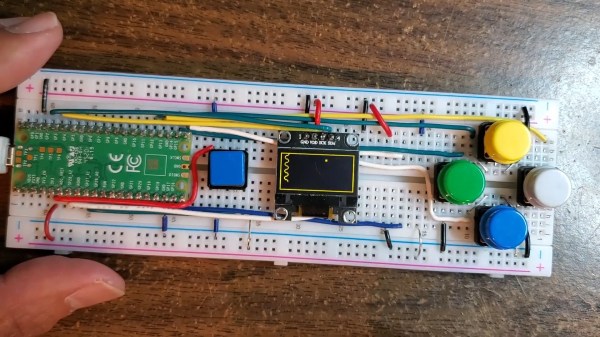
[Hari] set about writing Snake in MicroPython for the Raspberry Pi Pico. The hardware side of things is simple enough – five buttons hooked up to the Pico, along with an 128×64 I2C OLED screen to display the game on. On the software side of things, [Hari] pushed the boat out, deciding that his version of Snake had to have the player character slither like the real thing. This took a little effort to get right, particularly when navigating corners in different directions. However, perseverance paid off and [Hari] got the job done.

Code is on GitHub for those that want to tinker at home. It’s a tidy piece of work, though not the weirdest place we’ve seen the game appear – we’ve actually seen it run within PCB routing software before thanks to some nifty scripting. Video after the break. Continue reading “Play Your Favorite Nokia Game On The Raspberry Pi Pico”

AVR Reverse Engineering Hack Chat

Join us on Wednesday, April 21 at noon Pacific for the AVR Reverse Engineering Hack Chat with Uri Shaked!

We’ve all become familiar with the Arduino ecosystem by now, to the point where it’s almost trivially easy to whip up a quick project that implements almost every aspect of its functionality strictly in code. It’s incredibly useful, but we tend to lose sight of the fact that our Arduino sketches represent a virtual world where the IDE and a vast selection of libraries abstract away a lot of the complexity of what’s going on inside the AVR microcontroller.

While it’s certainly handy to have an environment that lets you stand up a system in a matter of minutes, it’s hardly the end of the story. There’s a lot to be gained by tapping into the power of assembly programming on the AVR, and learning how to read the datasheet and really run the thing. That was the focus of Uri Shaked’s recent well-received HackadayU course on AVR internals, and it’ll form the basis of this Hack Chat. Then again, since Uri is also leading a Raspberry Pi Pico and RP2040 course on HackadayU in a couple of weeks, we may end up talking about that too. Or we may end up chatting about something else entirely! It’s really hard to where this Hack Chat will go, given Uri’s breadth of interests and expertise, but we’re pretty sure of one thing: it won’t be boring. Make sure you log in and join the chat — where it goes is largely up to you.

join-hack-chatOur Hack Chats are live community events in the Hackaday.io Hack Chat group messaging. This week we’ll be sitting down on Wednesday, April 21 at 12:00 PM Pacific time. If time zones have you tied up, we have a handy time zone converter.

Click that speech bubble to the right, and you’ll be taken directly to the Hack Chat group on Hackaday.io. You don’t have to wait until Wednesday; join whenever you want and you can see what the community is talking about.
Continue reading “AVR Reverse Engineering Hack Chat”