Juggling Machine Listens To The Bounce To Keep Ball In The Air

It’s a seemingly simple task: bounce a ping-pong ball on a wooden paddle. So simple that almost anyone can pick up a ball and a paddle and make a reasonable job of it. Now, close your eyes and try to do it just by the sound the ball makes when it hits the paddle. That’s a little tougher, but this stepper-driven platform juggler manages it with aplomb.

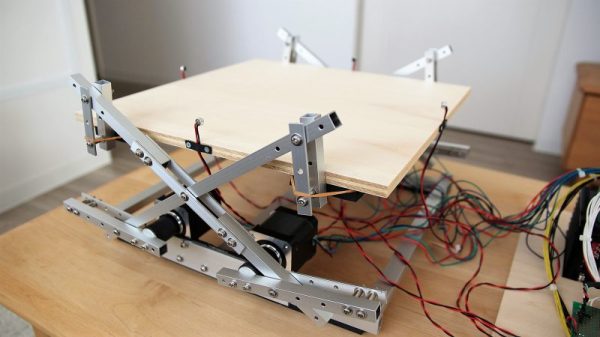
That’s not to say that the path to the finished product in the video below was a smooth one for [tkuhn]. He went through multiple iterations over the last two years, including a version that surrounded the juggling platform with a fence of phototransistors to track where the ball was at any time. That drove four stepper motors through a cross-linkage that popped the platform up at just the right moment to keep the ball moving, and at just the right angle to nudge it back toward the center of the platform. The current version of the platform does away with the optical sensors in favor of four small microphones. The mics pick up the sharp, well-defined sound of the ball hitting the platform, process the signal through an analog circuit, and use that signal to trigger a flip-flop if the signal exceeds a setpoint. An Arduino then measures the time delay between arriving signals, calculates the ball’s position on the platform, and drives the steppers through a PID loop to issue the corrective bounce.

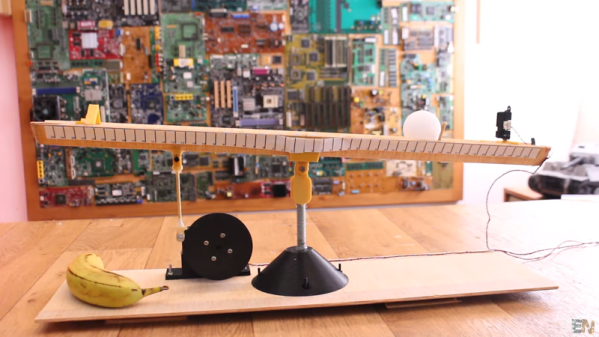
The video below is entrancing, but we found ourselves wishing for a side view of the action too. It’s an impressive build nonetheless, one that reminds us of the many maze-runner and Stewart platform robots we’ve seen.

Continue reading “Juggling Machine Listens To The Bounce To Keep Ball In The Air”

DIY Tube Oven Brings The Heat To Homebrew Semiconductor Fab

Specialized processes require specialized tools and instruments, and processes don’t get much more specialized than the making of semiconductors. There’s a huge industry devoted to making the equipment needed for semiconductor fabrication plants, but most of it is fabulously expensive and out of reach to the home gamer. Besides, where’s the fun in buying when you can build your own fab lab stuff, like this DIY tube oven?

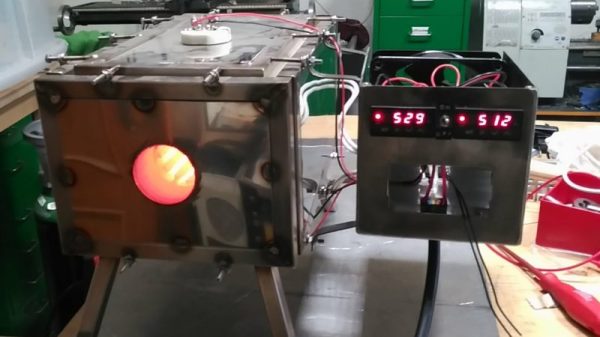
A tube oven isn’t much more complicated than it sounds — it’s just a tube that gets hot. Really, really hot — [Nixie] is shooting for 1,200 °C. Not just any materials will do for such an oven, of course, and this one is built out of blocks of fused alumina ceramic. The cavity for the tube was machined with a hole saw and a homebrew jig that keeps everything aligned; at first we wondered why he didn’t use his lathe, but then we realized that chucking a brittle block of ceramic would probably not end well. A smaller hole saw was used to make trenches for the Kanthal heating element and the whole thing was put in a custom stainless enclosure. A second post covers the control electronics and test runs up to 1,000°C, which ends up looking a little like the Eye of Sauron.

We’ve been following [Nixie]’s home semiconductor fab buildout for a while now, starting with a sputtering rig for thin-film deposition. It’s been interesting to watch the progress, and we’re eager to see where this all leads.

Supersize DIY R/C Servos From Windscreen Wipers

We’re all familiar with the experience of buying hobby servos. The market is awash with cheap clones which have inflated specs and poor performance. Even branded servos often fail to deliver, and sometimes you just can’t get the required torque or speed from the small form factor of the typical hobby servo.

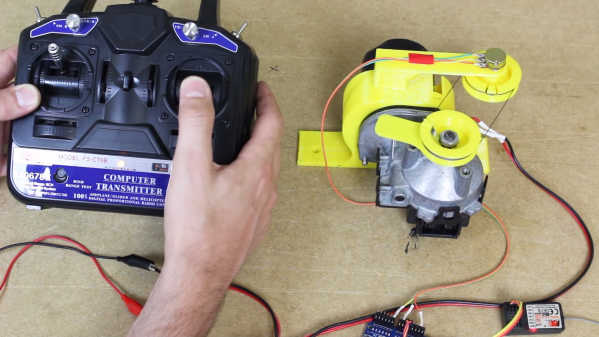
Enter [James Bruton] and his DIY RC servo from a windscreen wiper motor. Windscreen wiper motors are cheap as chips, and a classic salvage. The motor shaft is connected to a potentiometer via a pulley and some string, providing the necessary closed-loop feedback. Instead of using the traditional analog circuitry found inside a servo, an Arduino provides the brains. This means PID control can be implemented on the ‘duino, and tuned to get the best response from different load characteristics. There’s also the choice of different interfacing options: though [James]’ Arduino code accepts PWM signals for a drop-in R/C servo replacement, the addition of a microcontroller means many other input signal types and protocols are available. In fact, we recently wrote about serial bus servos and their numerous advantages.

We particularly love this because of the price barrier of industrial servomotors; sure, this kind of solution doesn’t have the precision or torque that off-the-shelf products provide, but would be sufficient for many hacks. Incidentally, this is what inspired one of our favourite open source projects: ODrive, which focuses on harnessing the power of cheap brushless motors for industrial use.

Continue reading “Supersize DIY R/C Servos From Windscreen Wipers”

Reflowduino: Put That Toaster Oven To Good Use

There are few scenes in life more moving than the moment the solder paste melts as the component slides smoothly into place. We’re willing to bet the only reason you don’t have a reflow oven is the cost. Why wouldn’t you want one? Fortunately, the vastly cheaper DIY route has become a whole lot easier since the birth of the Reflowduino – an open source controller for reflow ovens.

This Hackaday Prize entry by [Timothy Woo] provides a super quick way to create your own reflow setup, using any cheap means of heating you have lying around. [Tim] uses a toaster oven he paid $21 for, but anything with a suitable thermal mass will do. The hardware of the Reflowduino is all open source and has been very well documented – both on the main hackaday.io page and over on the project’s GitHub.

The board itself is built around the ATMega32u4 and sports an integrated MAX31855 thermocouple interface (for the all-important PID control), LiPo battery charging, a buzzer for alerting you when input is needed, and Bluetooth. Why Bluetooth? An Android app has been developed for easy control of the Reflowduino, and will even graph the temperature profile.

When it comes to controlling the toaster oven/miscellaneous heat source, a “sidekick” board is available, with a solid state relay hooked up to a mains plug. This makes it a breeze to setup any mains appliance for Arduino control.

We actually covered the Reflowduino last year, but since then [Tim] has also created the Reflowduino32 – a backpack for the DOIT ESP32 dev board. There’s also an Indiegogo campaign now, and some new software as well.

If a toaster oven still doesn’t feel hacky enough for you, we’ve got reflowing with hair straighteners, and even car headlights.

Reflow Rig Makes SMD Soldering A Wok In The Park

For a DIY reflow setup, most people seem to rely on the trusty thrift store toaster oven as a platform to hack. But there’s something to be said for heating the PCB directly rather than heating the surrounding air, and for that one can cruise the yard sales looking for a hot plate to convert. But an electric wok as a reflow hotplate? Sure, why not?

At the end of the day [ThomasVDD]’s reflow wok is the same as any other reflow build. It has a heat source that can be controlled easily, temperature sensors, and a microcontroller that can run the proportional-integral-derivative (PID) control algorithm needed for precise temperature control. That the heating element he used came from an electric wok was just a happy accident. A laser-cut MDF case complete with kerf-bent joints holds the heating element, the solid-state relay, and the Arduino Nano that runs the show. A MAX6675 thermocouple amp senses the temperature and allows the Nano to cycle the temperature through different profiles for different solders. It’s compact, simple, and [ThomasVDD] now has a spare wok to use on the stove top. What’s not to like?

Reflow doesn’t just mean oven or hotplate, of course. Why not give reflow headlights, a reflow blowtorch, or even a reflow work light a try?

PID Control With Arduino

Experience — or at least education — often makes a big difference to having a successful project. For example, if you didn’t think about it much, you might think it is simple to control the temperature of something that is heating. Just turn on the heater if it is cold and turn it off when you hit the right temperature, right? That is one approach — sometimes known as bang-bang — but you’ll find there a lot of issues with that approach. Best practice is to use a PID or Proportional/Integral/Derivative control. [Electronoob] has a good tutorial about how to pull this off with an Arduino. You can also see a video, below.

The demo uses a 3D printer hot end, a thermocouple, a MAX6675 that reads the thermocouple, and an Arduino. There’s also an LCD display and a FET to control the heater.

Continue reading “PID Control With Arduino”

Digital Kiln

A kiln or foundry is too often seen as a piece of equipment which is only available if a hackspace is lucky enough to have one or individuals are dedicated enough to drop the cash for one of their own. [The Thought Emporium] thought that way until he sourced materials to make his own kiln which can also be seen after the break. It costs half the price of a commercial model not including a failed—and exploded—paint can version.

As described in the video, these furnaces are tools capable of more than just pottery and soft metal baubles. Sure, a clay chess set would be cool but what about carbon fiber, graphene, aerogel, and glass? Some pretty hot science happens at high temperatures.

We get a nice walk-through of each part of the furnace starting with the container, an eleven-gallon metal tub which should set the bar for the level of kiln being built. Some of the hardware arrangements could be tweaked for safety and we insist that any current-carrying screw is safely mounted inside an enclosure which can’t be opened without tools. There’s good advice about grounding the container if metal is used. The explanation of PID loops can be ignored.

What else can you do with a kiln? How about jewelry, heat treating metal, or recycle your beer cans into an engine.

Continue reading “Digital Kiln”