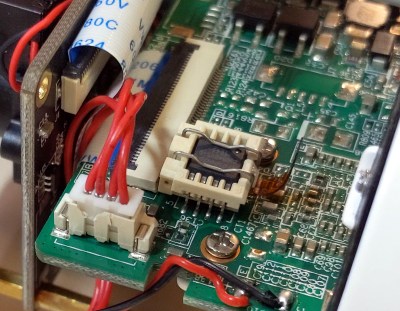
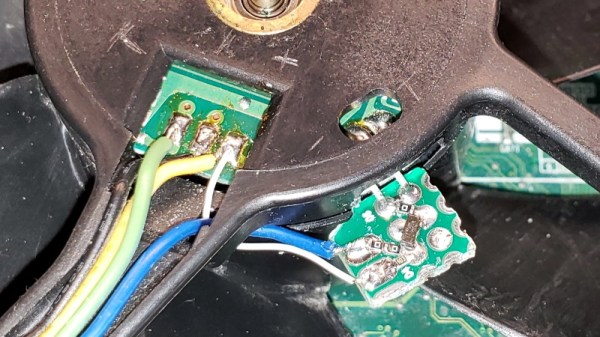
100% display from filter screen and the responsible mod chip

Clearing The Air About Proprietary Consumables With A Xiaomi Filter DRM Resetter

The “razor and blades model” probably set a lot of young hackers on their current trajectory. If we buy a widget, we want to pick our widget refills instead of going back to the manufacturer for their name-brand option. [Flamingo-Tech] was having none of it when they needed a new filter for their Xiaomi air purifier so they set out to fool it into thinking there was a genuine replacement fresh from the box. Unlike a razor handle, the air purifier can refuse to work if it is not happy, so the best option was to make a “mod-chip.”

The manufacturer’s filters have a Near-Field Communication (NFC) chip and antenna which talk to the base station. The controller receives the filter data via I2C, but the mod-chip replaces that transmitter and reassures the controller that everything is peachy in filter town. On top of the obvious hack here, [Flamingo-Tech] shows us how to extend filter life with inexpensive wraps, so that’s a twofer. You can create your own mod-chip from the open-source files or grab one from [Flamingo-Tech’s] Tindie store.

We usually hear about mod-chips in relation to games, but we are happy to extend that honor to 3D printers. Have you ever fooled a “razor?”

Continue reading “Clearing The Air About Proprietary Consumables With A Xiaomi Filter DRM Resetter”

Modifying Lights For DIY Ambiance

The ESP32 and ESP8266 spread like wildfire a few years ago due to their small form factor, low price, and wireless capability. They didn’t just take over the DIY scene, though. Plenty of mass market products began to incorporate these tiny chips as well, which means that there are some interesting pre-made devices around that are ripe for modification. In this case, using an off-brand smart light bulb as a base for an semi-proprietary lighting setup.

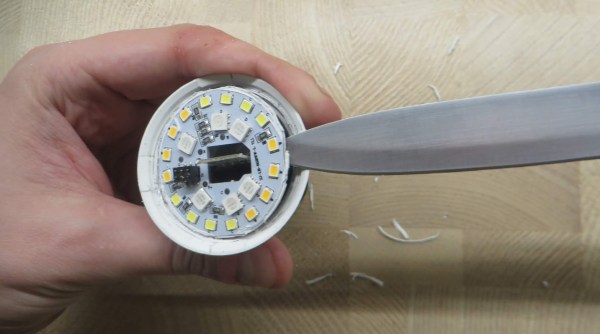
The lighting in this build is a generic RGB light bulb with the ability to control its color over Wi-Fi. Since it has an ESP8266 chip in it, it can be made to work with Philips Hue lights with some minor modifications, allowing a much wider range of control than otherwise available. For this one, [Vadim] needed to pry open the bulb case to access the chip, then solder wires to it for reprogramming. It needed power during this step which meant plugging the resulting mess of wires back into a lamp socket, but after this step the new programming allows the bulb to be reprogrammed remotely.

After that step is complete, though, the generic bulb is ready for its inclusion into a Hue lighting system. In this case, [Vadim] is using diyHue, a Hue emulator that allows control of the bulbs without needing to use any cloud services, running on a BeagleBone. It’s a fairly comprehensive way of adding many different types and brands of bulbs to one system, and avoids any subscription models or the use of a cloud service, which is always something we can get behind.

Continue reading “Modifying Lights For DIY Ambiance”

Legacy Digital Photos, With A Side Of Murphy’s Law

[Dave Madison] came across some old digital photos, and in his quest to access them, he ran into quite a few challenges. The saga brings to mind both Murphy’s Law, and while [Dave] prevailed in the end, it required quite a few more steps than one might expect.

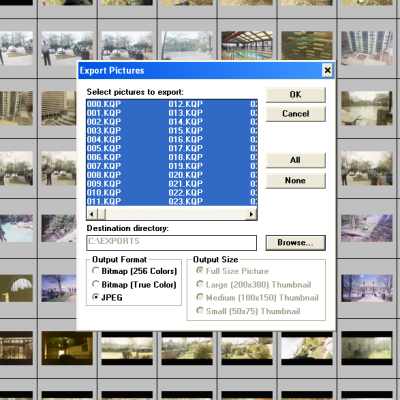
The one smooth part of the process was that Konica’s proprietary software had a handy JPEG export feature.

Here’s the scene: in the late 90s, Konica partnered with photo shops to provide a photo scanning service, delivering digital scans of film photos on 3.5″ floppy disks, and that’s exactly what [Dave] had to work with. The disks were in good condition, and since modern desktop computers still support floppy drives and the FAT filesystem, in theory all one needs to do is stick disks into the reader one at a time in order to access the photos.

Sadly, problems started early. A floppy drive is revoltingly slow compared to any modern storage device, so [Dave]’s first step was to copy all of the files to his machine’s local storage before working on them. This took a bit of wrangling to deal with 8.3 format file names and avoid naming collisions across disks while still preserving some metadata such as original creation date. It was nothing a quick python script couldn’t handle, but that soon led to the next hurdle.

The photos in question were in an obsolete and proprietary Konica .KQP format. [Dave] went through a number of photo viewing programs that claimed to support .KQP, but none of them actually recognized the images.

Fortunately, each disk contained a copy of Konica’s proprietary “PC PictureShow” viewer, but despite having a variety of versions dated between 1997 and 2001 (making them from the Windows 98 and Windows ME eras) [Dave] could not get any version of the program to run in Windows 10, even with compatibility mode for legacy programs enabled. The solution was to set up a Windows XP virtual machine using Oracle’s Virtualbox, and use that to ultimately run PC PictureShow and finally access the photos. After all that work, [Dave] finally had a stroke of luck: Konica’s software had a handy feature to export images in JPEG format, and it worked like a charm.

In the end, [Dave] was able to save 479 out of the 483 images on the old floppy disks, with a reminder that proprietary formats are a pain. The disks and images may have been over twenty years old, but the roots of digital imaging go considerably further back than that. Take a few minutes out your day to read a bit about Russell Kirsch and the first digitized image, that of his three-month old son in 1957.

Rolling Your Own TiVo WiFi Adapter

The only thing more surprising than finding out TiVo actually put out a new 4K set-top box recently is learning that somehow they didn’t bother to build WiFi into the thing. You’re forced to buy a special wireless adapter to the tune of $60 USD to add the feature. We’d make a joke about the company living in the past, but frankly, it would be too easy.

Having to buy just one of these expensive dongles in 2020 would be insulting enough, but TiVo superfan [xxbiohazrdxx] needed four of them. Rather than hand nearly $250 to the antennae-headed overlords, they decided to reverse engineer the adapter and produce their own low-cost version. While the final result might not be as slim and svelte as the original, it does come in at less than 1/4 the price.

Operating under the assumption that the TiVo would only talk to a WiFi adapter based on the same Broadcom BCM43569 chipset used in the official one, [xxbiohazrdxx] started by trying to find a standard USB dongle that might be a drop-in replacement. Unfortunately, it looks like this particular chip was almost exclusively used in proprietary applications, most commonly as a WiFi board inside of smart TVs. But as it turns out, that wasn’t necessarily a deal breaker.

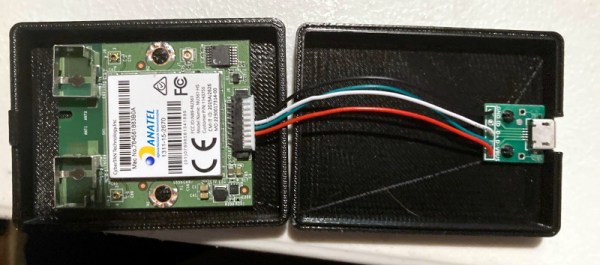
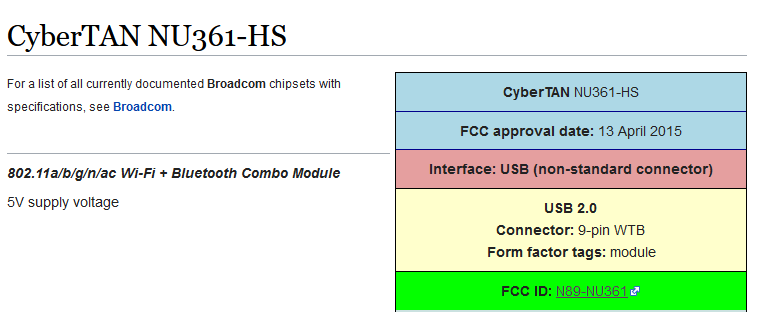
After some searching, [xxbiohazrdxx] eventually found the promising CyberTAN NU361-HS board. Not only was it based on the right chipset and ran from 5 volts, but its FCC ID entry had a complete pinout for the connector. This particular WiFi module is used in a number of budget TVs and is widely available as a spare part for less than $10. By combing the board and a USB breakout PCB inside of a 3D printed case, you’ve got a plug-and-play WiFi adapter that the TiVo thinks is the real deal.

There was a time when Hackaday was flooded with TiVo hacks, but it’s now been more than a decade since cheap carrier-provided DVRs ate the company’s lunch. Realistically, there’s an excellent chance that this post will be the only time a mention of the once-mighty DVR graces the front page in 2020. While the reign of the TiVo might be at its end, the impact it had as one of the first Linux-powered consumer devices will be etched in hacker history forever.

Poking Around Inside Of A Linux Security Camera

This deep dive into the Linux-powered Reolink B800 IP camera started because of a broken promise from its manufacturer. When [George Hilliard] purchased a kit that included six of the cameras and a video recorder, the website said they were capable of outputting standard RTSP video. But once he took delivery of the goods, and naturally after his return window had closed, the site was updated to say that the cameras can only function with the included recorder.

Taking that as something of challenge, [George] got to work. His first big break came when he desoldered the camera’s SPI flash chip and replaced it with a socket. That allowed him to easily take the chip out of the device for reading and flashing as he tinkered with modifying the firmware. After adding cross-compiled versions of busybox, gdb, and strace to the extracted firmware, he bundled it back up and flashed it back to the hardware.

If you think that’s the end of the story, it isn’t. In fact, it’s just the beginning. While getting root-level access to the camera’s OS would have potentially allowed for [George] to dump all the proprietary software it was running and replace it with open alternatives, he decided to take a different approach.

Instead of replacing the camera’s original software, he used his newly granted root powers to analyze it and figure out how it worked. This allowed for to sniff out some very suspect “encryption” routines built into the software, and eventually write his own server side in Rust that finally allowed him to use the cameras with his own server…albeit with a bit more work than he bargained for.

Projects like these are a fantastic look at real world reverse engineering, and a reminder that sometimes achieving your ultimate goal means taking the long way around. Even if you’re not in the market for a hacked security camera, there’s no doubt that reading the thorough write-up [George] has prepared will teach you a few things. But of course, we’d expect no less from a guy who runs Linux on his business card.

Proprietary Fan Blows, Gets PWM Upgrade

Proprietary components are the bane of anyone who dares to try and repair their own hardware. Nonstandard sizes, lack of labeling or documentation, and unavailable spare parts are all par for the course. [Jason] was unlucky enough to have an older Dell computer with a broken, and proprietary, cooling fan on it and had to make some interesting modifications to replace it.

The original fan had three wires and was controlled thermostatically, meaning that a small thermistor would speed up the the fan as the temperature increased. Of course, the standard way of controlling CPU fans these days is with PWM, so he built a circuit which essentially converts the PWM signal from the motherboard into a phantom thermistor. It’s even more impressive that it was able to be done with little more than a MOSFET and a Zener diode.

Unfortunately, there was a catch. The circuit only works one way, meaning the fan speed doesn’t get reported to the motherboard and the operating system thinks the fan has failed. But [Jason] simply disabled the warning and washed his hands of that problem. If you don’t want to use a CPU fan at all, you can always just dunk your entire computer in mineral oil.

Compaq Motherboard Power Mod

cpq2atx_brd2

Some companies insist on using proprietary pieces. It can be really frustrating when there is no apparent reason other than consumer lock in. It irritates us to feel like we’re being forced to buy their pieces. This is one of the more popular reasons listed when you ask a hacker or modder what got them started.  This project takes us through making a normal power supply work with the compaq proprietary 14 pin plug found in some smaller desktop PCs.

Aside from the plug itself being different, the motherboards require a 3.3v standby voltage. A normal power supply usually only has a 5v. Though there are even simpler ways of bypassing the issue, he chose to put an inline voltage regulator. Schematics are available on the site.

[via Hacked Gadgets]