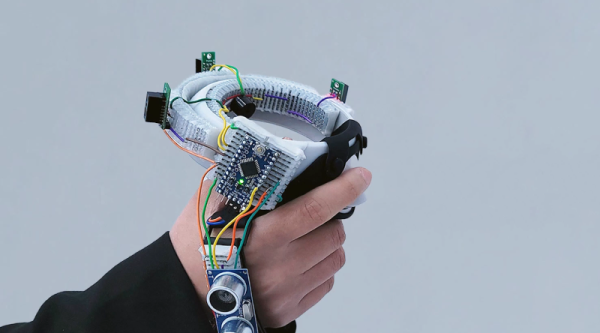
You think of breadboards as being a flexible way to build things — one can easily add components and wires and also rip them up. But MIT researchers want to introduce an actual flexible breadboard called FlexBoard. The system is like a traditional breadboard, but it is literally flexible. If you want to affix your prototype to a glove or a ball, good luck with a traditional breadboard. FlexBoard makes it easy. You can see a short video below and a second video presentation about the system, also.
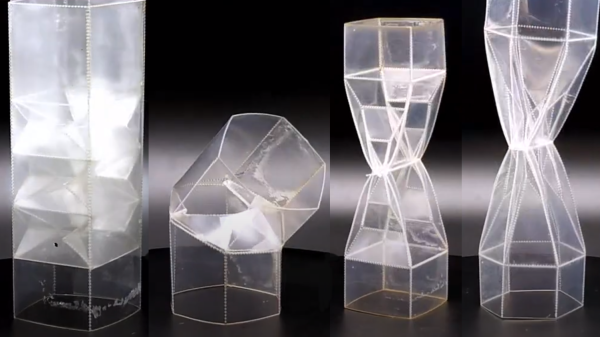
The breadboard uses a plastic living hinge arrangement and otherwise looks more or less like a conventional breadboard. We can think of about a dozen projects this would make easier.
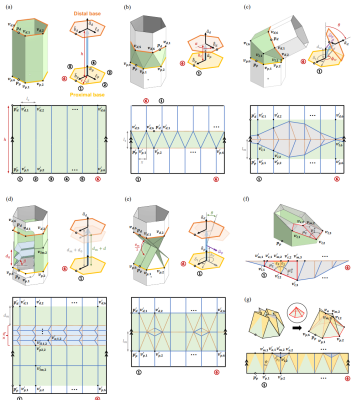
What’s more, it doesn’t seem like it would be that hard to fabricate using a 3D printer and some sacrificial breadboards. The paper reveals that the structures were printed on an Ender 3 using ePLA and a flexible vinyl or nylon filament. Want to try it yourself? You can!
We know what we will be printing this weekend. If you make any cool prototypes with this, be sure to let us know. Sometimes we breadboard virtually. Our favorite breadboards, though, have more than just the breadboard on them.

![USB to Dupont adapter by [PROSCH]](https://hackaday.com/wp-content/uploads/2022/01/2022-01-01-USB-to-DuPont-adapter-feat.jpg?w=600&h=450)